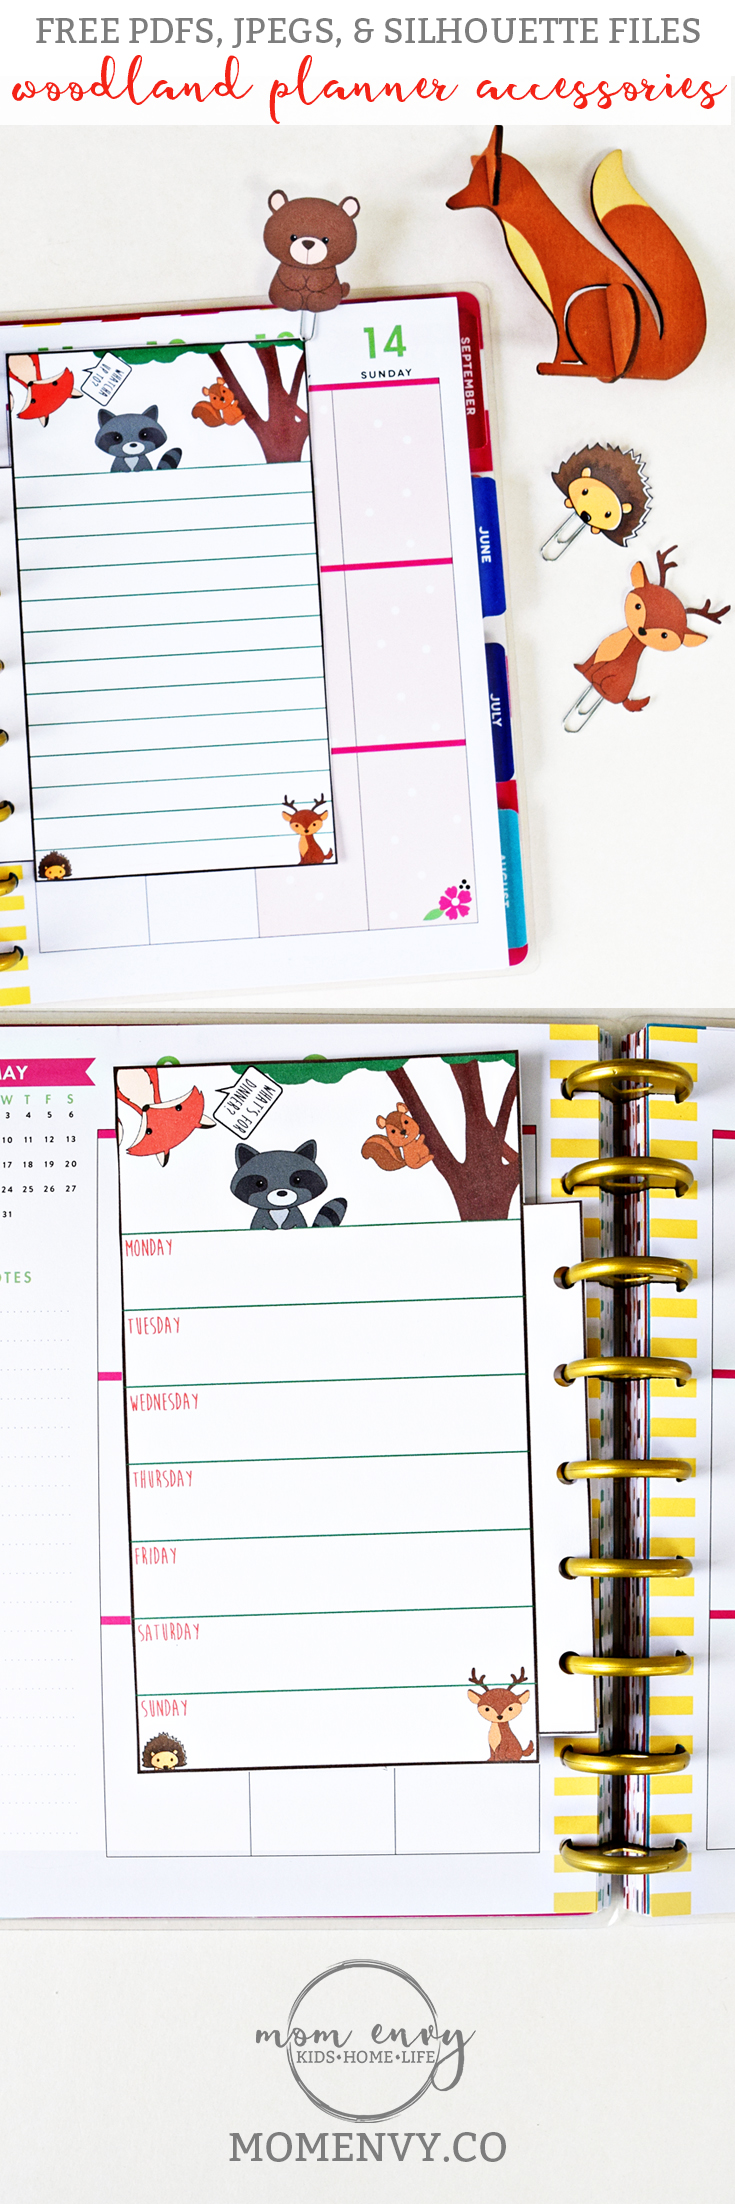
I thought about starting my post with what does a fox say, but then I realized it’s not 2013. Foxes and woodland animals have a special place in my heart because that’s my second son’s nursery theme. For this week’s planner printables, I have created a set of woodland-themed inserts and planner clips.
The woodland animal clips include a deer, bear, and a porcupine or hedgehog (I am not sure which one it’s supposed to be, I think it could honestly work as either. I think hedgehog and my husband says porcupine).
In addition, I have created 3 options for the planner insert – lined, blank, and a menu plan. The header of the inserts includes a raccoon, fox, and a squirrel on a tree while the bottom has the deer and porcuhog (I think that’s my new name for him since I don’t know exactly what he is).
While I designed these for my Happy Planner, they can work for a multitude of other planners. They come in a Classic/Mini size (it can fit in either), and a Big Size (for planners the size of a sheet of paper).
Thanks to my fellow planner girls in my one Facebook group for voting on the woodland animals. They took a vote as to which theme I should create inserts/clips for next. What would you like to see? I have flamingos on my upcoming list. I’d love to hear from you.
If you use the clips/inserts, I’d love to see! Tag me on Instagram (@momenvyblog) or Facebook.

Free Woodland Animal Planner Inserts and Clips
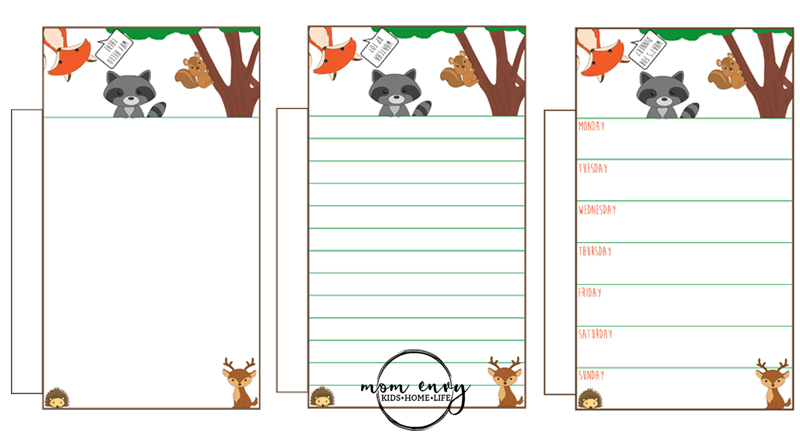
Here are the insert options available (choose one for the front and one for the back – labeled with a number 2).
- Inserts are available in 2 sizes: Mini/Classic, and Big. Classic/Mini will fit most planners. Big will fit planners that are 8.5 x 11.
- Files are in JPEG, PDF, and Silhouette format.
- There are 3 available styles (see above).
As an Amazon Associate, I earn from qualifying purchases. I am also an affiliate for the HP ink program. Click here to read more.
Directions for the Planner Clips (this youtube video is helpful to watch)
- Print one front piece and one back piece (has a number 2 at the end) on cardstock for added durability.
- Print/Cut using the silhouette file or cut with scissors
- If you’re going to laminate your clips, laminate the planner clips first in two separate pieces.
- Glue the paper clip to the back of one of the printed paper clip toppers. Make sure to glue the paper clip low enough that it will still work as a paper clip.
- Use more glue to place the other piece on top of the paper clip/first side. Make sure the image is facing out.
- This is the perfect glue for making planner clips. It’s strong enough to hold. Hot glue also works well.
- Allow time to dry before use.
Directions for the Planner Inserts
- Print one front piece and one back piece (has a number 2 at the end) on cardstock for added durability.
- Print/Cut using the silhouette files or cut with scissors.
- Glue the front and back together using a strong glue or hot glue.
- If you want to laminate the the insert (to use with a dry erase marker), glue first and then laminate.
- Hole punch in the hole punch area.
- Allow time to dry before use.
Tips and Tricks for Printing/Cutting
- Colors may vary. Printers print differently depending on many factors. (The printer I use is a more expensive unit that uses pigment ink).
- Print on cardstock for added durability. (this is my favorite from Amazon)
- Simply download the files below, unzip, and print the files you need. Files are in three different sizes so pick the one that works with your planner.
- This is the perfect glue for making planner clips. It’s strong enough to hold.
- Make sure you select one front and one back design for the inserts and clips (backs are all labeled with a 2 at the end).
- If you’d like to print the clips/inserts in another size, adjust the size percentage on your printer options page.
- The Silhouette file is set for a portrait (what I have). It can easily be used with a Cameo instead, just change the mat settings.

Deb
Wednesday 21st of September 2022
Laura, Thank you so very much for all the files you share! You make it possible for those of us who are retired and on a fixed income to share in all the fun of having a cute planner! Thank You!
Feature Friday: Fall Planner Printables + September Freebies – Diary of a Nostalgic Dreamer
Friday 1st of September 2017
[…] Free Woodland Animal Planner Inserts and Clips from Mom Envy […]