
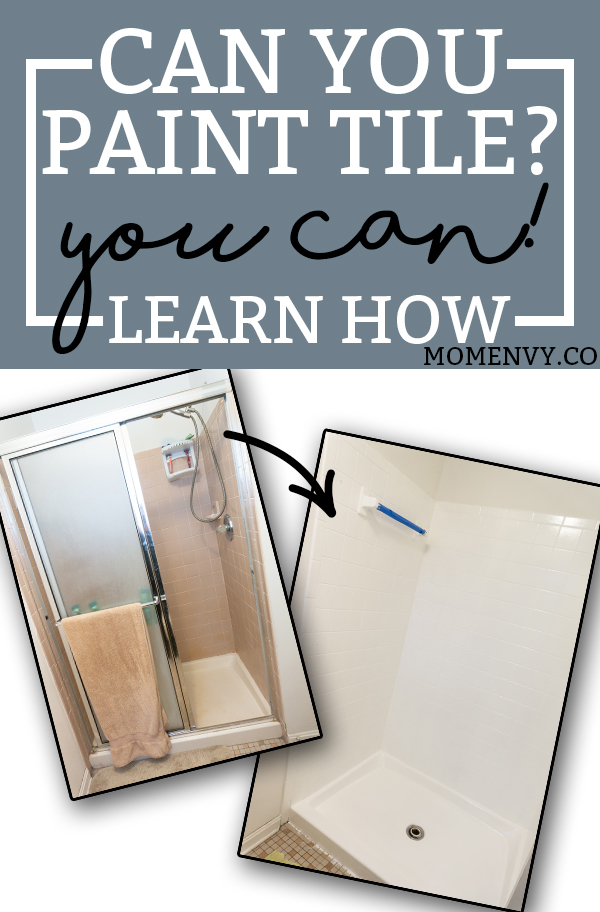
Can you paint tile? You betcha! And even though it's time-consuming, you won't believe just how easy it can be.
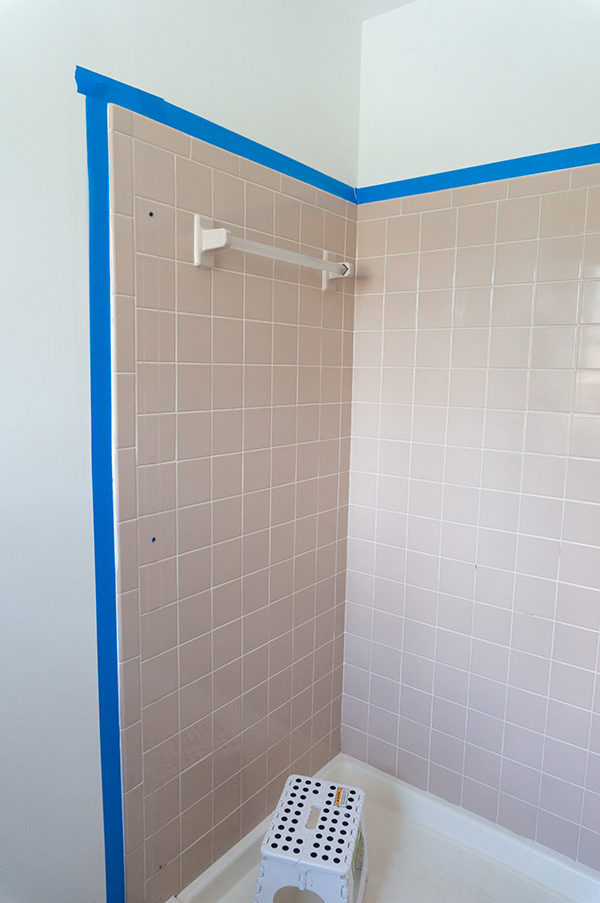
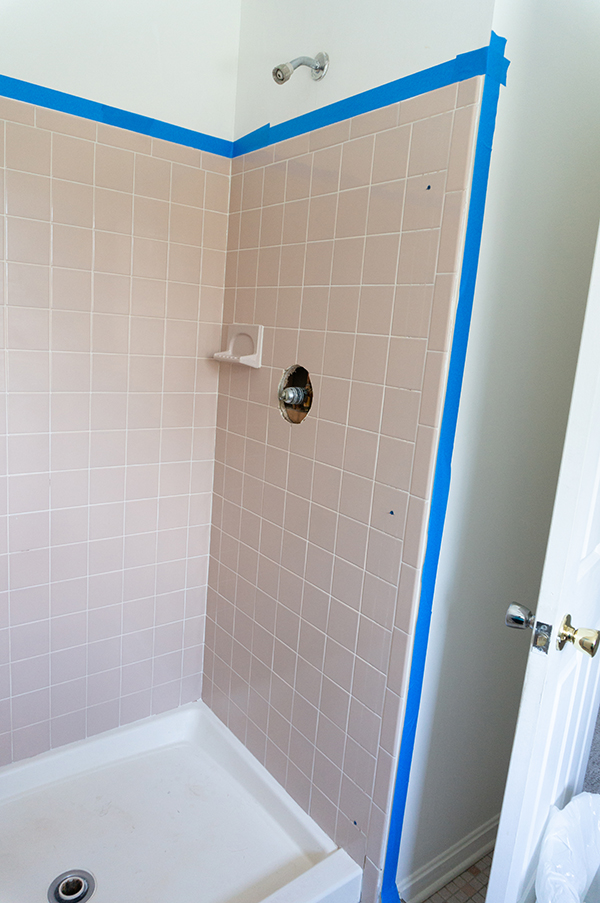
When it came time to remodel our master bathroom, we knew that replacing the tile within the shower wasn't going to be an option. But there was no way that I could put our house on the market with pink tile. Let me remind you of what the tile looked like...
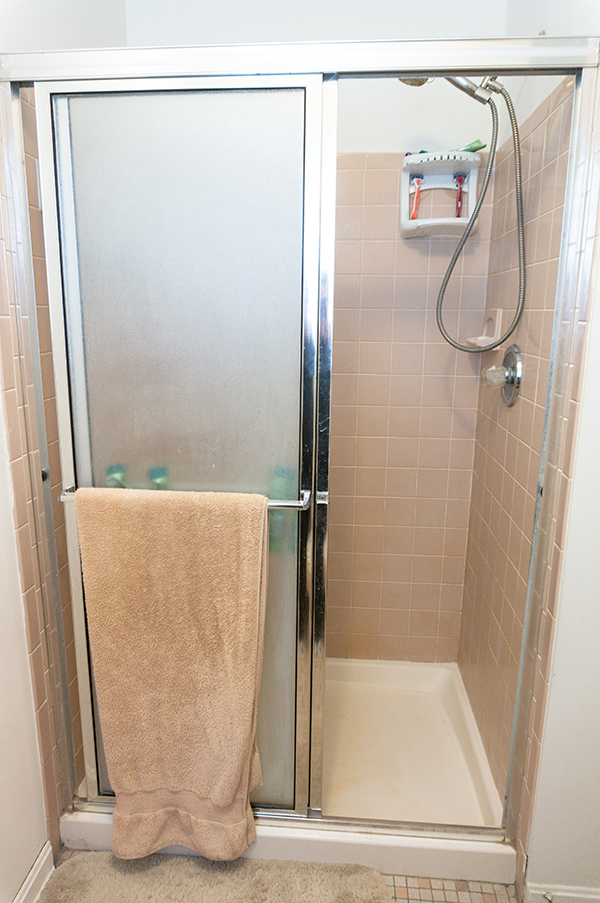 I mean seriously, who would want a 1980's pink bathroom? 1950's pink tile, sure! Now maybe one day people will feel nostalgic about the 1980's pink bathroom tile but that time is not today.
So I went on a search to determine, can you paint tile? I remember seeing some DIYs on Pinterest but I wanted to make sure that the end product wouldn't look like it was done by amateurs. With plans to sell our house, I needed to know that tub and tile reglazing would really work.
After much research, we decided to take the plunge. We figured the worst thing that would happen is that we'd need to rip it out or pay someone to fix it.
And guess what? We were happily surprised at the results; our reglazed shower turned out great. Let me tell you how to do it yourself.
What Do You Need for DIY Tub and Tile Reglazing?
As an Amazon Associate, I earn from qualifying purchases.
- Time. It took me one full day (but it could be split into two half-days)
- Patience
- A nice day so you can open the windows
- 2x Tub and Tile Refinishing Kit from Rustoleum *If you have a larger shower or a tub and tile walls, you may need 3 boxes
- 120 grit Sandpaper (ignore what the box says. You need a higher grit sandpaper).
- Tac cloth
- Painters tape
- Abrasive Cleaner (I used comet)
- Lime-a-way
- Fan (I used a box fan)
- Respirator Mask
- Gloves (I used a couple of pairs)
- Safety glasses
- Stir stick (super important)
- Rubbing alcohol (cleaning up your skin)
- High-quality roller
- High-quality brush
- Throw-away-paint tray
- Caulk Remover if you have a shower door (you can also just use a utility knife)
- Razor blade scraper if you have a shower door**This was a MUST have for this project
- Utility knife if you have a shower door
How to Refinish Ceramic Tile
Prepare the Space
Do not, I repeat, do not skimp on preparation. Everything I read said that if you fail to prepare your space properly, the product will not adhere.
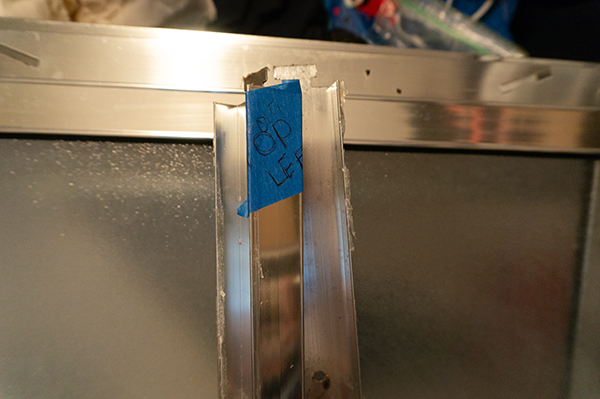
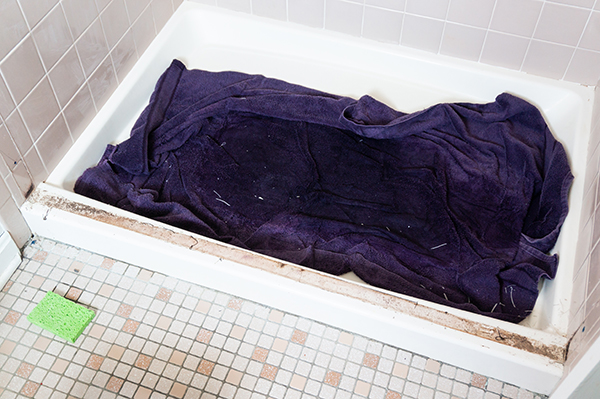
- Remove any attached doors.
- Mark the doors with tape so you can easily put them back on.
- Remove hardware such as faucets, showerheads, drain covers, etc.
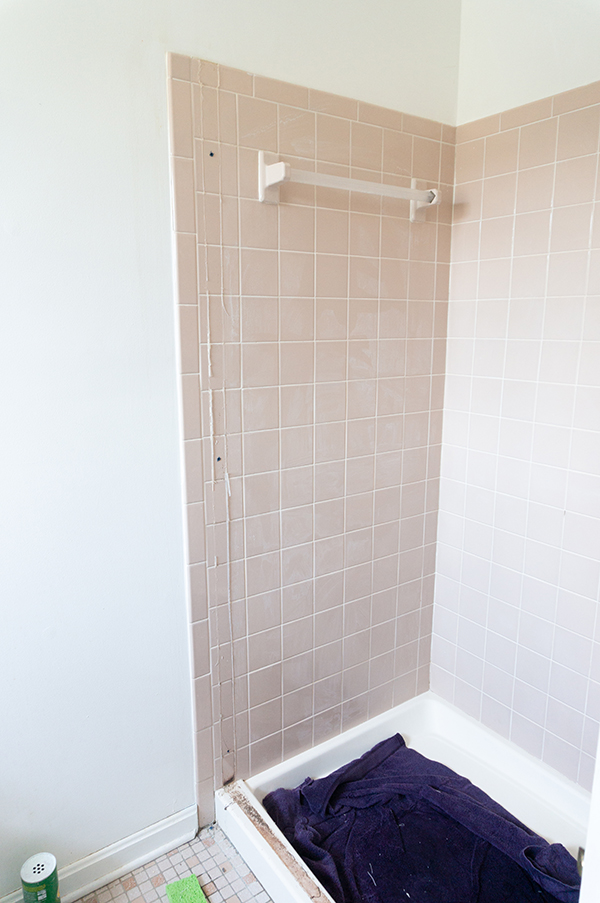
- Gently scrape off all caulk or glue from the doors using caulk remover, razor blade scraper, and utility knife.
- Clean your shower or tub with an abrasive cleaner.
- Sand your shower or tub.
- Clean with lime-a-way.
- Dry surface well.
- Use tac cloth over the entire surface to make sure there is no stray debris.
- Tape the walls, floors, and any other areas bordering the tub or shower.
Paint Application
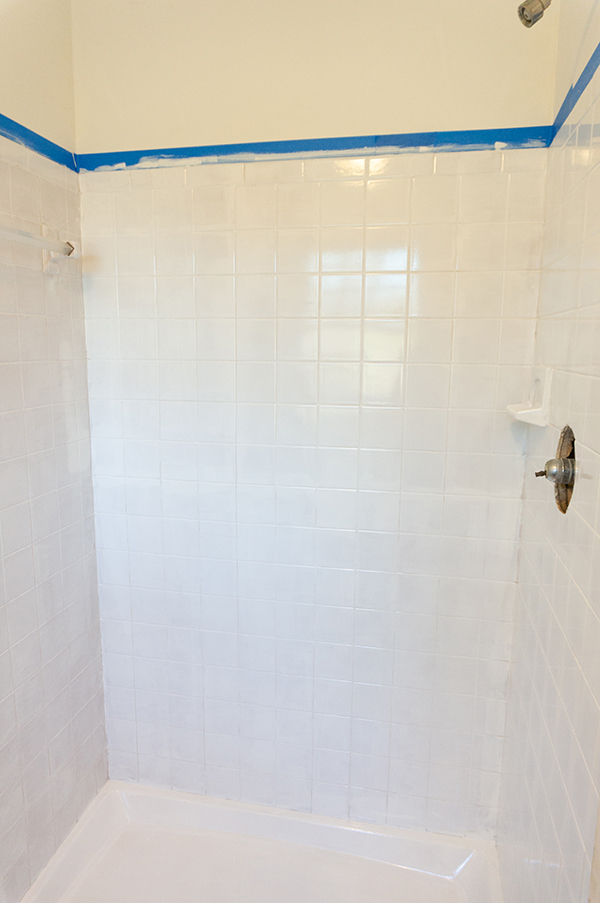
Once you combine the activator and the paint, you only have 6 hours to work. This is super important to know ahead of time if you want to do one coat today and the second coat tomorrow, you will have to use two different boxes. I decided to do it all in one day (I did three coats).
- Open the windows in the space to create ventilation.
- Do not close the bathroom door (the fumes are seriously strong).
- Place a fan in the window directing the air from the bathroom out through the window.
- Put on your safety goggles, mask, and gloves.
- Mix both of the containers separately.
- Then, combine small container into the big container. It will be completely full.
- Carefully stir the two parts together. It's important that they are combined well. It's easy to spill over so I placed the quart into a box so that if there was any spillage, it didn't get on the floor.
- Pour into the paint tray.
- Work on one wall or section at a time.
- Cut in where needed then roll. I cut in the grout lines for my first coat.
- Move on to the next wall or section and repeat until you're done.
- Provide dry time (I did an hour and a half between coats).
- Paint a second coat. (I needed to open a second box about half-way through my second coat).
- Provide dry time (again, another hour and a half).
- If needed, paint a third coat.
- Allow time for the paint to cure (three days) before getting it wet or putting the shower or tub back together.
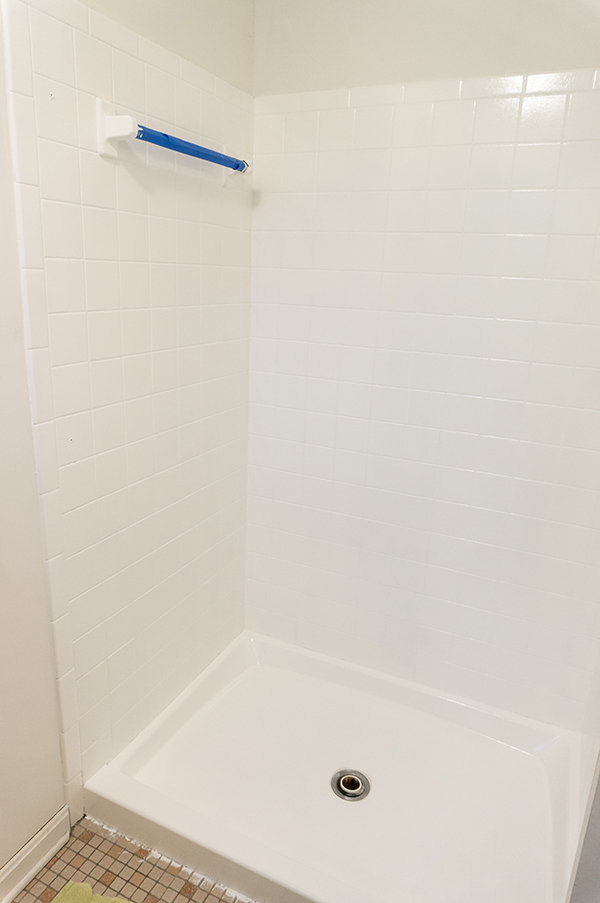
So, Can You Paint Tile? The Results
You definitely can. I can't believe how good the tiles look. The tiles really look like they were professionally painted.
I can't wait to show you the final reveal once we get the bathroom completed and put back together. The next week, we'll be working on refinishing the vanity.
If you are ready to skip to the final results, click here to see the reveal of our master bathroom.
![]()
One Room Challenge - Spring 2018 Challenge

If you've never heard of the One Room Challenge before, make sure to check it out. Twice a year they select participants to redo a space in six weeks. Yep, six weeks. In addition, anyone can join as a guest participant (which is what I am doing now and also what I did when we made over our foyer in the fall). It's one of my favorite times of the year because I love to check out everyone's makeovers to get some new home inspiration. You can see all of the other guest participants entries for week one here. Here are the entries from week two.
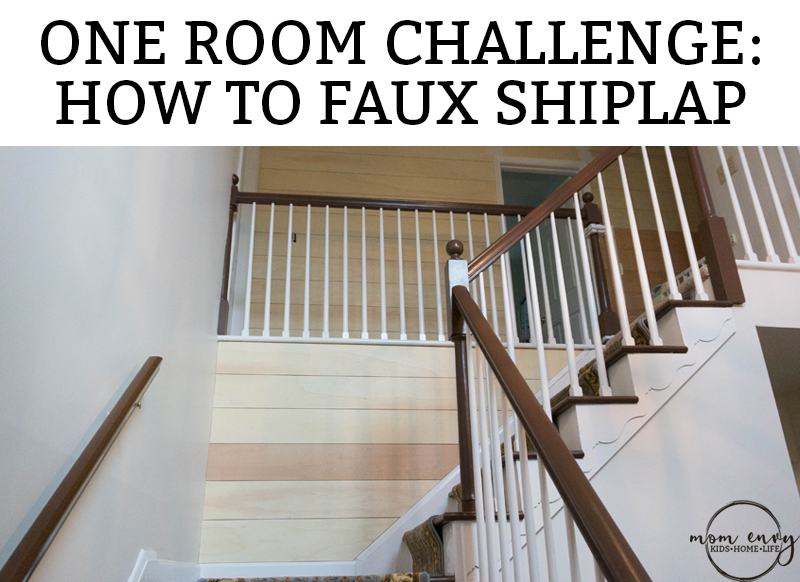
Click the image below to learn about the biggest makeover of our fall one room challenge - our faux DIY shiplap.


2 Comments