For the past couple of weeks I have been pinning etching how-to’s. I was really worried about trying to attempt something that I have never done. I couldn’t believe how easy it was! Since etching these mason jars, I have been searching my house for other things I can etch (can’t wait to etch our pyrex dishes so I never leave one at a pot-luck again!). When I created these, I didn’t have a Silhouette machine which is why I used stickers. Now I have one and definitely will be using it with vinyl to etch in the future.
For today’s post, I am sharing with you a Father’s Day etching project we made for the Grandpa’s in Carl’s life (his Dziadek and Pop). In addition to Father’s Day, these would be perfect for birthdays or holidays (or for Grandma’s ,or Dad’s, or Mom’s, etc). Have you ever etched anything before? I would love to see some more etching ideas!
Etched Mason Jars DIY How-to
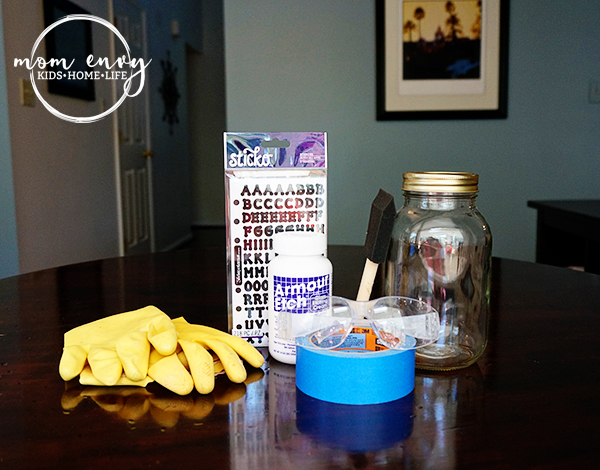
Materials:
Rubber gloves (must-have for safety)
Safety glasses (again, must-have for safety)
Armour etch (or other etching cream)
Painters Tape
Sponge brush or Popsicle sticks
Mason Jar or other glass item to etch
Letter stickers
Directions:
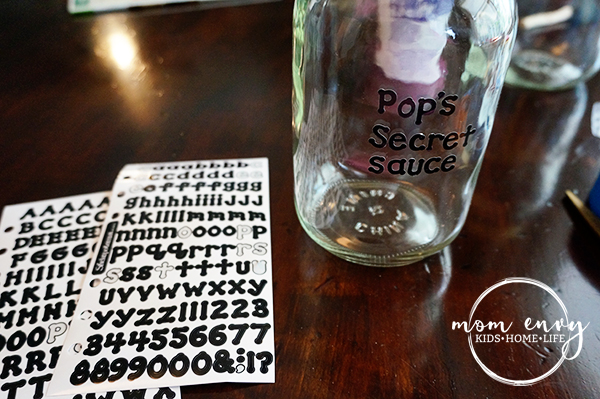
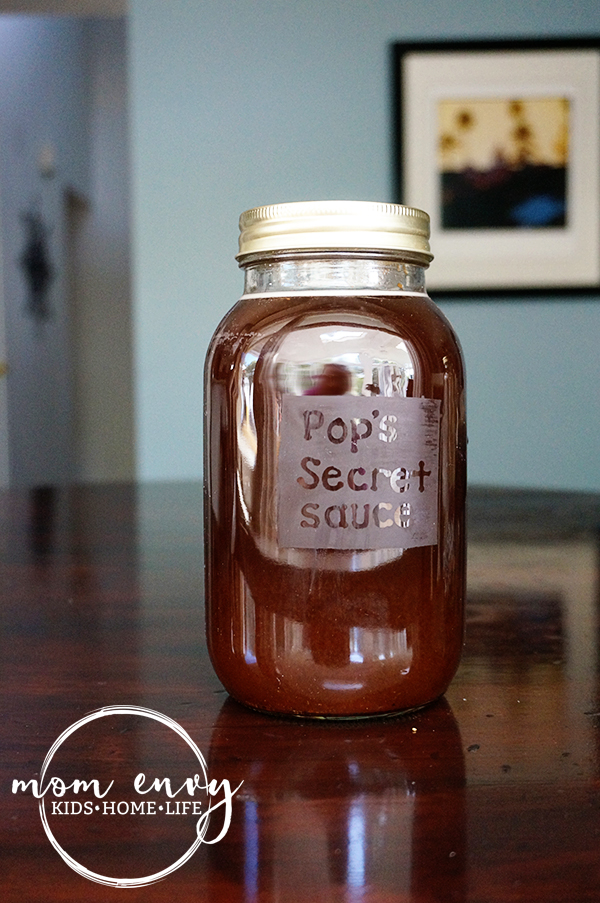
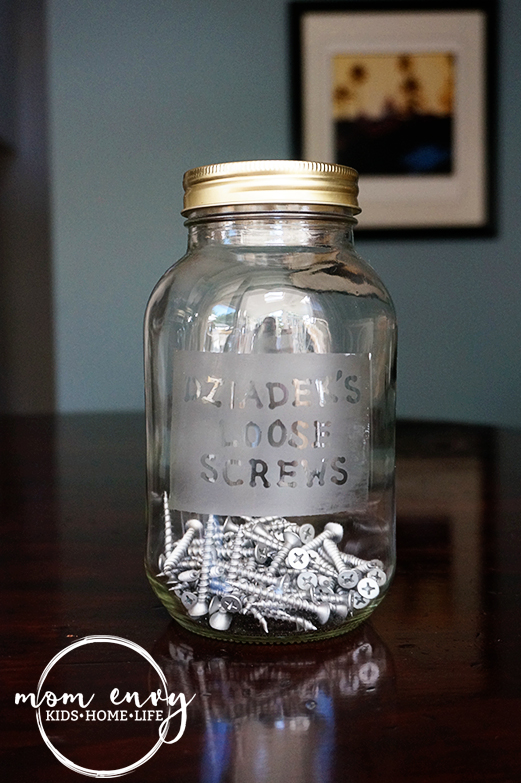
1. Place stickers on the mason jar to spell out your desired message. For our jars, we went with: Dziadek’s Loose Screws (my Dad is a super handy-man so we went with this play-on-words for a fun place to store extra screws) and Pop’s Secret Sauce (for my father-in-law’s special BBQ sauce he makes).
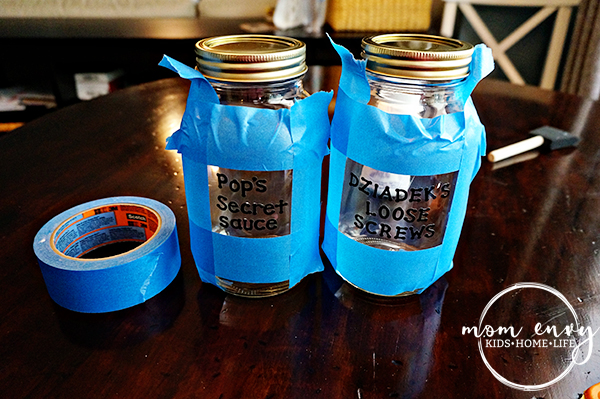
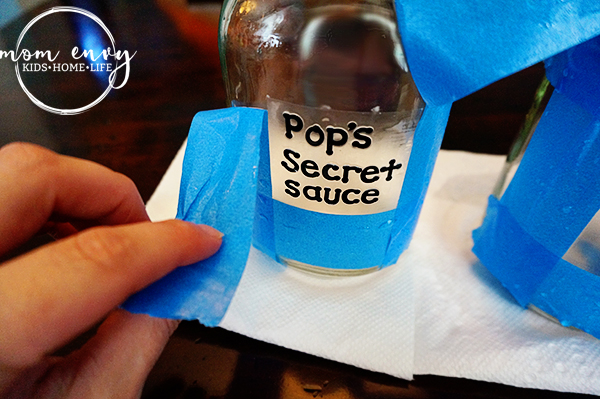
2. Use painters tape to mark off the area you don’t want etched. For our jars, I decided to create a simple square around the message.
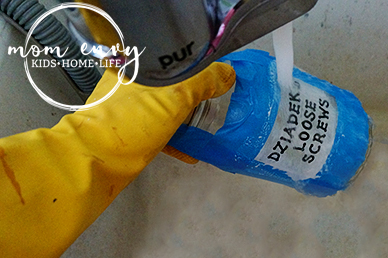
3. Put on your gloves and glasses.
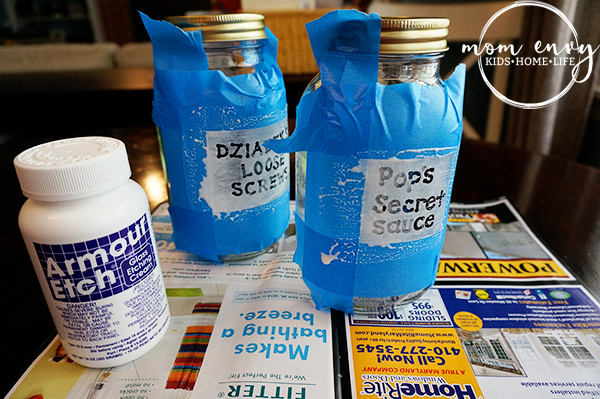
4. Use a the paint brush or popsicle stick to spread etching cream over the entire area. (sorry I didn’t take a picture of this because I was alone and didn’t want to accidentally get it on my skin or camera).
5. Leave the jars untouched for 5-10 minutes (I left mine on for 7. There are various opinions on how long to leave the Armour Etch on. 7 minutes worked for me!)
6. Rise the Armour Etch off. **Make sure not to rinse in a ceramic sink because it can ruin it. As you can tell, I rinsed ours in our laundry tub that has been stained from numerous painting, staining, and crating projects).
7. Peel off the painters tape and stickers.
8. And you’re done!
Here are our final jars!
Disclosure: This post contains affiliate links for Amazon products, which means that if you click on one of the product links, I may receive a small endorsement. This is what helps keep my page and freebies, free for my readers. All items that I share are ones that I believe in and stand behind. I am Amazon Prime obsessed – I shop there more than anywhere else. While I use affiliate links, I did not receive any products for free in return for advertising or a review.
<3 Thanks for linking up at the Bloggers Brags Pinterest Party!!
Laura Burton
Monday 23rd of June 2014
Thanks Dana!
Taylor-Made Ranch
Tuesday 17th of June 2014
I absolutely love this idea! I have lots of glass jars, this would be a great way to use them for gifts. Thanks for sharing! (visiting from the Treasure Box Tuesday hop)
~Taylor-Made Ranch~Wolfe City, Texas
Laura Burton
Tuesday 17th of June 2014
Thank you!!
Selene @ Restoration Beauty
Monday 16th of June 2014
Hi Laura!! I love this idea!!! I always keep my glass jars to store dry goods in! Thanks for stopping by my blog and leaving a sweet comment :)
Laura Burton
Tuesday 17th of June 2014
Thanks so much Selene!
Camille Gillham
Friday 13th of June 2014
Great project- I'm always nervous to do these but you make it look doable. Thanks!
Laura Burton
Saturday 14th of June 2014
Thanks Camille! I actually etched 3 more items tonight and it took me a total of 15 minutes tops and they came out even better than the jars! I swear it looks a lot scarier than it actually is!
Prudent Wisdom
Monday 23rd of June 2014
<3 Thanks for linking up at the Bloggers Brags Pinterest Party!!
Laura Burton
Monday 23rd of June 2014
Thanks Dana!
Taylor-Made Ranch
Tuesday 17th of June 2014
I absolutely love this idea! I have lots of glass jars, this would be a great way to use them for gifts. Thanks for sharing! (visiting from the Treasure Box Tuesday hop)
~Taylor-Made Ranch~Wolfe City, Texas
Laura Burton
Tuesday 17th of June 2014
Thank you!!
Selene @ Restoration Beauty
Monday 16th of June 2014
Hi Laura!! I love this idea!!! I always keep my glass jars to store dry goods in! Thanks for stopping by my blog and leaving a sweet comment :)
Laura Burton
Tuesday 17th of June 2014
Thanks so much Selene!
Camille Gillham
Friday 13th of June 2014
Great project- I'm always nervous to do these but you make it look doable. Thanks!
Laura Burton
Saturday 14th of June 2014
Thanks Camille! I actually etched 3 more items tonight and it took me a total of 15 minutes tops and they came out even better than the jars! I swear it looks a lot scarier than it actually is!