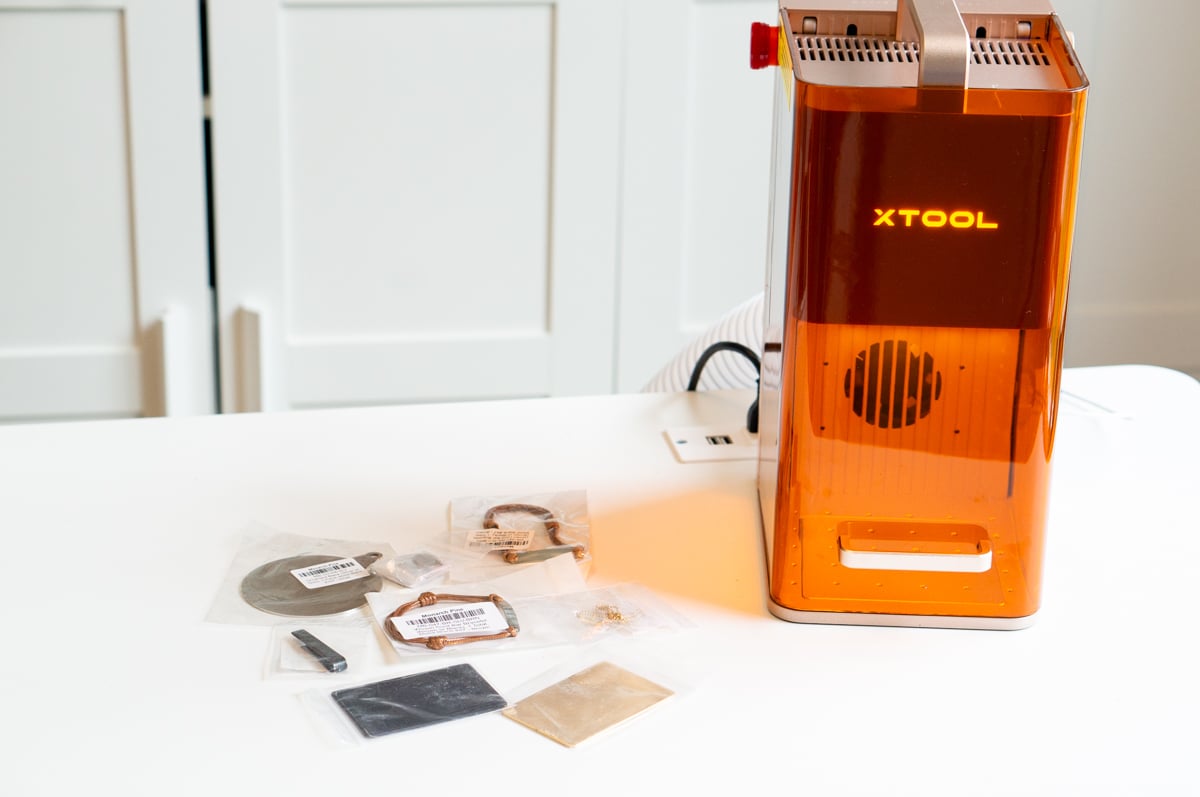
One of the things I was most excited to try when I got my xTool F2 was jewelry engraving.
After testing quite a few different materials with the F2, metal quickly became one of my favorites. The finished results look so clean and professional, and there are SO many jewelry blanks available that the possibilities are nearly endless.
But what makes jewelry engraving even more exciting with the xTool F2 is the ability to create something truly custom.
You can add a name or initials to a necklace, engrave a special date onto a bracelet, add someone's actual handwriting to a tie clip, or even turn a child's drawing into a piece of jewelry.
As an Amazon Associate, I earn from qualifying purchases. I am also an affiliate for xTool, the HP ink program, ShareaSale, Awin, and CJ Networks. Click here to read more.
And because the xTool F2 is portable, you aren't limited to doing all of this from your craft room.
You could actually bring the machine with you to a craft fair, market, pop-up shop, wedding, or other event and create personalized jewelry right on the spot. That is where I think the F2 really shines.
WANT TO LEARN MORE ABOUT THE MACHINE ITSELF? READ MY FULL XTOOL F2 REVIEW HERE.
Watch My Complete xTool F2 Jewelry Engraving Tutorial
Before we get too far, I created a VERY detailed video showing the entire process of engraving multiple pieces of jewelry with the xTool F2.
And when I say detailed, I mean it.
The video is about 48 minutes long. Apparently I had a lot to say about engraving jewelry! So, no judgment from me if you decide to watch me at 1.5x or even 2x speed.
But I purposely made the video longer because I wanted to show more than just one perfectly edited project from start to finish.
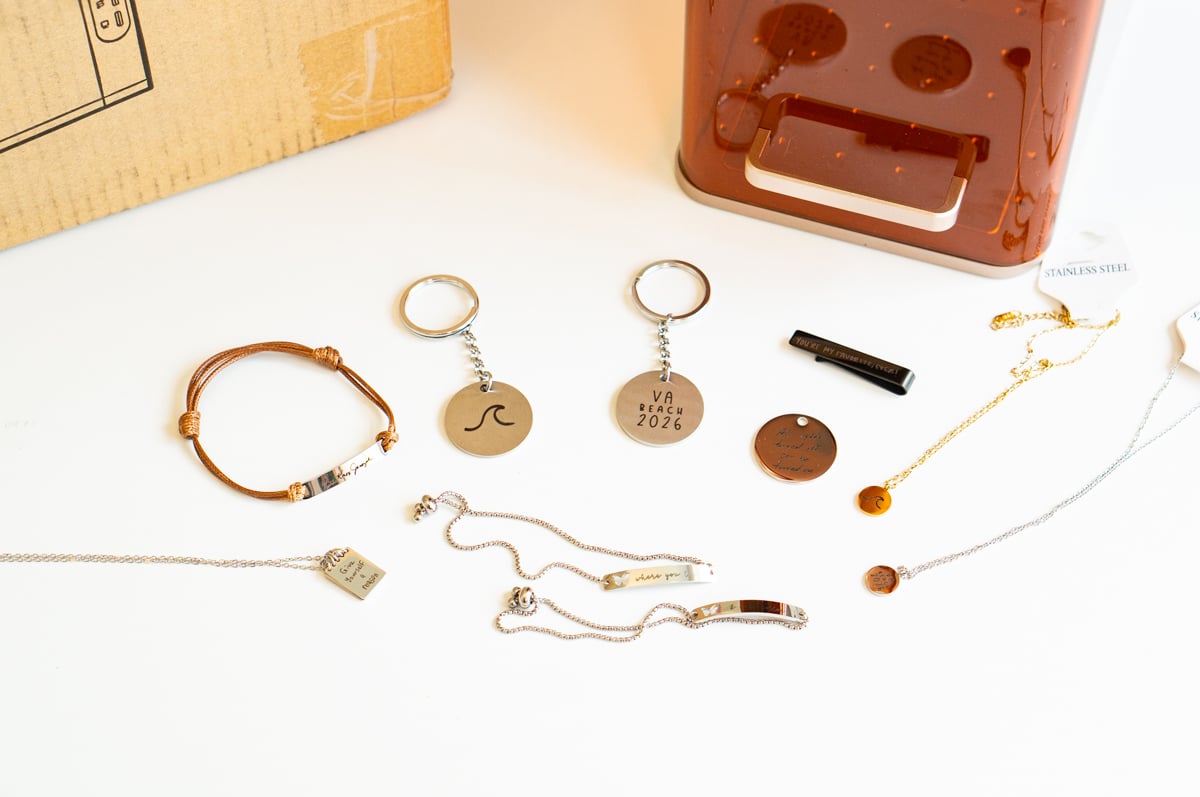
I walk through testing materials, positioning designs, troubleshooting problems, using framing, engraving different jewelry shapes, and even some of the little mistakes I made along the way.
Because realistically, that is what learning a new laser looks like.
In the video, I show you how to engrave jewelry using:
- Standard text created directly in the xTool software
- SVG designs
- Hand drawn designs that are scanned into your computer
- Handwriting and artwork drawn on an iPad
- Designs created from actual handwriting and drawings
I also test multiple types of jewelry including necklaces, bracelets, a tie clip, and other small metal pieces.
Why the xTool F2 Is So Good for Jewelry
The small size of the F2 could look like a disadvantage compared to a larger laser, but for jewelry, it actually makes a lot of sense.
Jewelry pieces are small. You don't need a giant laser bed to engrave a necklace pendant or bracelet.
The F2 has a working area of approximately 4.53 inches by 4.53 inches, which gives you plenty of space for most jewelry blanks and other small personalized products.
It is also a dual laser machine with both a 15W diode laser and a 5W infrared laser. For the metal jewelry I am engraving in this tutorial, I use the infrared laser. The F2 is also FAST. It has a maximum engraving speed of 6000 mm/s.
That speed becomes especially important if you are using the F2 for a business. If you have a line of people waiting at a craft fair or market, you don't want each customer standing there for 30 minutes waiting for their necklace.
Some of the simpler jewelry pieces I made in my video took around a minute or less to engrave. Of course, preparing the artwork, positioning everything correctly, and processing custom drawings can add additional time. But the actual engraving itself can be incredibly quick.
The F2's Portability Is What Makes It Different
I have larger xTool lasers that I absolutely love. YOU CAN READ MY FULL xTOOL P2 REVIEW HERE.
A larger laser is invaluable when I need to make bigger projects or work with larger sheets of material. But I am definitely not loading my P2 into my car and setting it up at a craft fair.
That is what makes the F2 completely different.
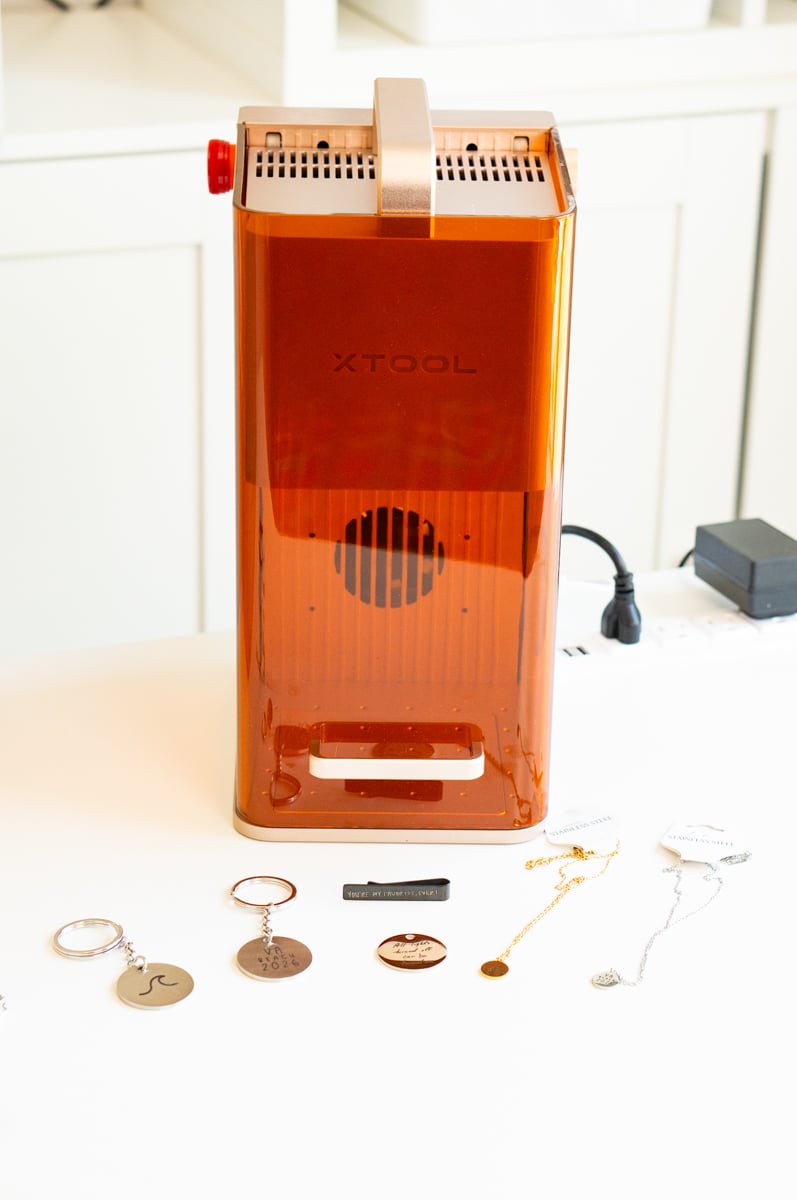
The F2 weighs only around 10.6 pounds and its footprint is small enough that it is actually realistic to travel with it.
Even as a hobbyist, I love this feature because I can take it to a friend's house, my boys' school, family events, and other places where I might want to create something.
But if you own a handmade business, the portability opens up an entirely different way to make money with a laser.
Customization Can Make a Simple Product Worth More
One of the biggest benefits of owning a laser for a small business is customization.
Think about how many products you can walk into a store and buy right now. You can buy a necklace almost anywhere.
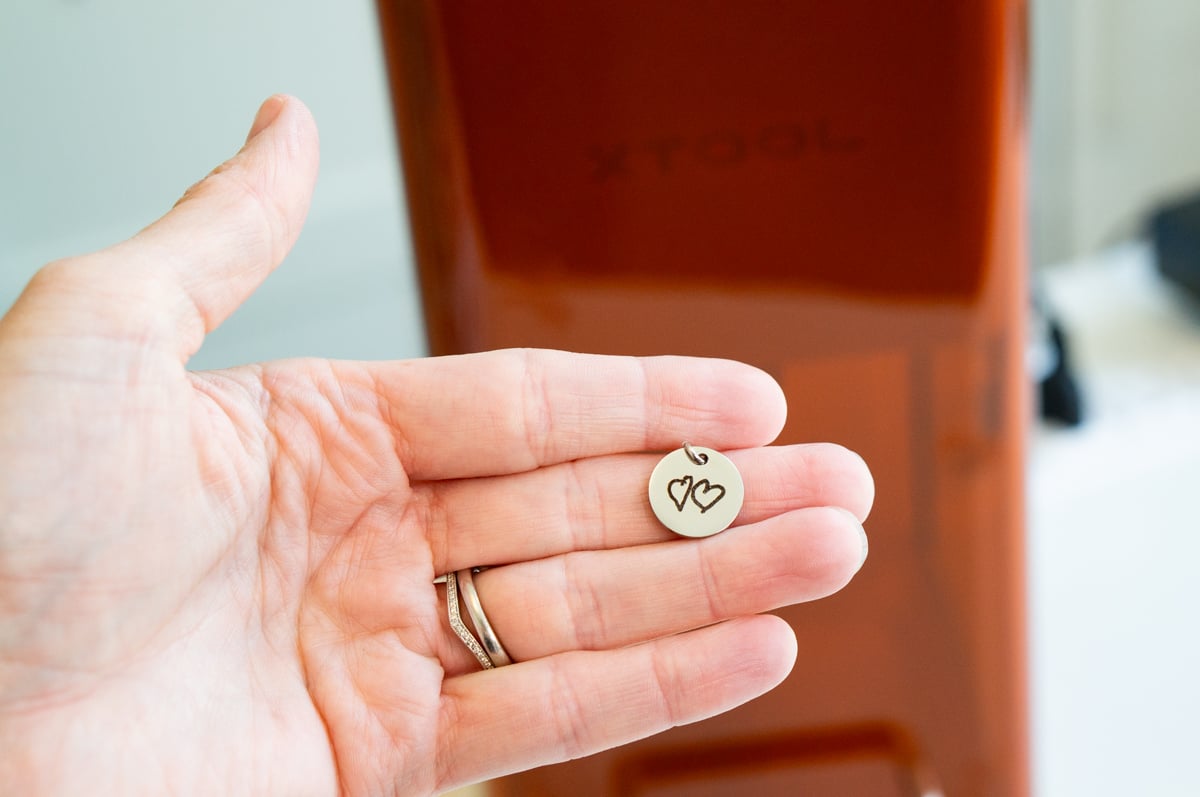
But can you walk into a store and buy a necklace with a heart your child actually drew? Probably not.
What about a tie clip with your spouse's actual handwriting?
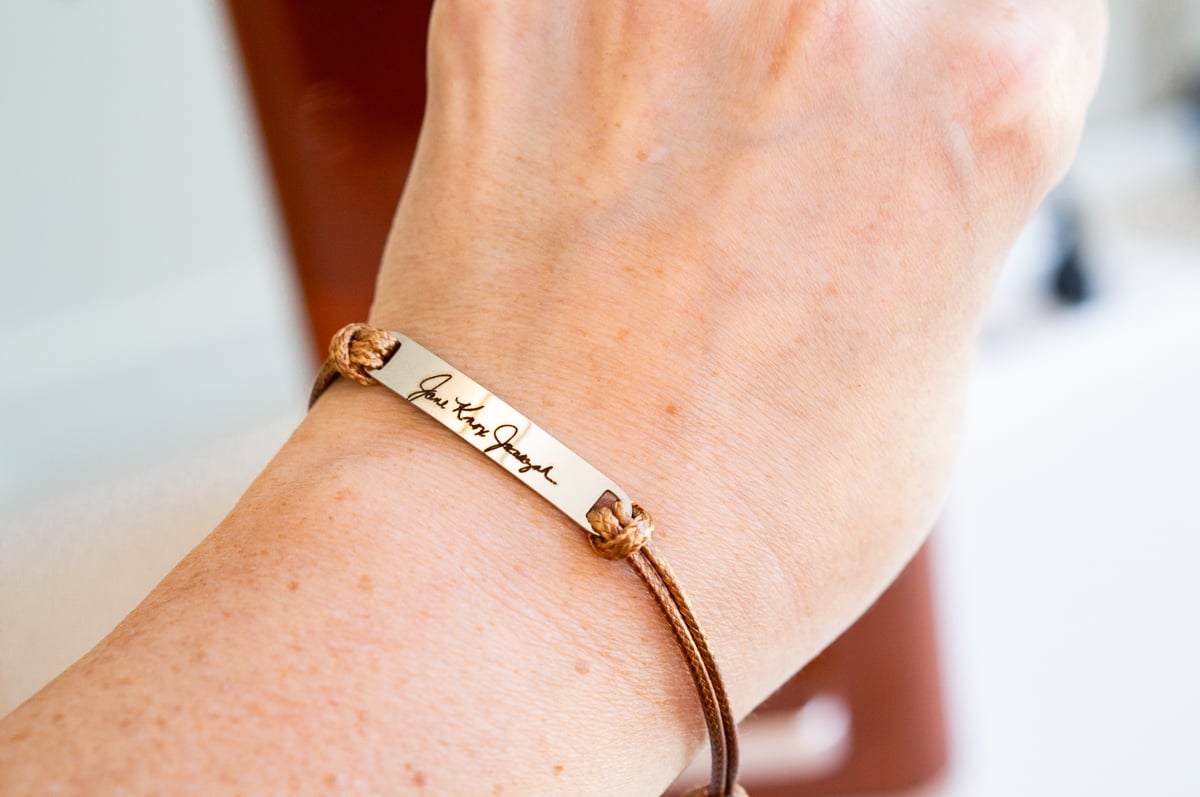
A bracelet with someone's signature?
A necklace engraved with a tiny drawing from your child's kindergarten years?
Those are the types of products that feel special. You're no longer selling just a piece of jewelry. You're selling something personal that was created specifically for that customer.
And that gives small handmade businesses an opportunity that large retailers simply cannot replicate as easily.
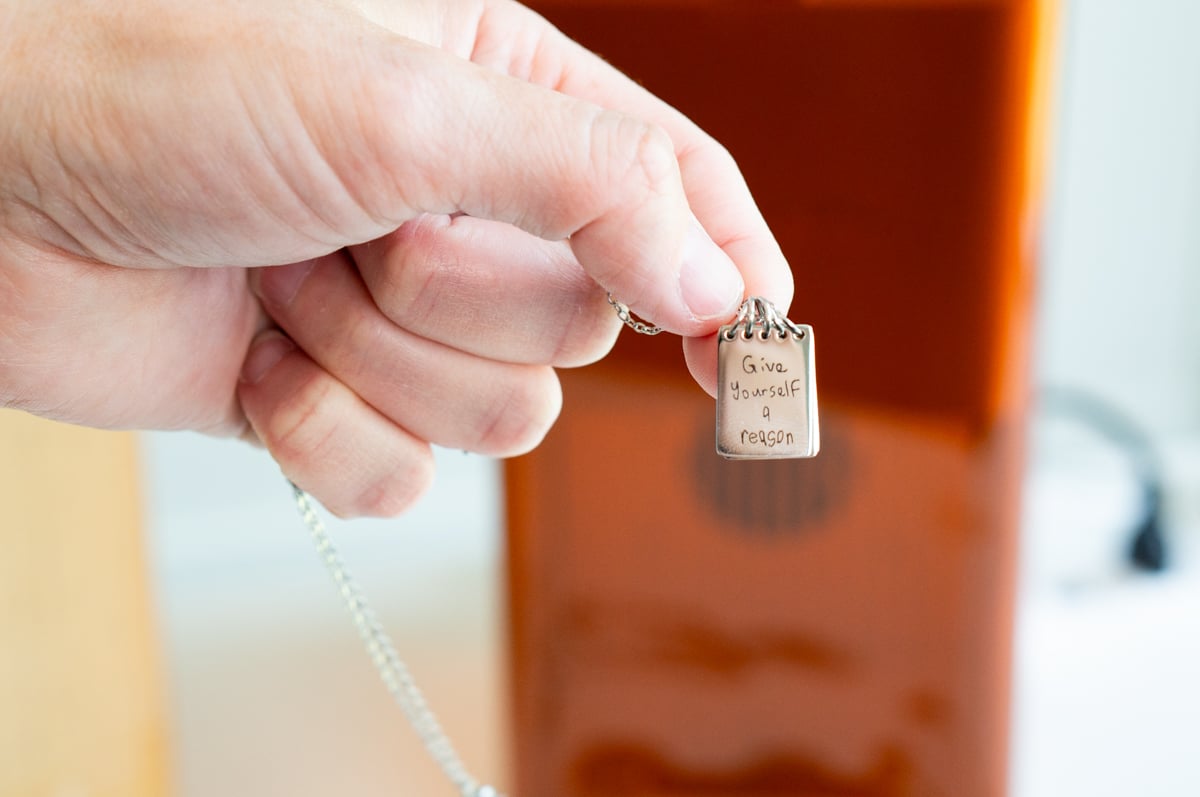
Turn Someone's Drawing Into Custom Jewelry
This was one of the things I really wanted to test when creating this tutorial. I didn't want to only show you how to download an SVG and engrave it onto a necklace.
That's useful, but it doesn't really show what makes on-site engraving so exciting.
I wanted to see how realistic it would be to have someone actually draw something and then turn that drawing into a piece of jewelry.
So I tested it in a couple of different ways.
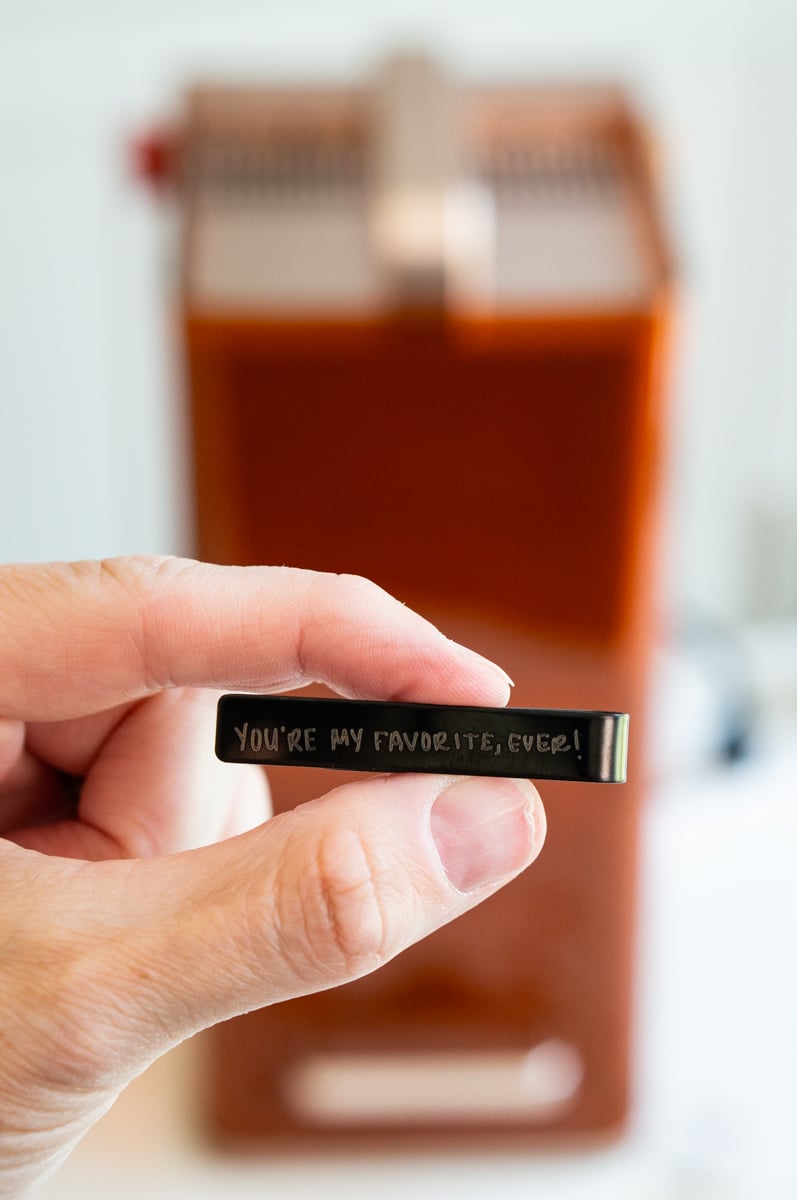
Option 1: Have Customers Draw Directly on an iPad
In the video, I write directly on my iPad using my Apple Pencil. I created handwritten designs, sent the image to my computer, and then imported it into the xTool software.
From there, I used the trace feature to convert the image into a vector that could be engraved.
This could be SUCH a fun craft fair setup.
Imagine having an iPad sitting at your booth where customers could write a name, sign their signature, draw a tiny picture, or have their child create something.
You could even create a template on the iPad showing approximately how much drawing space they have.
For example, if they are engraving a round necklace, I would have them draw directly inside a circle that represents the usable engraving space. That makes your job easier because you are not trying to completely rearrange their artwork after they finish.
Once they are done, you transfer the image to your computer, trace it, size it, and engrave it onto their jewelry.
Suddenly, they are walking away from your booth with a piece of jewelry containing something they literally created minutes earlier. That is WAY more memorable than picking a premade necklace off a display.
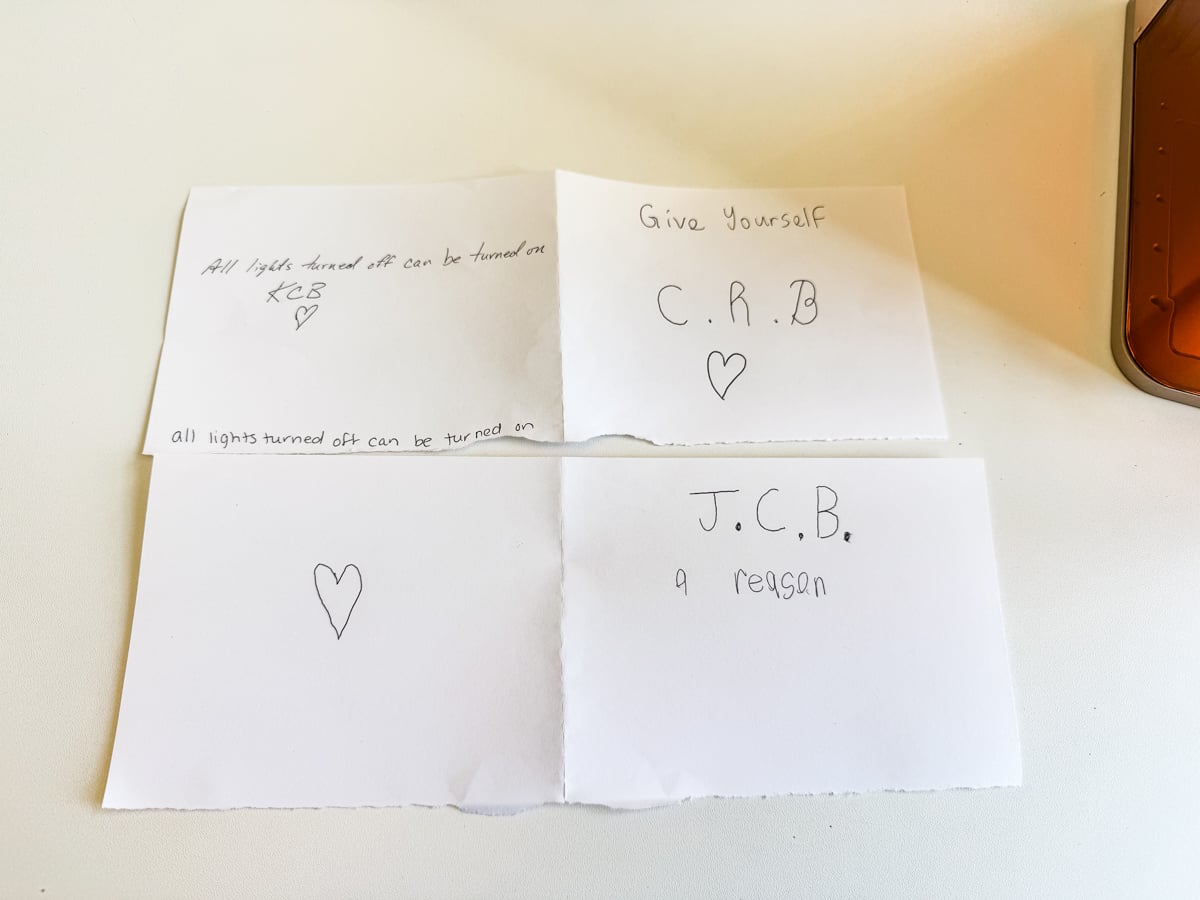
Option 2: Scan a Hand Drawn Design
You don't have to use an iPad either. Another option would be having customers draw on paper. This could be done in person for a craft show or you could take orders for an online store on ETSY, Shopify, your own webpage, etc.
In my video, I show the complete process of taking an actual hand drawn design, scanning it into my computer, importing the scanned image into the xTool software, and using the Trace tool to turn it into something the laser can engrave.
Depending on the original drawing, you may need to adjust the trace settings to make sure the software picks up all of the details.
Contrast matters here. If portions of the drawing are too light, the software may not detect everything automatically. So be sure to use a dark colored pencil, marker, etc.
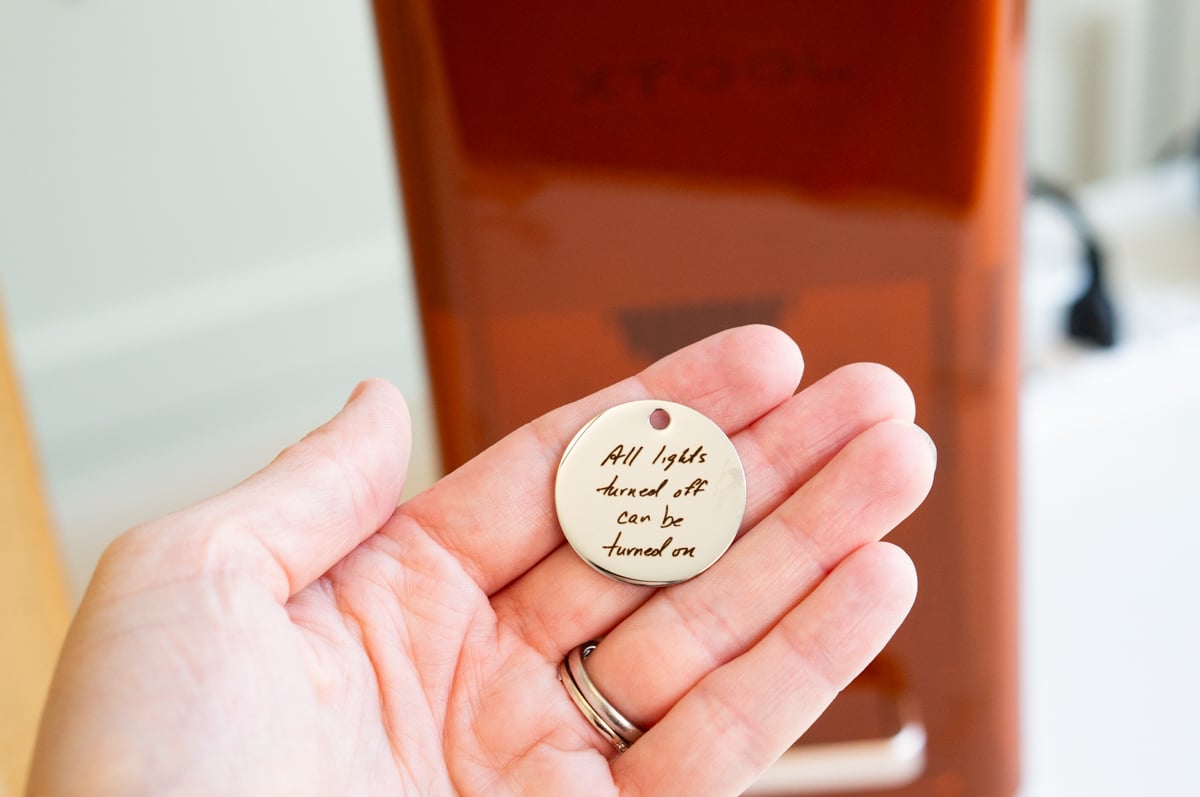
Once you have a good trace, you can separate the individual elements, rearrange them if needed, resize them, and turn them into your final jewelry design.
I HAVE A MORE IN-DEPTH TUTORIAL HERE SHOWING HOW TO TURN DRAWINGS AND HANDWRITING INTO SVGS.
For a craft fair setup, you could bring a small scanner with you or have customers submit drawings ahead of time.
You could also offer custom orders where someone sends you a scanned drawing or piece of handwriting online and you turn it into jewelry from home.
Use Actual Handwriting for Meaningful Jewelry
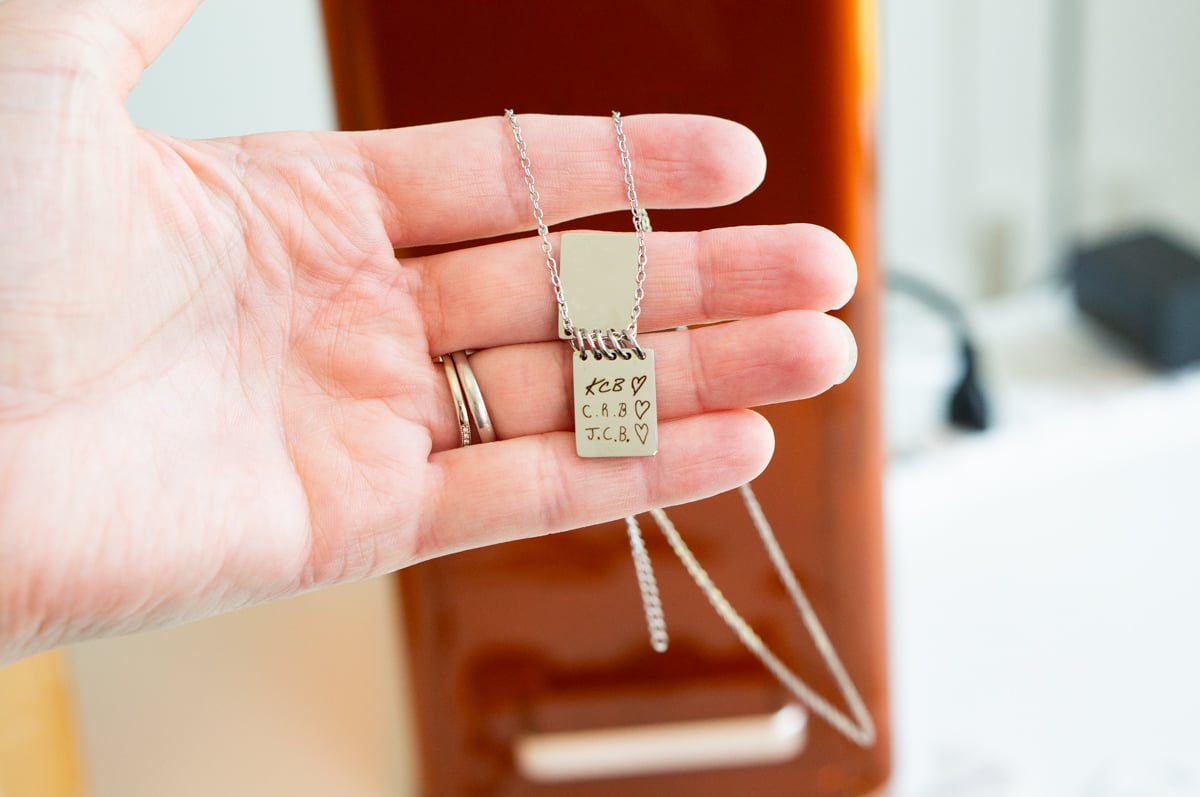
Handwriting jewelry has so many possibilities.
You could engrave:
- A child's handwriting
- A spouse's handwriting
- A parent's handwriting
- A grandparent's handwriting
- A signature
- A handwritten message
- A special date
- A tiny hand drawn heart
- A simple doodle
- Initials written by the actual person
And it doesn't have to be someone's current handwriting either.
You could work from an old card, letter, recipe card, note, or another sentimental piece of handwriting.
This is one of those projects where the final item can become much more meaningful than the actual cost of the blank.
Create Quick Personalized Jewelry Using the Text Tool
Not every piece needs to involve scanning and tracing artwork. Sometimes simple is better.
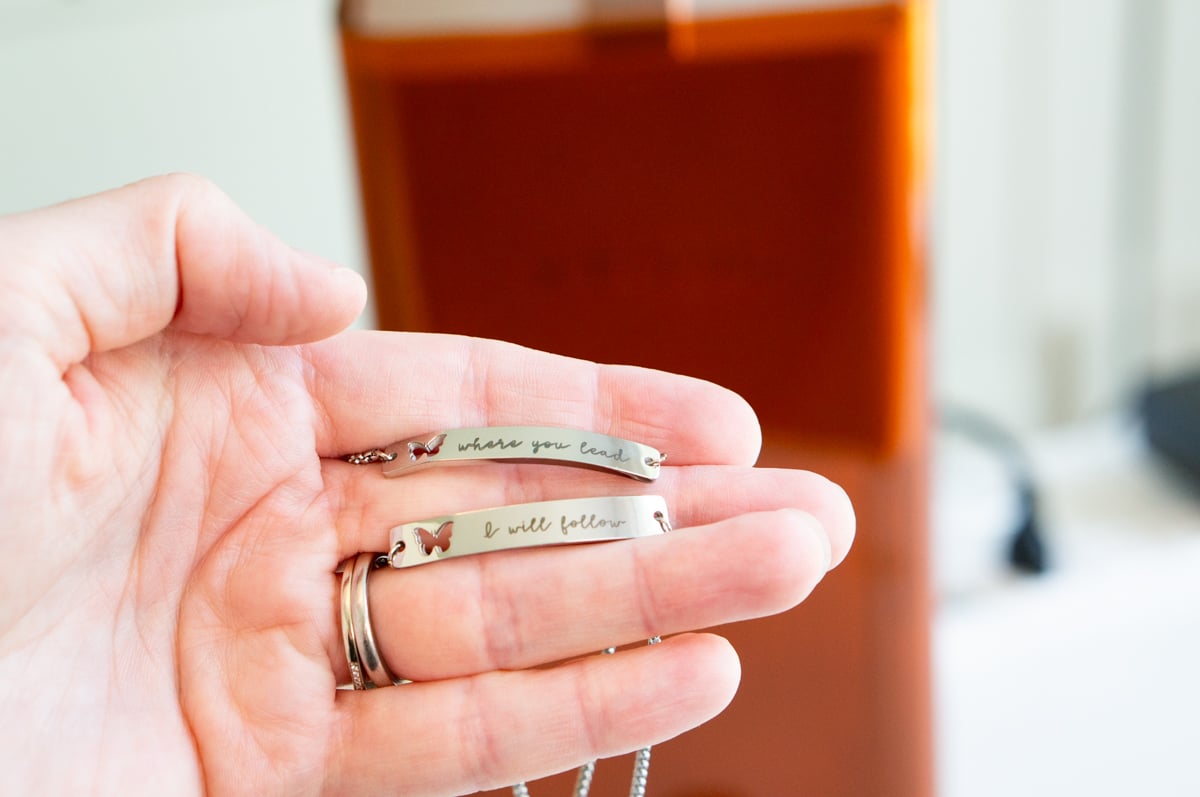
I also show how to create jewelry using the basic text tool directly inside the xTool software. This is probably one of the easiest options if you plan to offer on-site engraving. A customer could choose a necklace or bracelet and tell you exactly what they want engraved.
You could add:
- Names
- Initials
- Dates
- Short quotes
- Song lyrics
- Locations
- Coordinates
- Simple words or phrases
Then you simply select a font, size the text, position it, frame your design, and engrave.
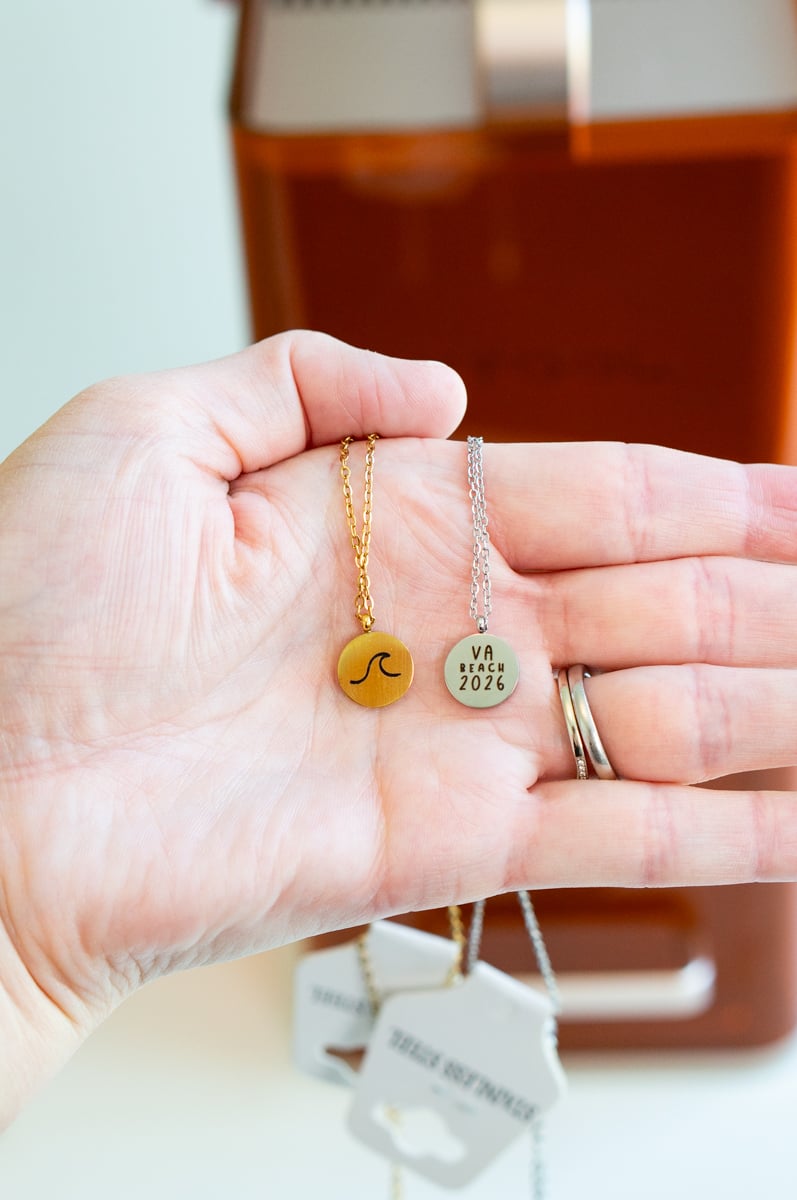
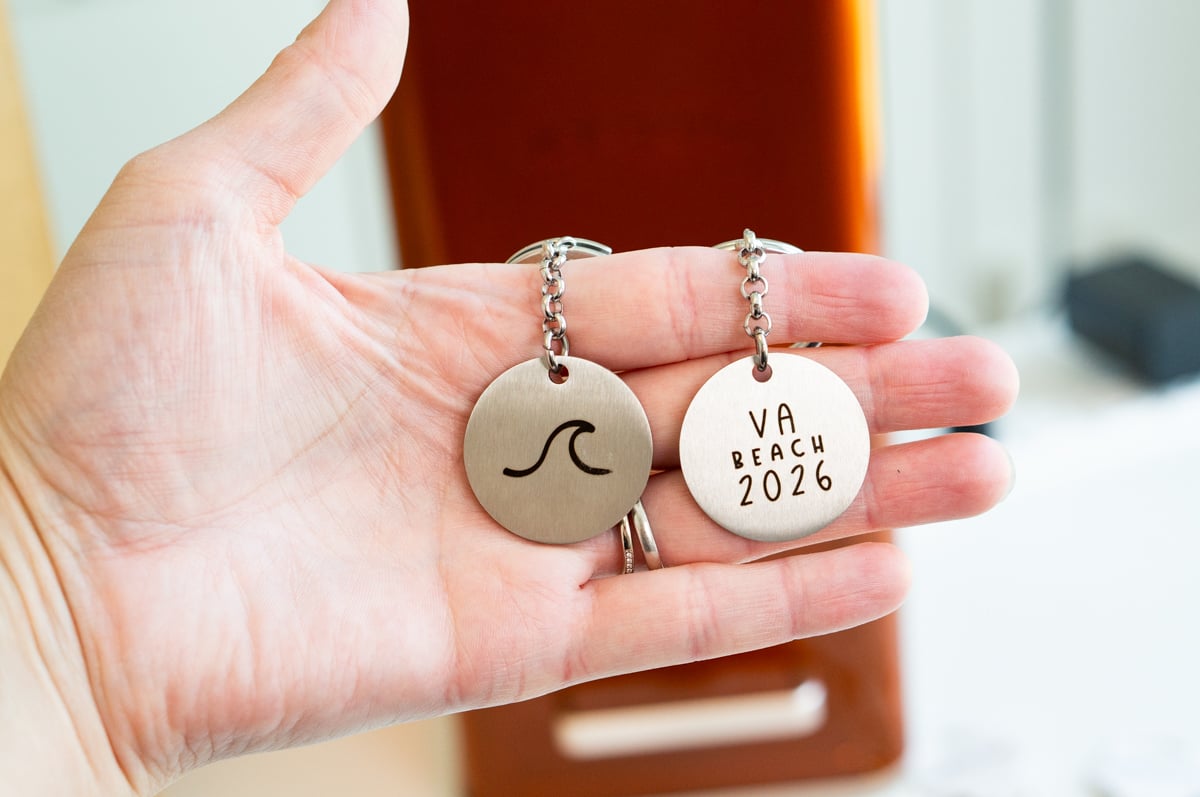
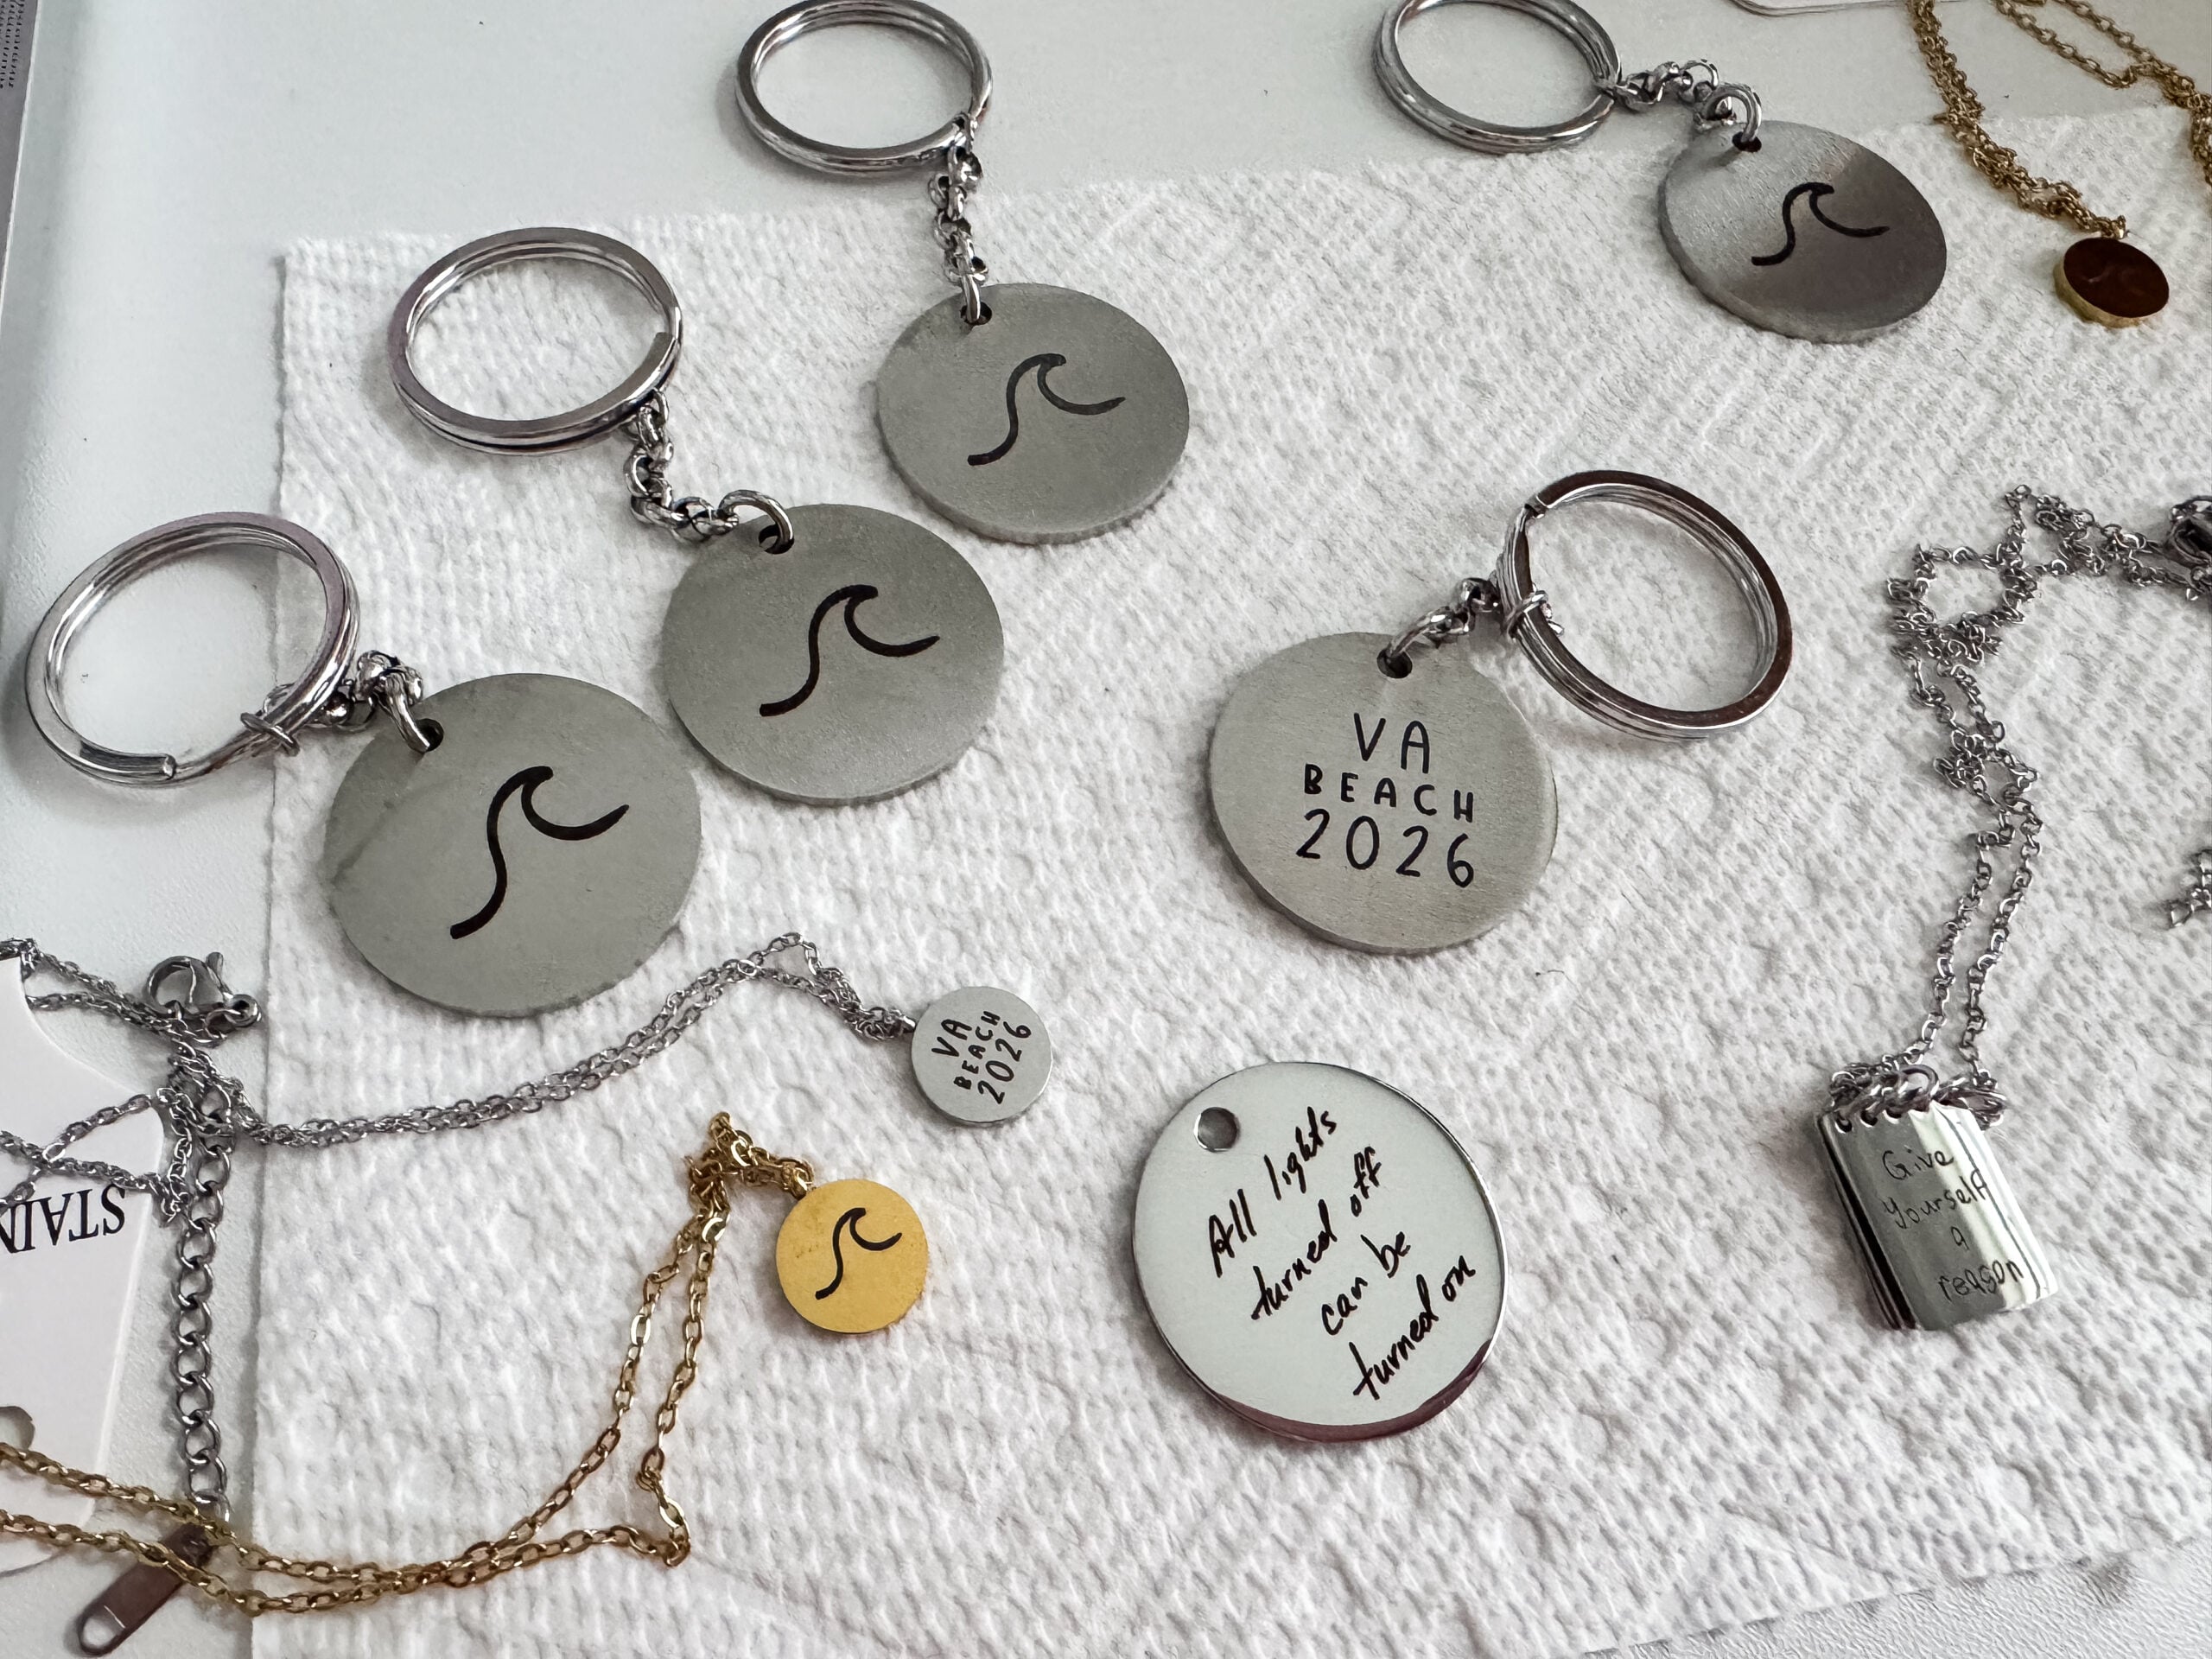
For one of my projects, I created matching bracelets using simple text. I also made a necklace with a small wave SVG on one side and added text to the other side to remember a family trip. Simple designs like these can be made incredibly quickly.
If I were setting up at a busy craft fair, I would definitely have a selection of quick customization options like initials, names, dates, and short phrases.
What I Would Offer at a Craft Fair
After actually testing all of these methods, I don't think I would offer every possible jewelry design as an on-the-spot option. Some customization is definitely more practical than others.
A simple flat pendant with initials? Absolutely.
A round necklace with a small handwritten design? Definitely doable.
A complicated curved bracelet that requires a lot of adjusting and repeated framing? I would probably save that one for custom orders I could complete at home.
Really difficult to read, older signature or drawing that needs cleaning up? Best for a custom order at home. You don't want a huge line forming while you spend 15 minutes rearranging someone's complicated artwork.
If I were using the F2 at a market, I would create a menu with a few levels of customization.
Quick options could include names, initials, dates, small premade SVGs, hearts, or short phrases.
Then I might offer handwriting and custom drawings as a premium option.
For more complicated requests, you could always take the order at the event and complete it later.
Create a Jewelry Bar at Craft Shows
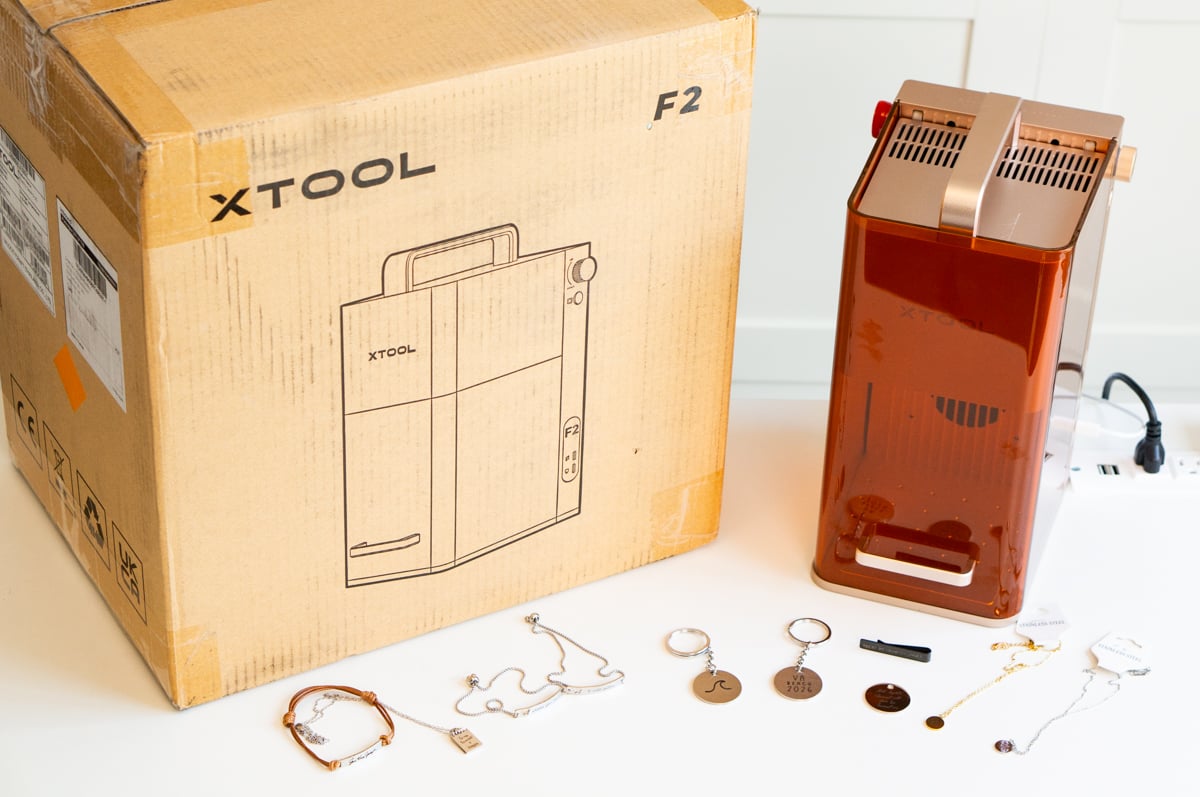
I LOVE the idea of creating a jewelry bar with the F2. Instead of simply hanging finished necklaces from a display, you could let customers build their own piece.
Set out several different blanks and examples showing what each piece looks like engraved.
Then let customers choose:
- Their jewelry blank
- Their engraving style
- Their text, handwriting, or design
- Any charms or additional pieces
You could even have a small iPad station where they create their artwork while you finish another customer's engraving.
The process itself becomes part of the shopping experience.
And honestly, people walking around a craft fair are probably going to stop and watch a laser engraving jewelry.
That gives you another way to draw attention to your booth.
Other Personalization Bars You Could Create with an xTool F2
Jewelry isn't the only way you could use this idea.
The same type of setup could work for:
- Charm bars
- Keychain bars
- Ornament bars
- Bookmark bars
- Pet tag stations
- Bag charm bars
- Coaster bars
- Teacher gift personalization
- Stocking tag stations
- Wedding favor engraving
- Graduation gifts
- Tumbler personalization
- Badge reels
- Notebook personalization
You could change your products and designs seasonally, too. Imagine personalized ornaments during Christmas, teacher gifts in May, graduation pieces in June, or backpack tags before school starts.
Test Your Jewelry Blanks FIRST
This might be one of the most important tips from my entire video. Please test your materials before making your final project, especially if you are planning to SELL what you make.
Different metals and coatings can react very differently to a laser.
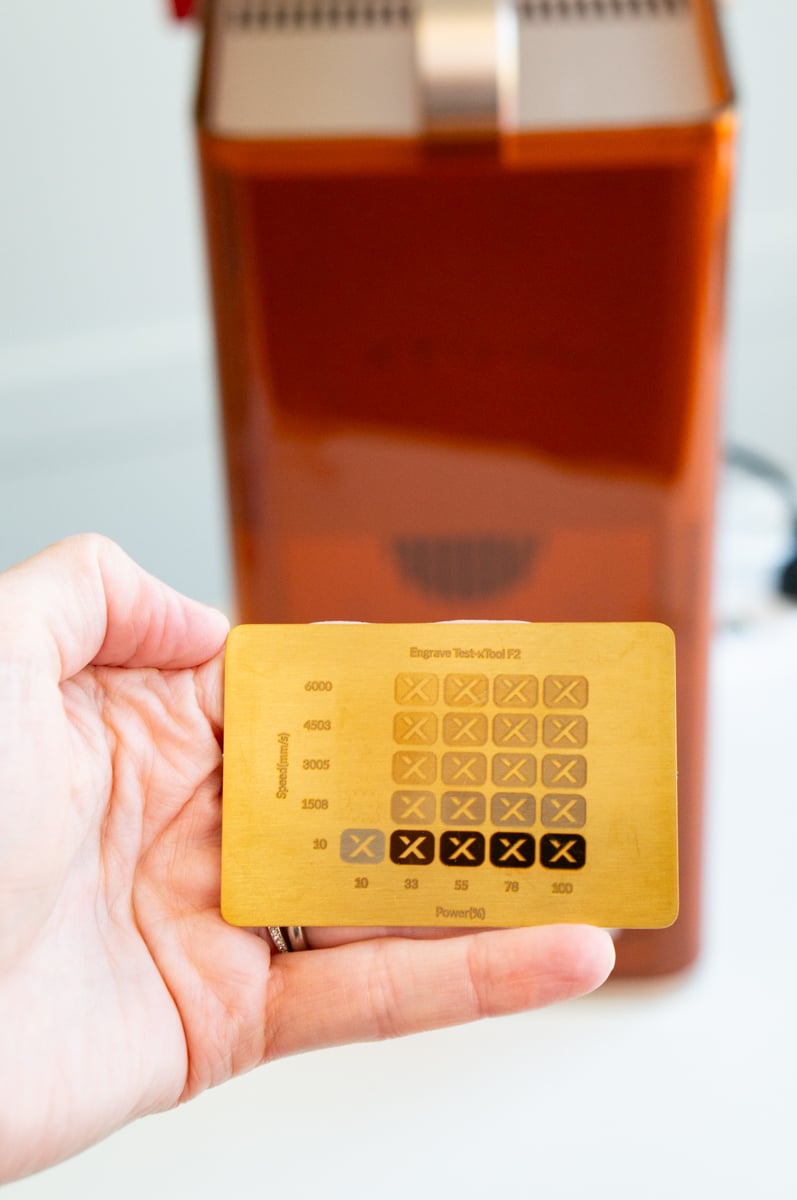
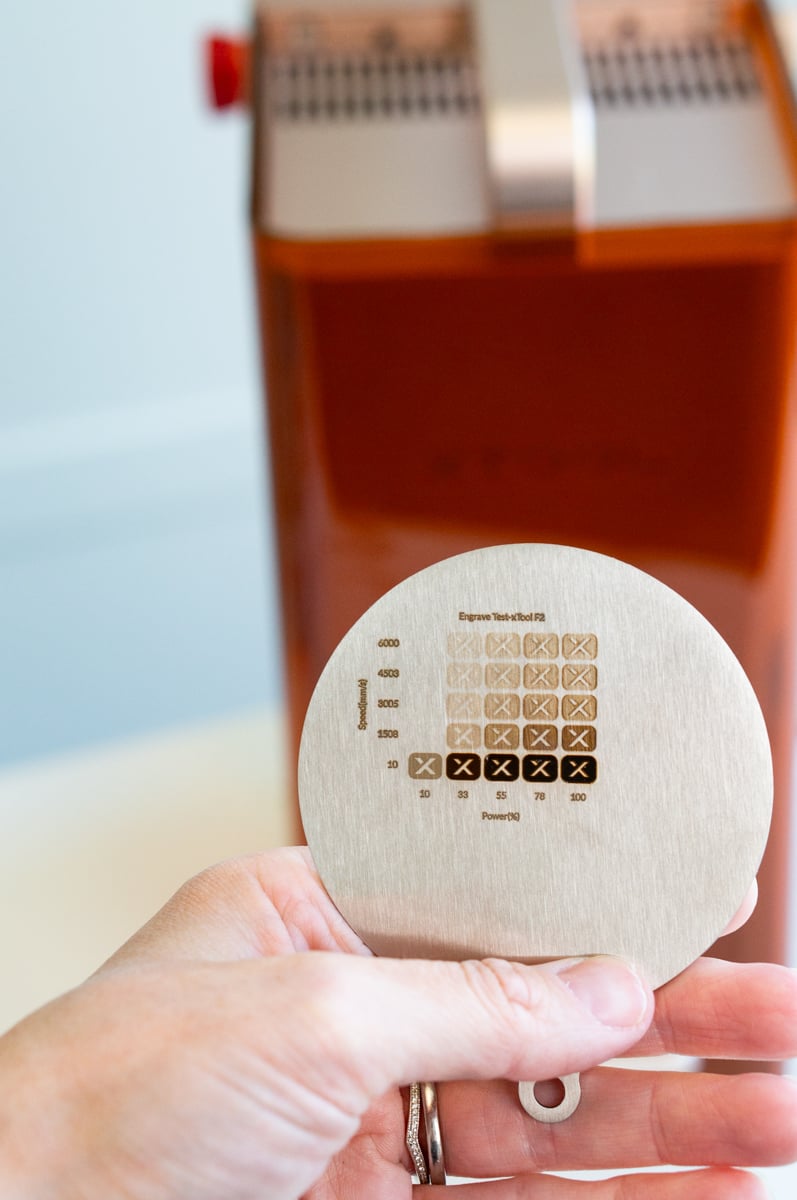
Before engraving my jewelry, I created material test arrays on different metal samples so I could see how different speeds and power settings affected the finished color and quality.
The material test array is built into the xTool software, which makes this much easier. And during my testing, I had a great example of why this matters.
I used one jewelry blank I purchased from a hobby store that I had not tested ahead of time and I was really disappointed by how it engraved.
I tried a higher quality blank instead, recreated the design, and the result was dramatically better.
The first one wasn't something I would have sold OR given as a gift. The better blank looked beautiful. Your laser settings matter, but your materials matter too.
If you are starting a business, buy a few extras and test everything before you begin taking orders. It is much better to waste one inexpensive blank while testing than ruin a customer's order.
Use Framing Before You Engrave
Another tool I use constantly when engraving small jewelry is framing. Jewelry gives you very little room for error.
If your design moves a few millimeters on a giant wood sign, you may never notice. Move a design a few millimeters on a tiny pendant and suddenly your engraving can be completely off center or even partially off the jewelry.
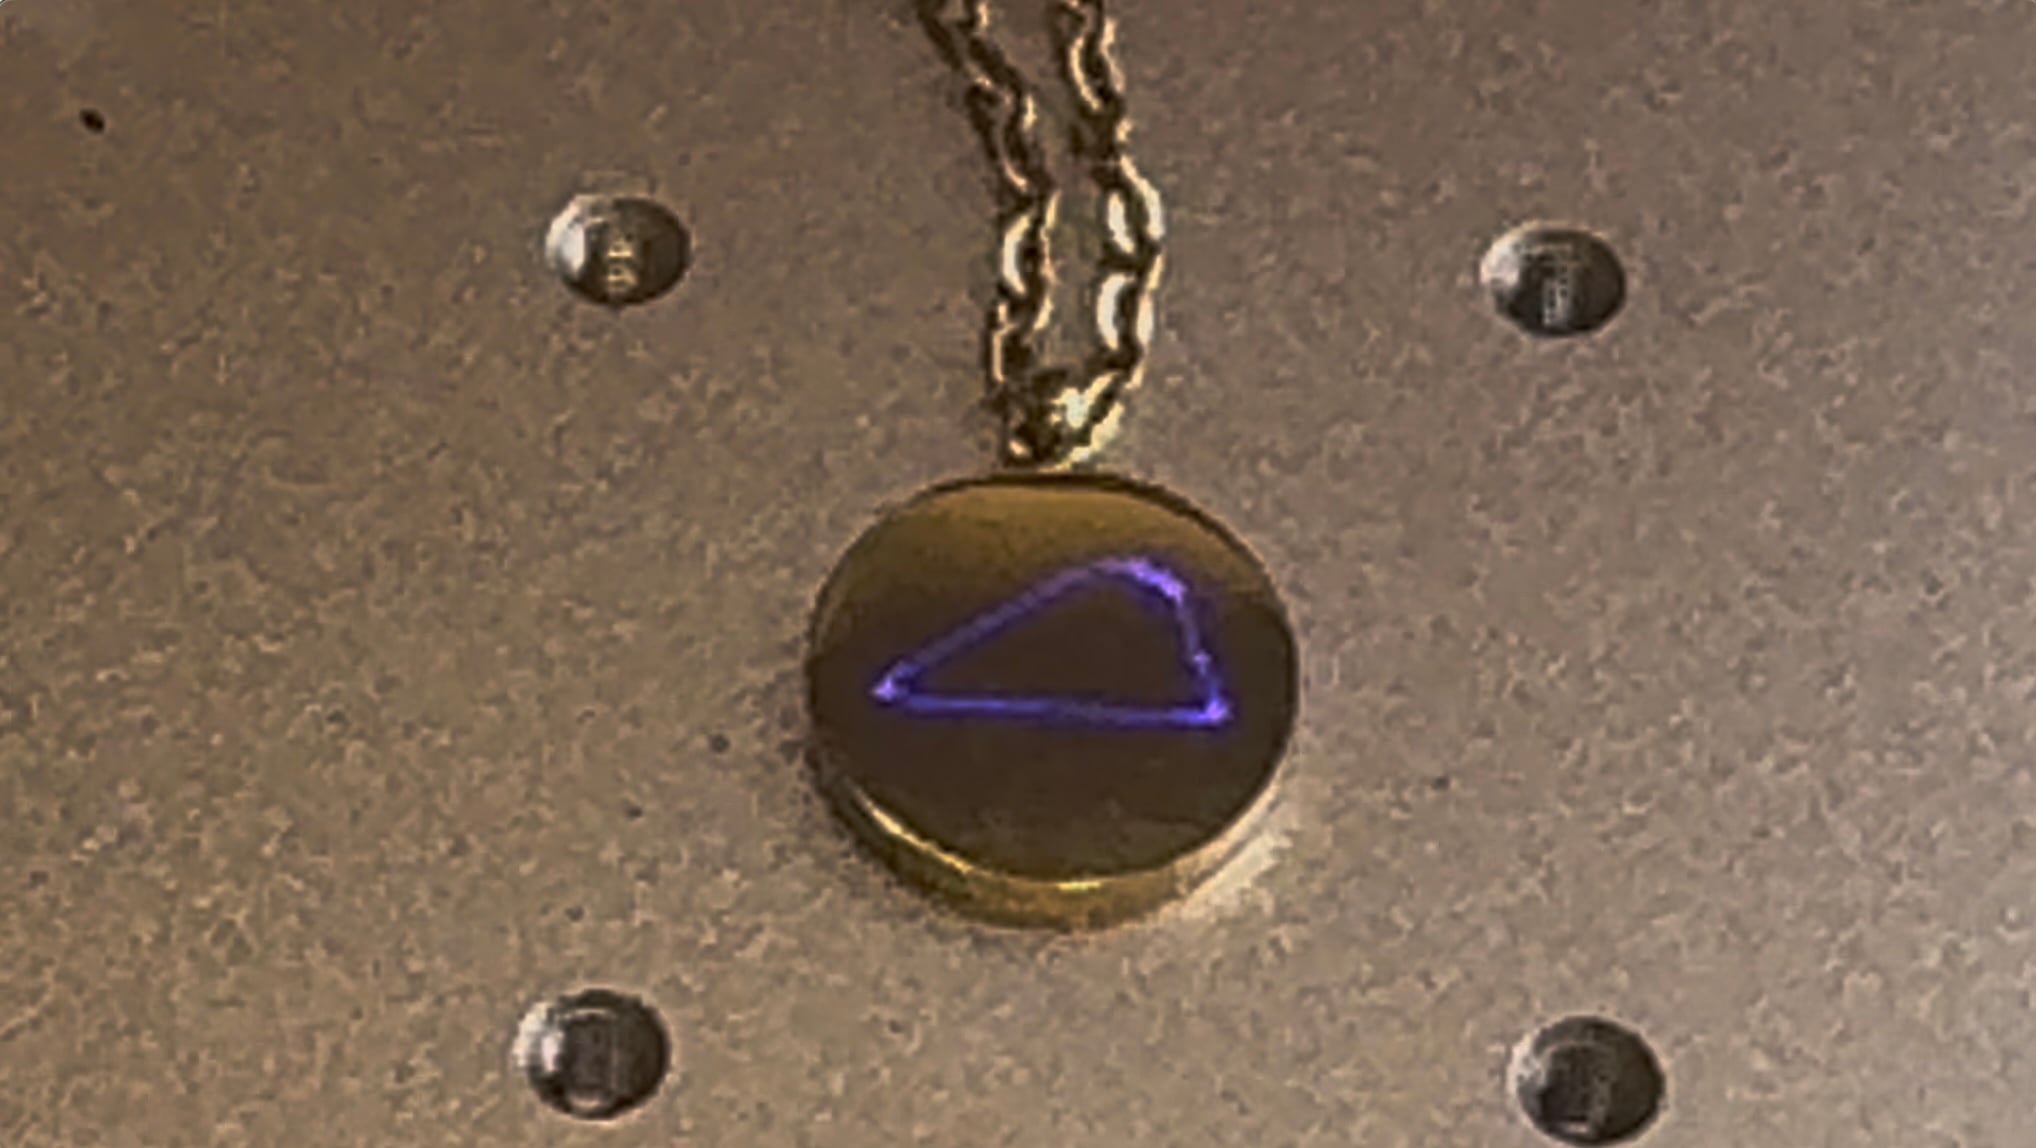
The F2's camera helps you visually position your artwork, but I still use framing before engraving my jewelry.
Framing projects a light around the area where your design will engrave so you can check the placement before actually starting the laser. I made several small adjustments after framing pieces during this tutorial.
I would much rather spend an extra minute checking placement than waste a jewelry blank. And since the xTool F2 offers the ability to use framing, why not take the extra step to ensure less waste?
A Helpful Trick for Autofocusing on Shiny Jewelry
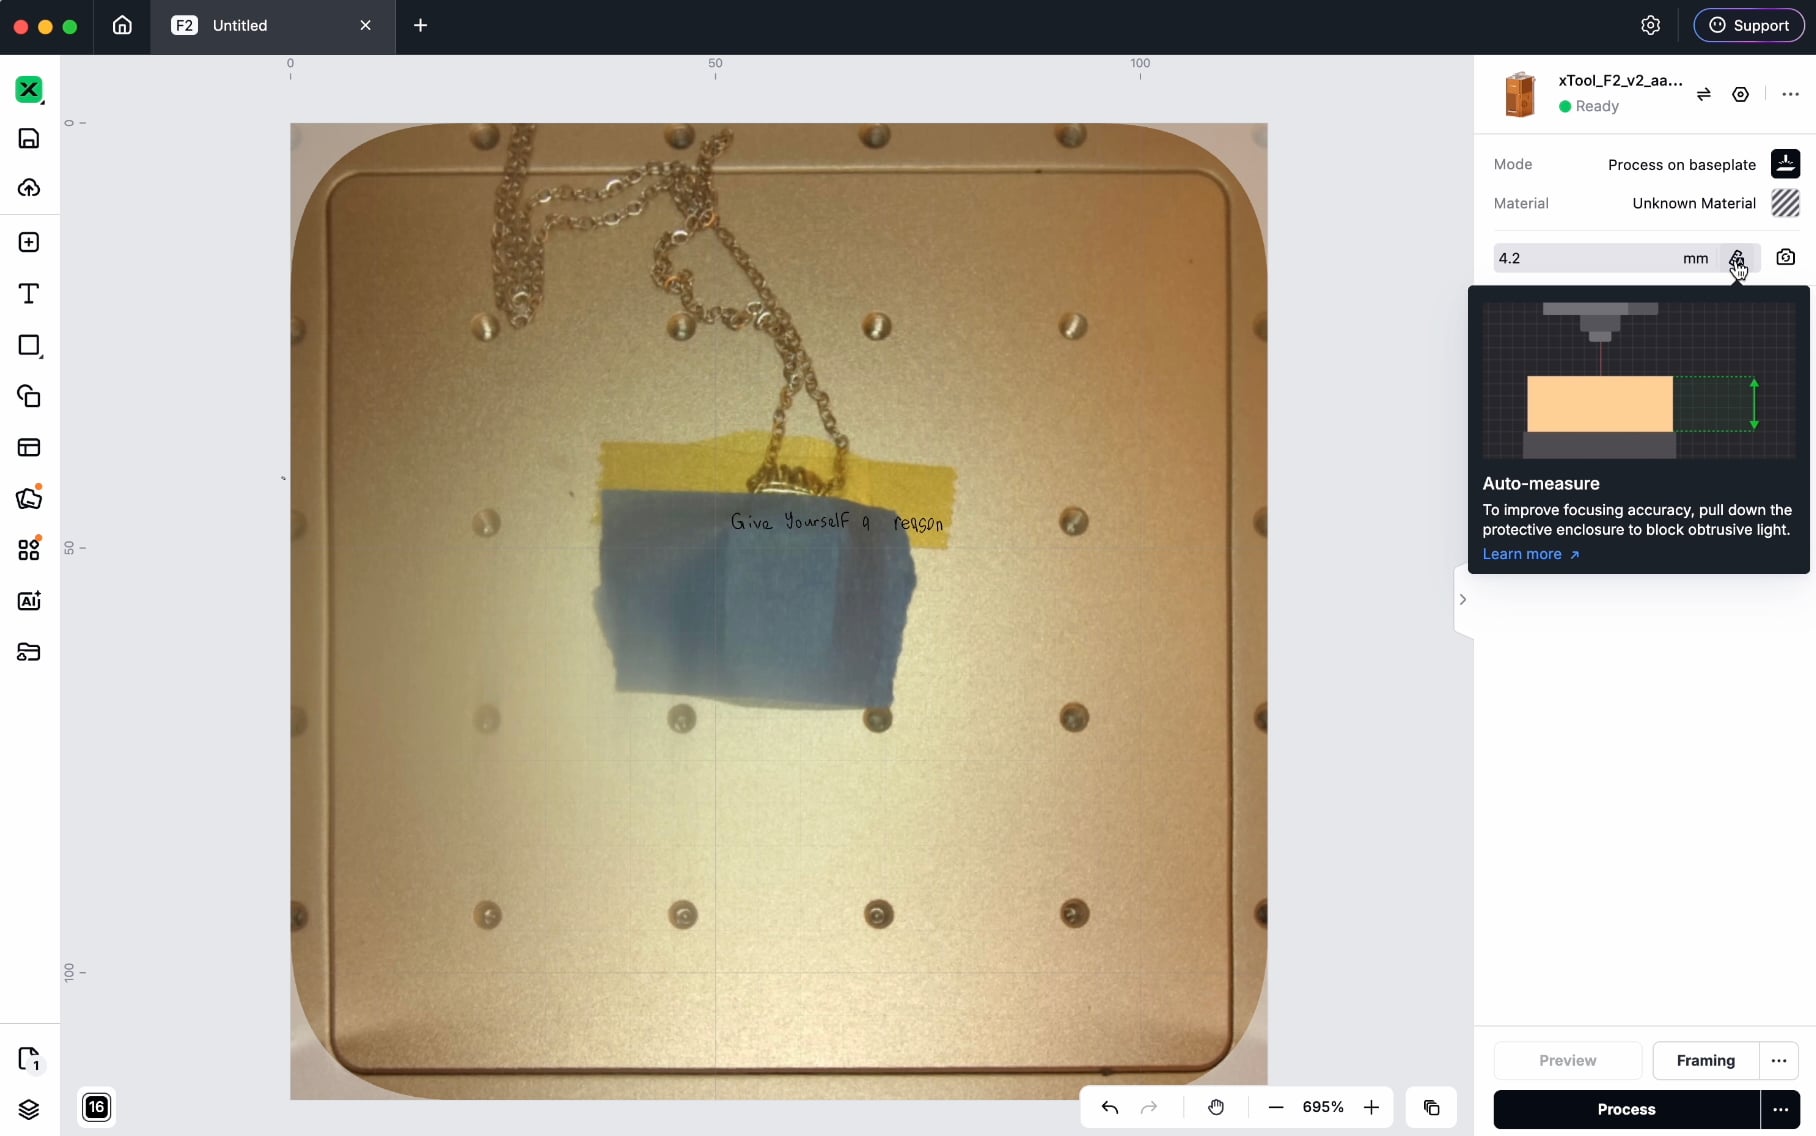
I ran into another issue during the tutorial that is worth mentioning. One of my shiny jewelry pieces would not autofocus correctly. Instead of giving up on autofocus, I placed a small piece of painter's tape over the shiny surface and measured again. It worked.
Once the F2 measured the height, I carefully removed the tape, refreshed my image, and continued setting up the engraving.
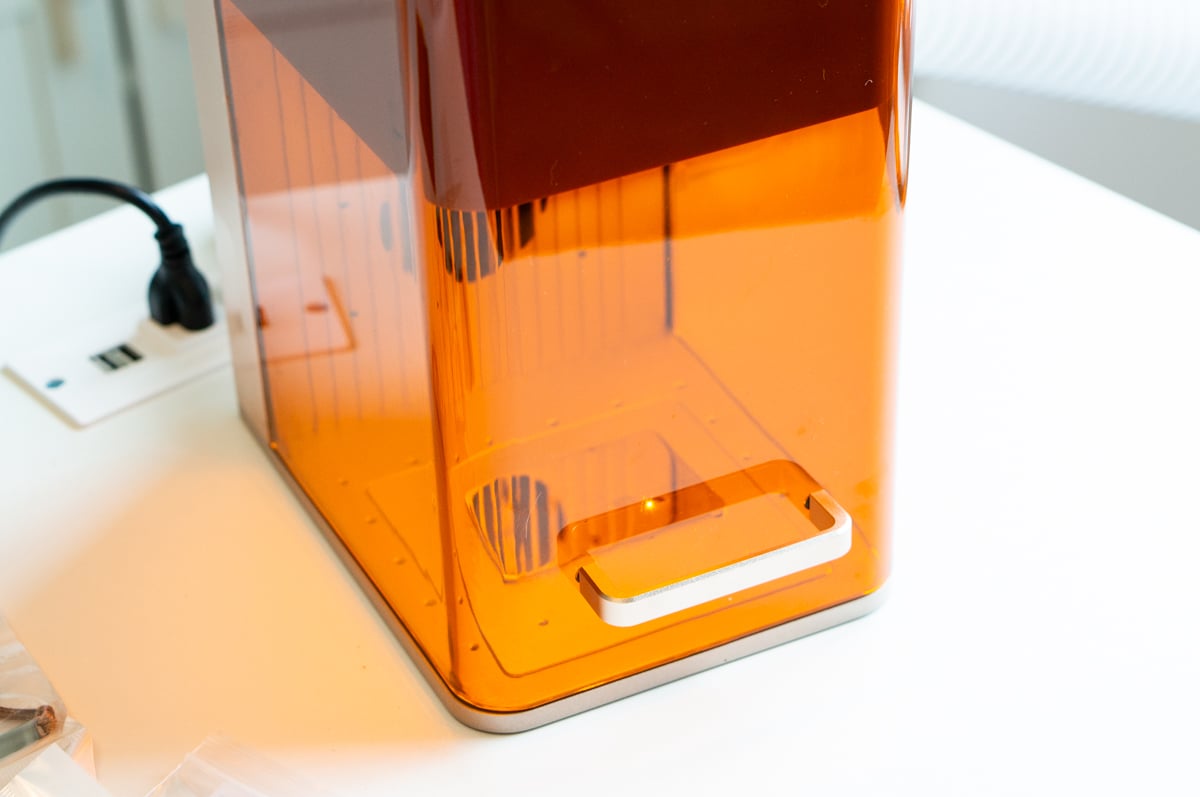
If you'd rather mannually focus, you can do that as well. It's actually really easy to use with the handle on the top right-side of the machine. You adjust the height until the two lights are centered on each other.
These are exactly the types of little things you learn after actually working with the machine and different materials.
Practice Before You Sell Personalized Jewelry
I purposely did not edit every little mistake out of my video. Could I have made it look like every single design magically landed perfectly in place on my first try?
Sure. But that's not realistic.
There is a learning curve when you start engraving small jewelry pieces. You will probably waste a few blanks. You'll put something slightly too high. You'll decide you don't like your settings.
You'll forget to refresh the camera before positioning something (ask me how I know).
That is normal when learning a new machine. But if you are planning to sell your work, practice BEFORE your first event. Ahead of opening your business, I would:
- Figure out your favorite blanks.
- Create test arrays.
- Save your settings.
- Make templates for your most common jewelry shapes.
- Practice your workflow.
- Decide which customization options take too long to reasonably offer on-site.
- Figure out your pricing to ensure a product's profit-margin makes it worth selling.
The more you can prepare before the event, the faster the process will be once customers are standing in front of you.
Why the xTool F2 Makes Sense for a Small Business
I think the F2 is an especially interesting machine for a handmade business because it allows you to turn customization into part of your actual business model. With a larger laser at home, you can absolutely sell custom products.
But at a market, you would generally need to take the customer's order, go home, make it, and then arrange shipping or pickup.
Some buyers will do that. Others won't. They came to the craft fair wanting to leave with something.
With the F2, they can choose their item, personalize it, watch it being made, and walk away with the finished product. That is a completely different customer experience.
And the more personalized the item is, the harder it becomes to compare your product to something mass produced sitting on a store shelf.
Is the xTool F2 Only for Small Business Owners?
Definitely not. I am not currently taking my F2 to craft fairs to run a jewelry business. All of the pieces above (and in the video) were created for myself and my family.
But I still LOVE having it as a hobby crafter. Personalized jewelry makes such a great gift.
You could create pieces for:
- Mother's Day
- Father's Day
- Christmas
- Birthdays
- Anniversaries
- Graduations
- Weddings
- Bridesmaid gifts
- Teacher gifts
- Memorial gifts
- Family vacations
- Friendship gifts
I especially love the ability to engrave my boys' handwriting and drawings. Those tiny drawings that are currently sitting on random pieces of paper can suddenly become something I can actually wear and keep.
And because the F2 is so much smaller than my other lasers, it doesn't require a huge dedicated space in my craft room.
Is the xTool F2 Good for Jewelry Engraving?
After testing multiple jewelry projects, absolutely.
In fact, metal jewelry is one of my favorite things I have made with the F2 so far.
The small work area isn't a problem because jewelry doesn't require a large laser bed. The infrared laser works well for marking metal, the engraving speed is great for small personalized projects, and the portability gives you options you simply don't have with a large desktop laser.
Most importantly, the F2 lets you go far beyond simply engraving premade SVG files. You can take someone's actual handwriting. You can take a child's drawing. You can have someone sketch something on an iPad while standing at your booth. And minutes later, that design can be sitting on a piece of jewelry.
Whether you are a small business owner looking for products you can personalize on-site or a hobby crafter who loves making truly one-of-a-kind gifts, that is what makes the xTool F2 so much fun to use.
And I already have MANY more ideas for what I want to engrave next.