Lighting is always one of my favorite parts about a room. The lights are the jewelry of the room - they accent the room and pull the entire look together.
Our original foyer light was far from a stunning piece of jewelry. It was more like hand me down play jewelry your kids have from your Mom's Designing Women days.
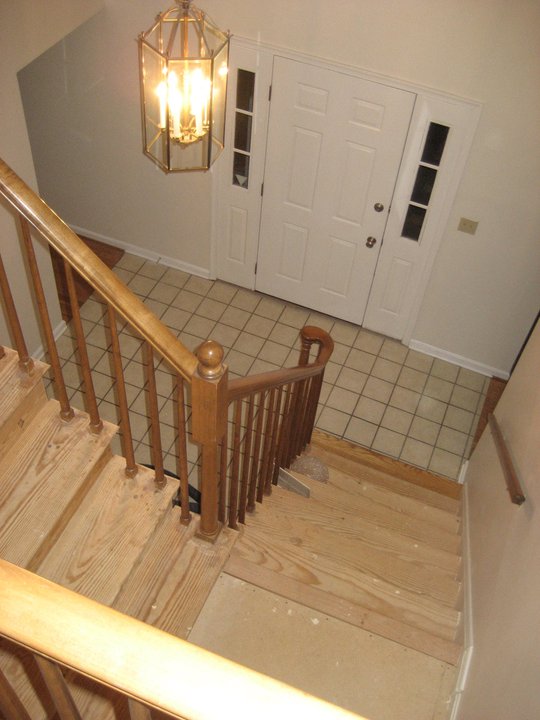
Not long after we moved in, we took off the glass cage covering the center light fixture. Unfortunately, it was missing a bunch of pieces of glass as well as some hardware to attach new glass.
When we decided to finally replace our 1980's light in the foyer, we just didn't have it in our makeover budget to spend hundreds on a new light. Instead of buying new, we needed to we needed come up with a cheap light makeover.
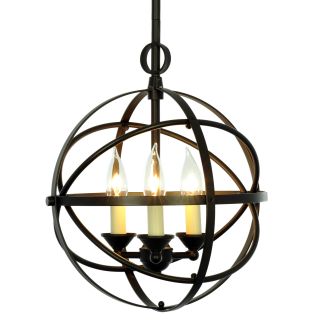
The inspiration for our entry light DIY came from the cage and orb chandeliers I have been seeing in stores, like this one from Lighting Direct.
After searching for ideas on Pinterest, I decided that I could use an orb decoration (like the smaller one I had just purchased at Home Goods). I thought I could some how cut it and place it around the inner part of my chandelier.
After searching Home Goods and some other local home decorating stores, I realized that I wasn't going to find an orb large enough to enclose the chandelier.
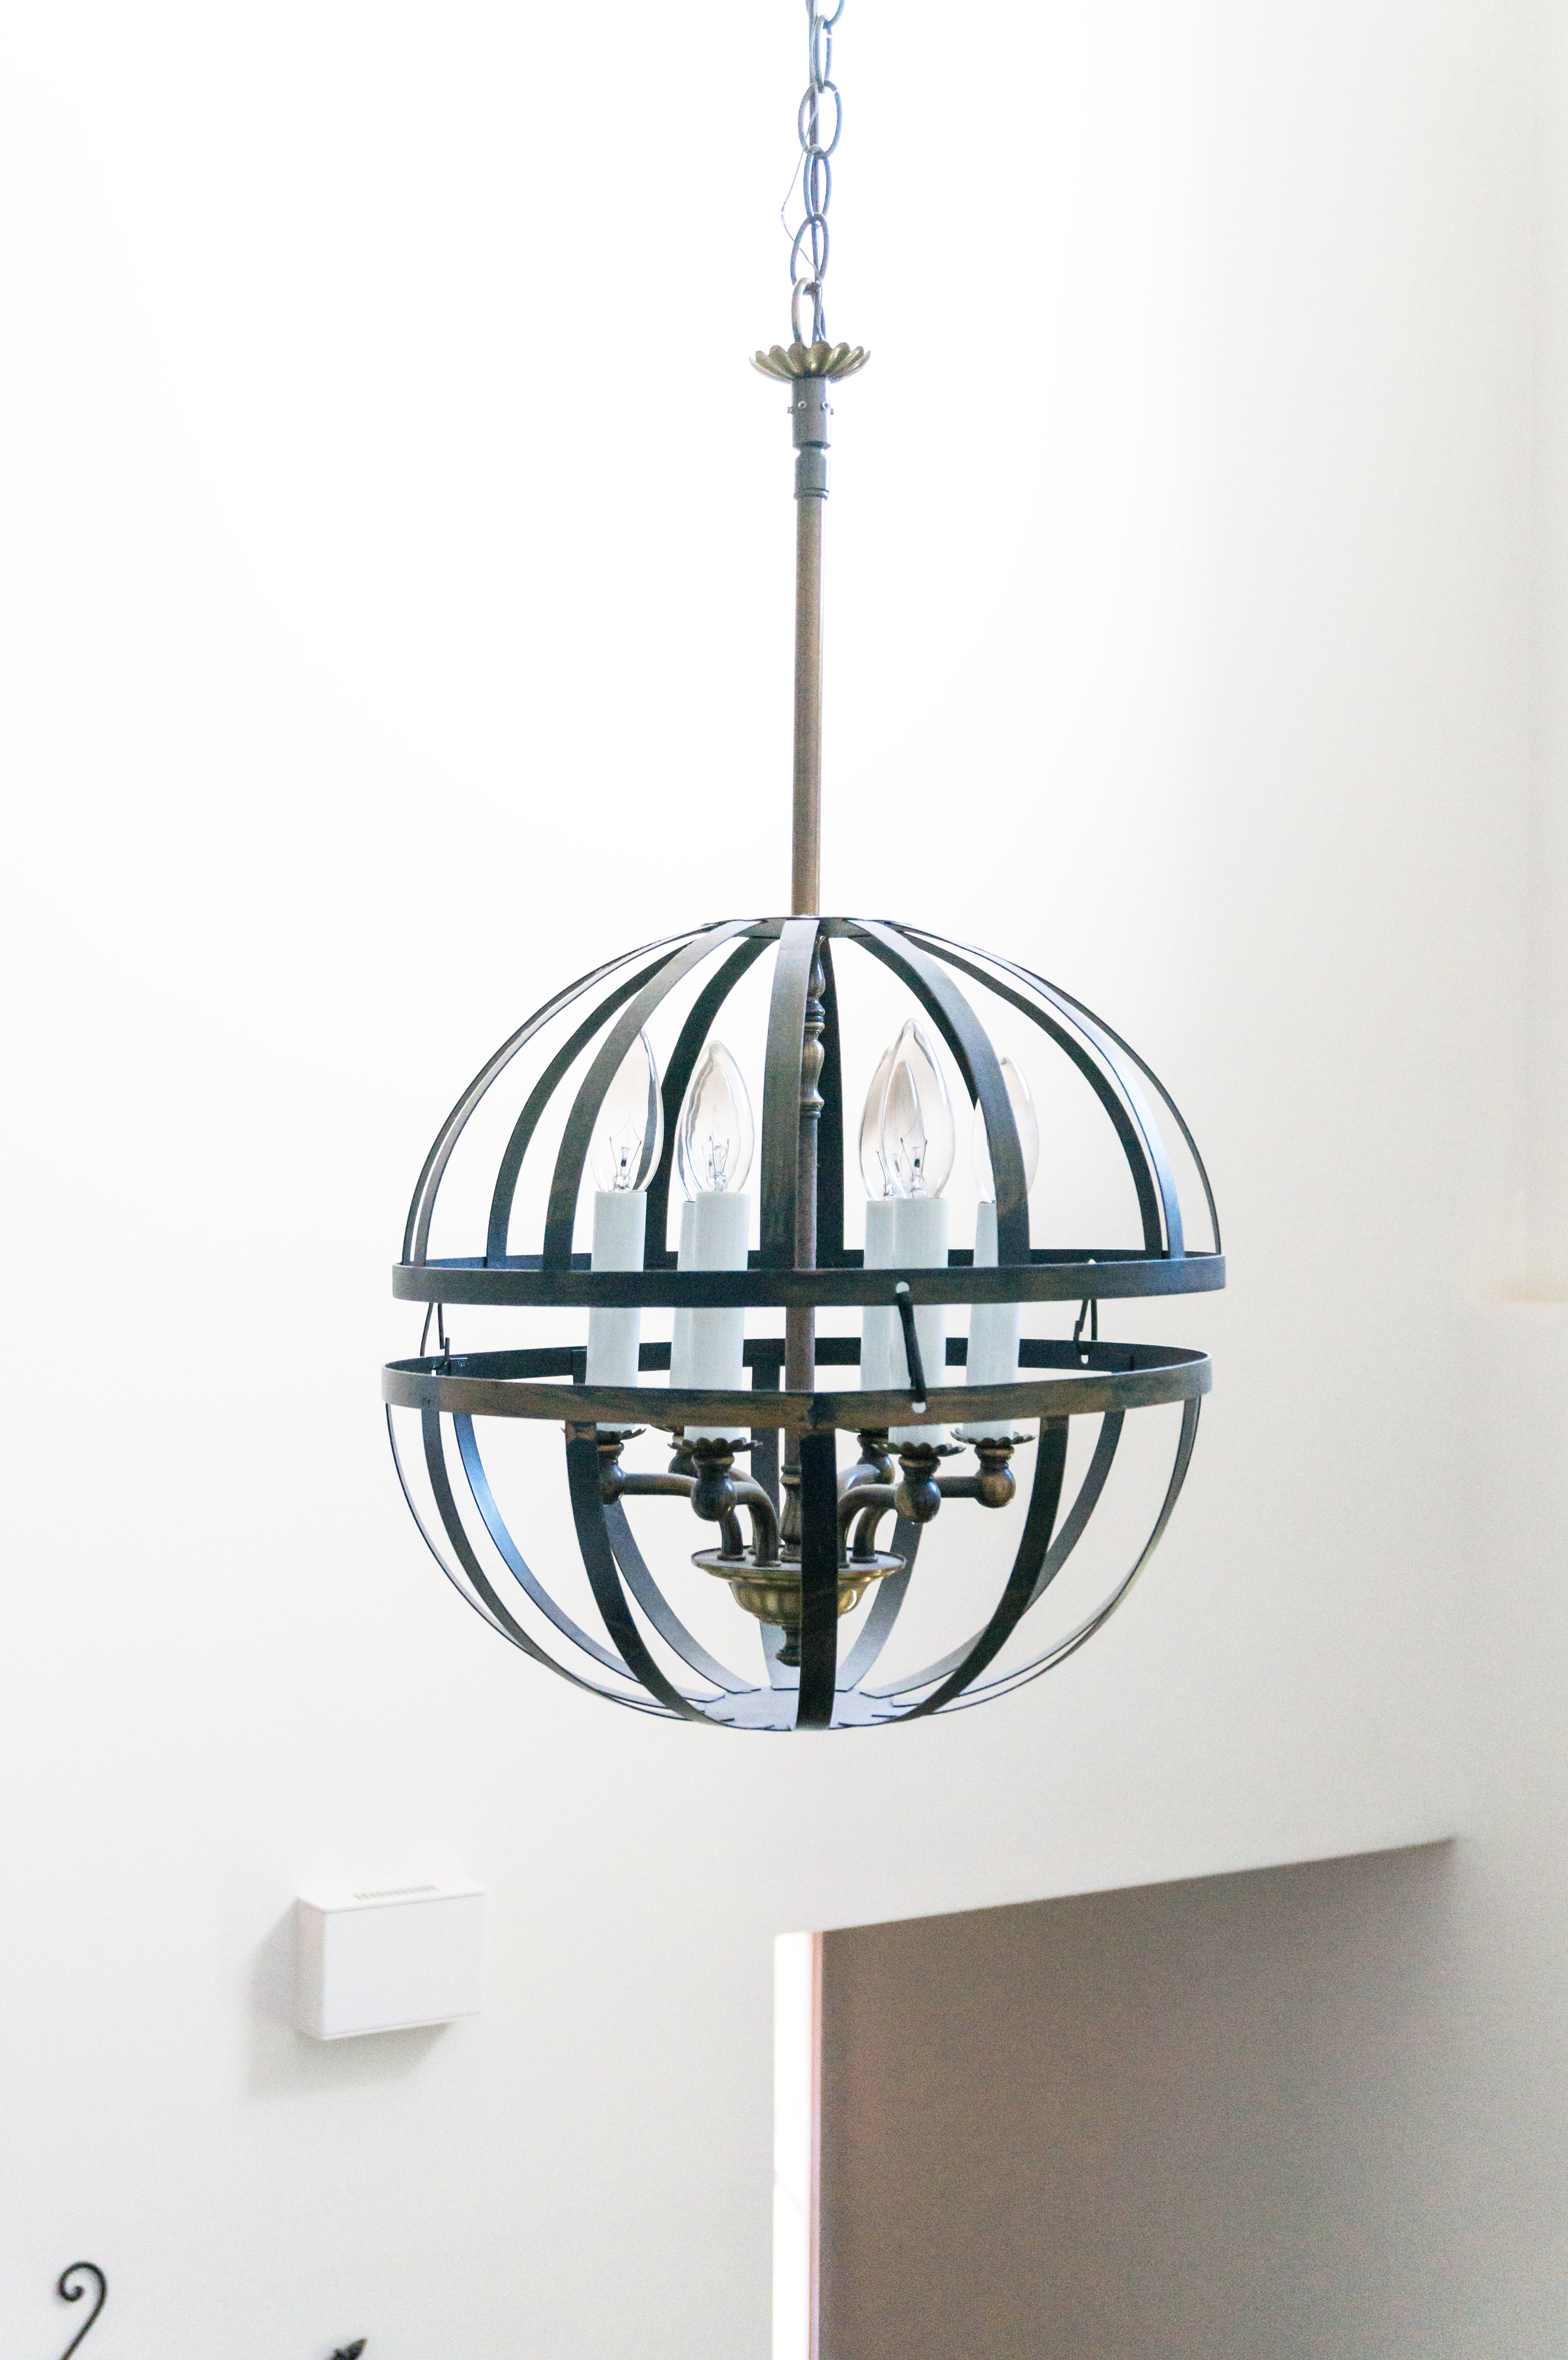
I was frustrated and defeated. But then my Mom had an amazing idea. She saw something in the garden section of a local hardware store that she thought would be perfect for making an orb/cage type of chandelier.

Yep, that's right. She bought two hanging baskets to DIY into a cage around the chandelier. And guess what, it worked perfectly.
Cheap Light Makeover
Materials & Tools
- 2 hanging plant baskets (these are the ones we used)
- Drill
- Drill bit slightly smaller than the tubing (pole) of the chandelier
- Existing chandelier or purchase one (similar chandeliers frequent second hand stores)
- Piece of scrap wood
- Dremel - only if your light's outer cage needs to be cut off
Directions
- Take the cage off the chandelier. If needed, use the dremel to cut it off.
- Take the chandelier's entire light assembly apart so that the chandelier/candelabra portion are separated from each other.
- Take the moss out of the planter.
- Take the chain off of both planters.
- Take the hooks off of one of the planters.
- Take the planter with the hooks remaining on it. It will become the top of the light.
- Find the center of the bottom of the planter and mark it (we placed some blue painters tape on the light first so that we could see the mark).
- Place the planter on a piece of scrap wood to help stabilize it while you drill.
- Using a drill bit that's slightly smaller than the pole, drill a hole where you marked.
- Turn the planter upside down and string the chandelier's main wires through the top of the hole.
- Rewire the candelabra portion of the chandelier.
- Use the hooks from the top planter to attach the bottom planter.
*You may want to use a different hook to attach the two planters. We used the hooks that came with the chandelier because it worked. But, we're already searching for a different type of hook or ring that we can use that will make it less noticeable.
Here's the final light:
Bonus Cheap Light Makeover - And it Takes Less than 5 Minutes!
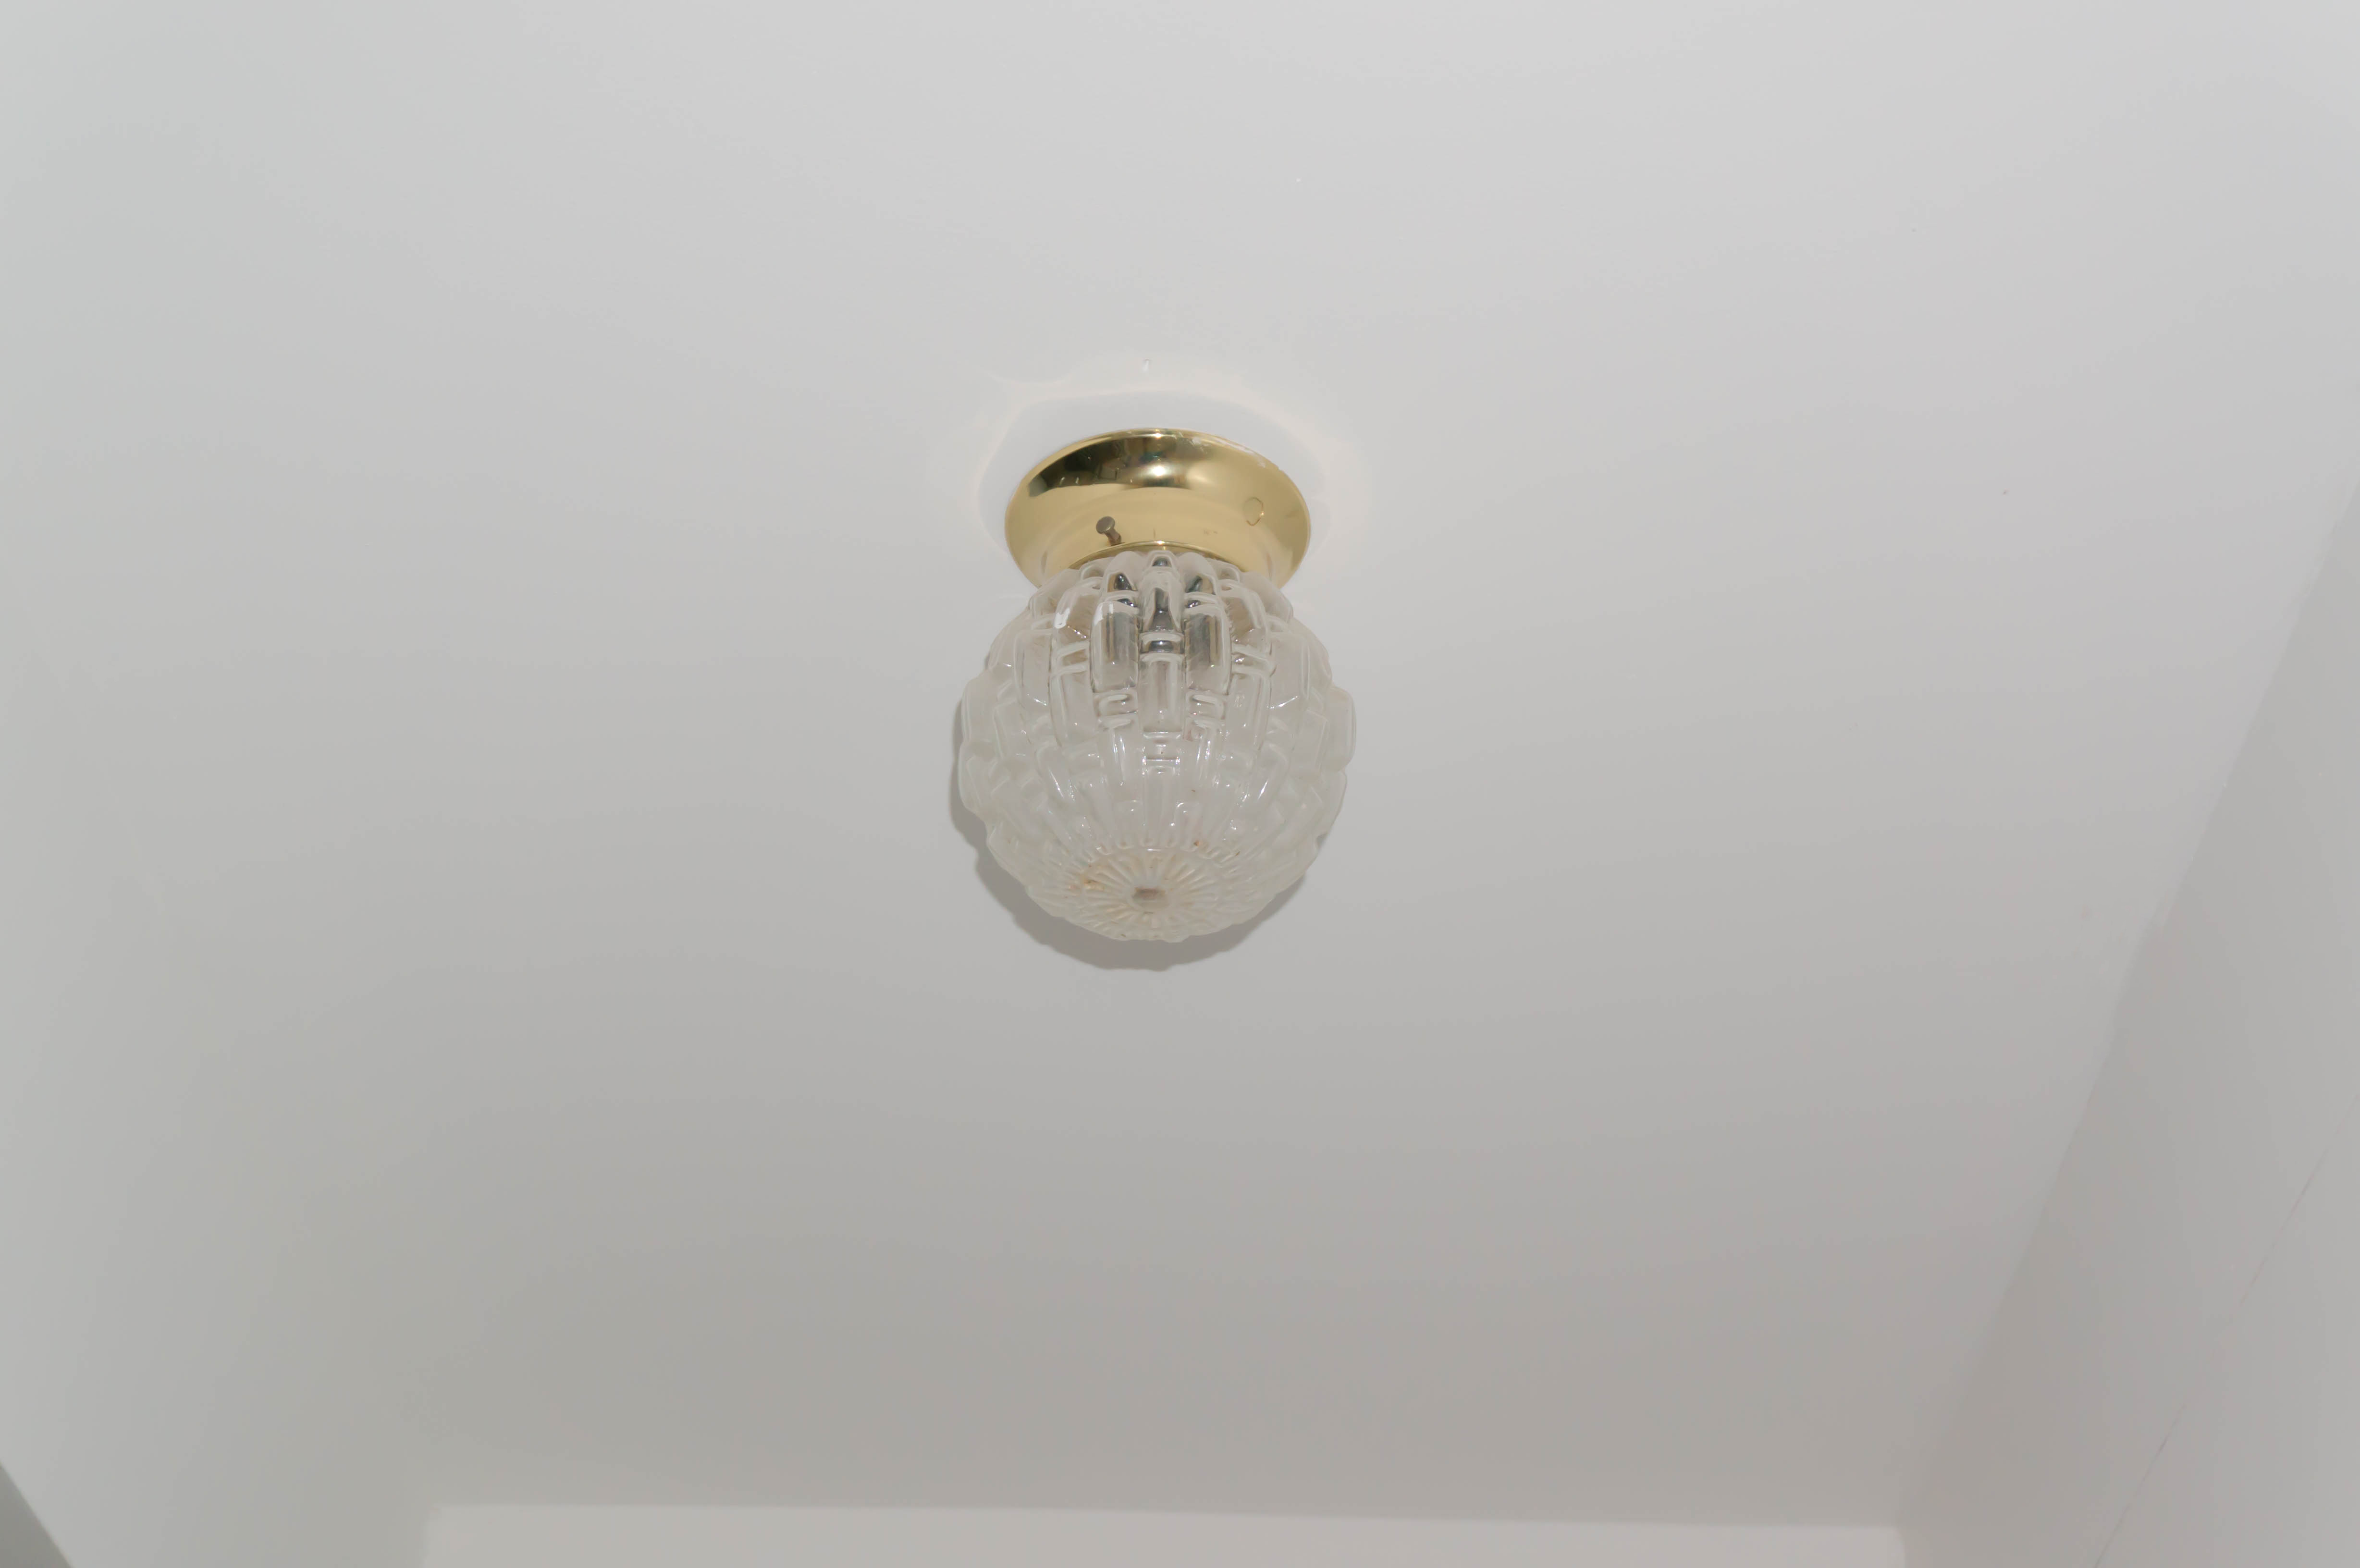
The second cheap light makeover we completed was simply replacing the globes on the two hall lights upstairs. We decided to stick with the schoolhouse lights to coordinate with the kitchen and living room.
Here's the quick cheap light makeover:

Next Steps in the Remodel
This past week, we also finished painting the shiplap white (which I will reveal later). Currently, I am searching for an entry piece. The one I planned to refinish just doesn't work in the space like I thought it would. In addition, I will be working on some custom prints and wall art.
Want to see the rest of our challenge - check out these posts:
- Week One: The Foyer Before
- Week Two: How to Install Faux Shiplap
- Week Four: Refinished Stairs and Chalk Painting a Sideboard
- Week Five: How to Turn a Cork Board into a Chalkboard
- Week Six: DIY Inexpensive Wall Art for Less than $6 a Piece
- Week Seven: Foyer Reveal
![]()

Need More Inspiration?
Don't forget to check out the rest of the One Room Challenge Guest Participants and the Feature participants. (The One Room Challenge brings bloggers together twice a year to redo one room in six weeks).


This is GENIUS! And it looks fantastic - I never would guess that these are hanging planters!
Best,
Kelly
Thanks so much, Kelly!! I love your bedroom - I am SO impressed with your plywood flooring!!
Wow, that's a great idea! Pinned to save this idea.
Thanks so much, Deb! I am SO sorry to hear about your basement flooding.
Well done to your Mum! That is such a clever idea! Who would know. 🙂
Wow! I honestly thought this was an original orb chandelier. Great job!
Thanks so much, Delia!! I love all of the inspiration pieces you have picked out for your bathroom! Can't wait to see it finished!
Hi, Laura!
I came across your project as I was uploading my link to the ORC. I LOVE the way this DIY turned out! I've gone through this exact same thought process and never arrived at the brilliant idea to use hanging planters. This might just have to be a project that happens in my future. Thanks for sharing!
This is a great idea! I have an ugly "boob" light in my bedroom, and I'm participating in the One Room Challenge and want to change it out, but I'm not sure I will have the budget for it. Might need to DIY something like this. Great post!