
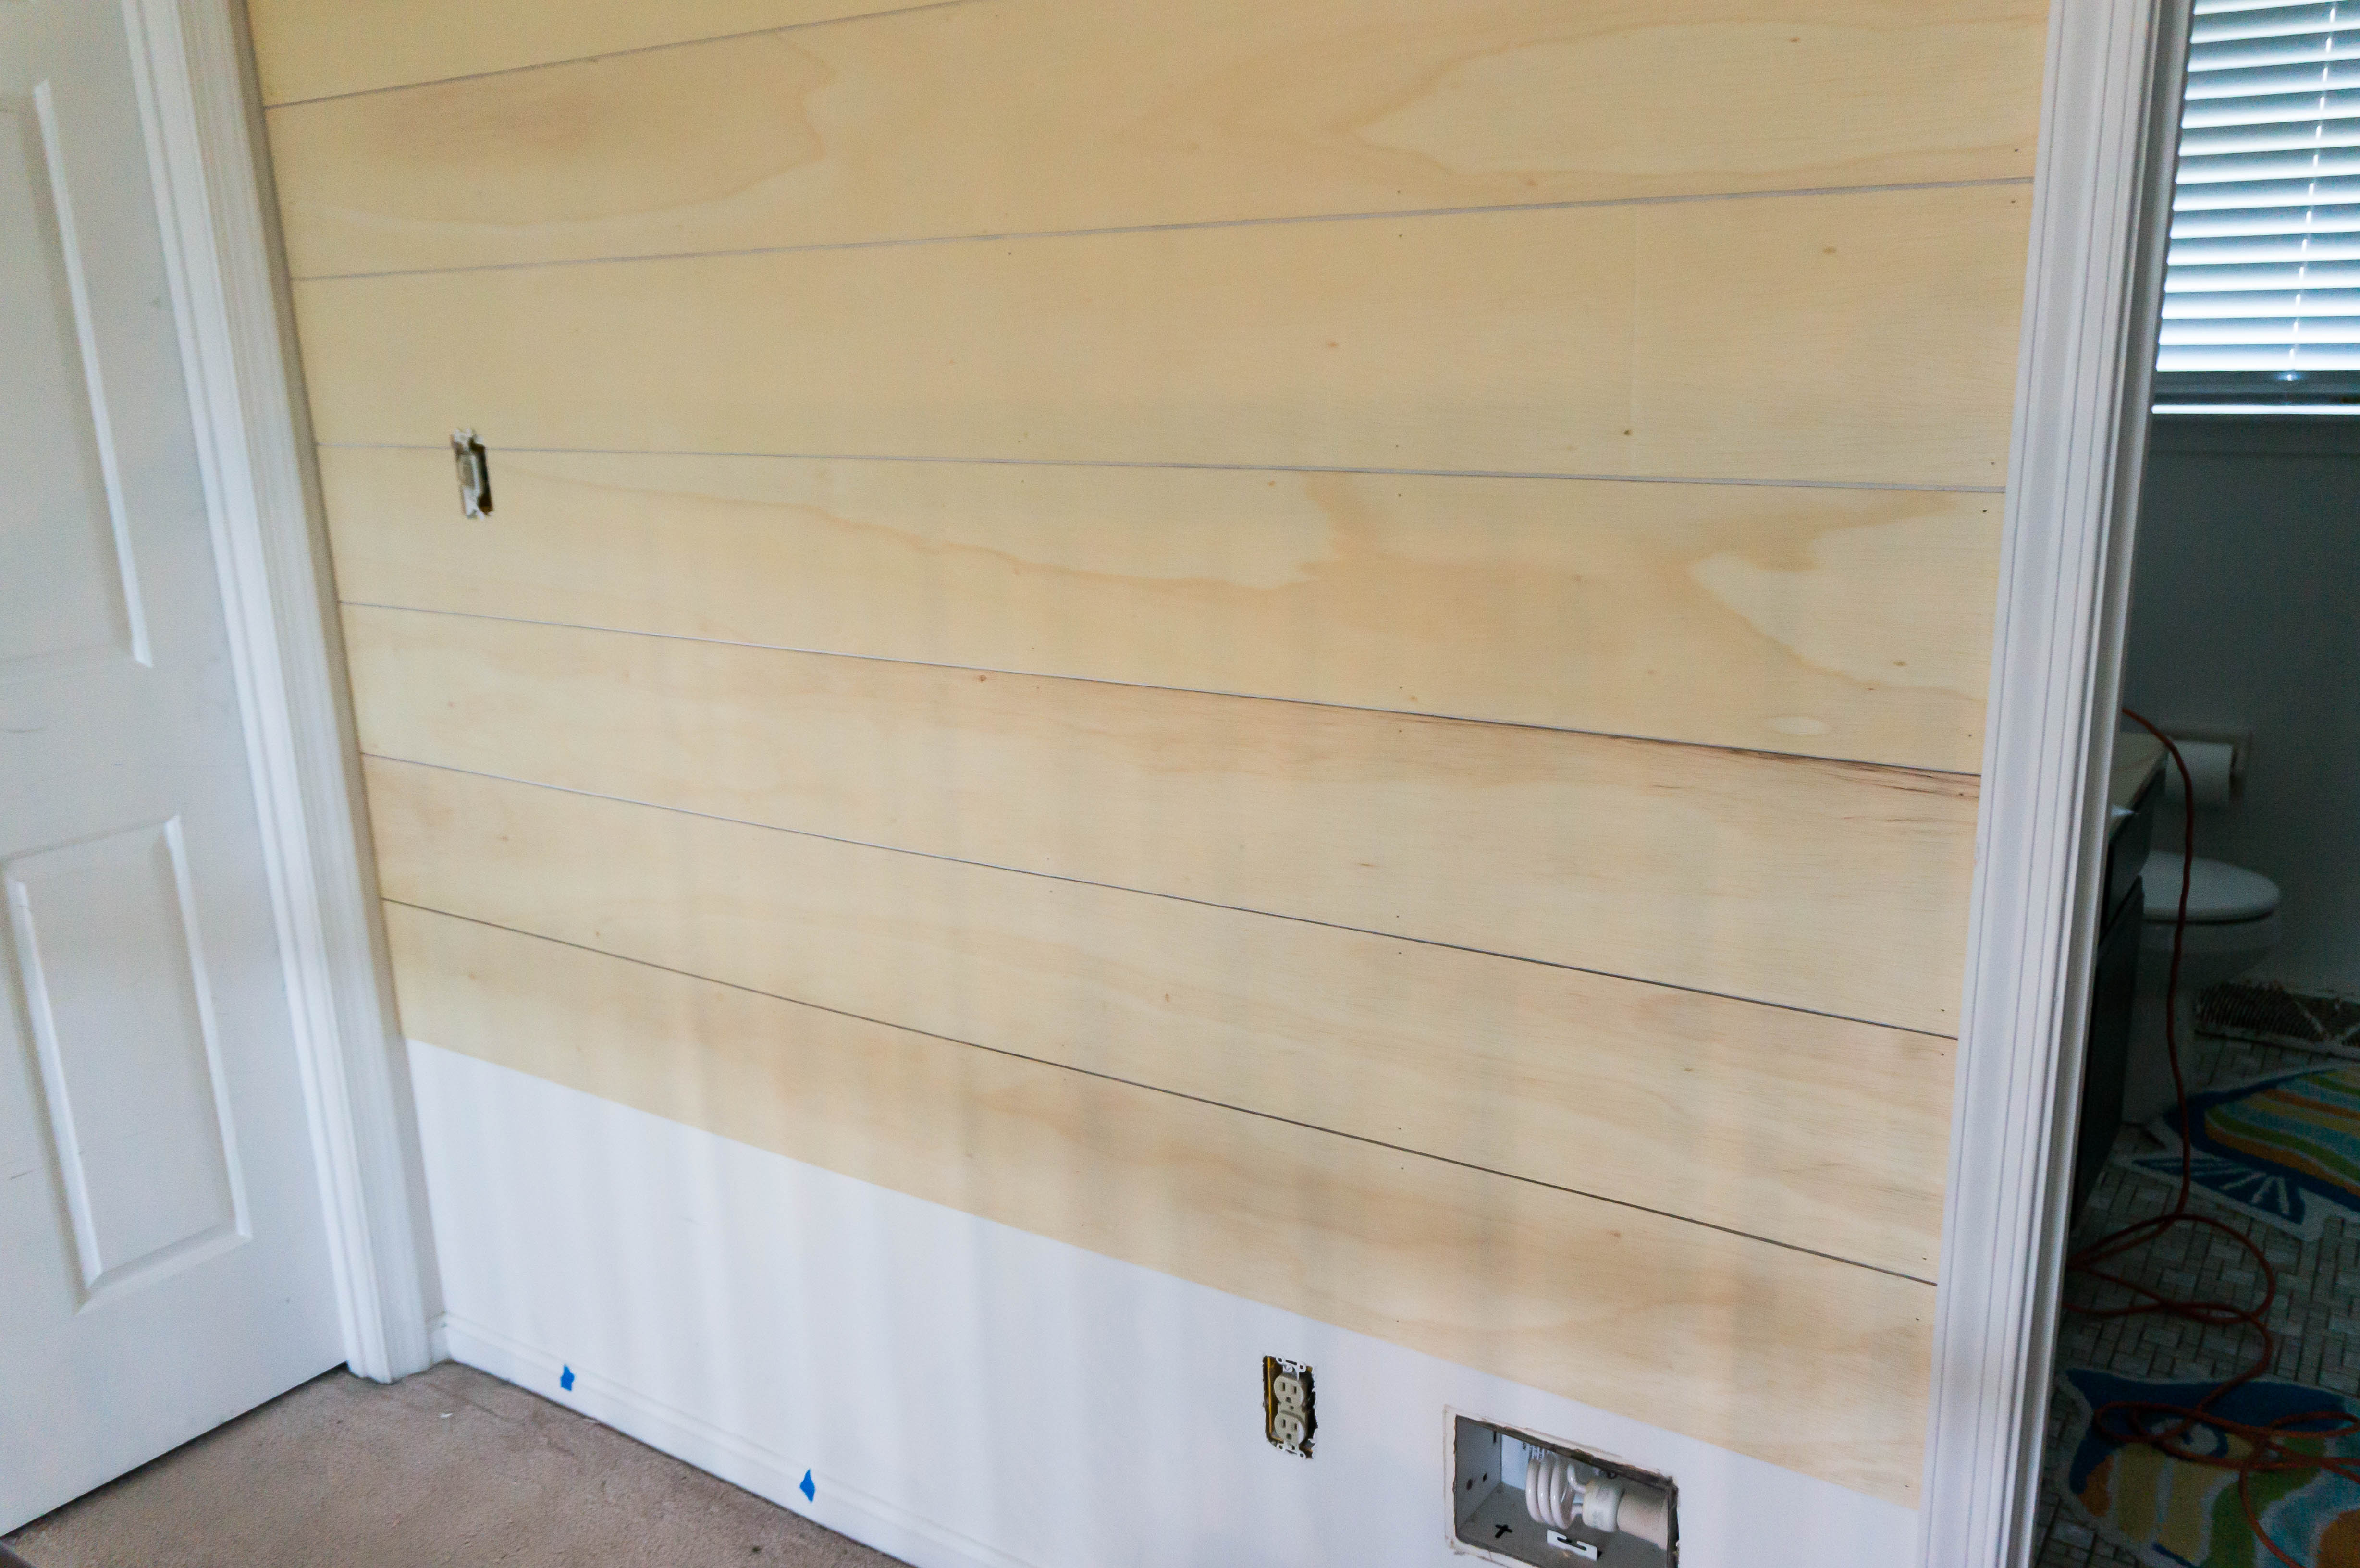
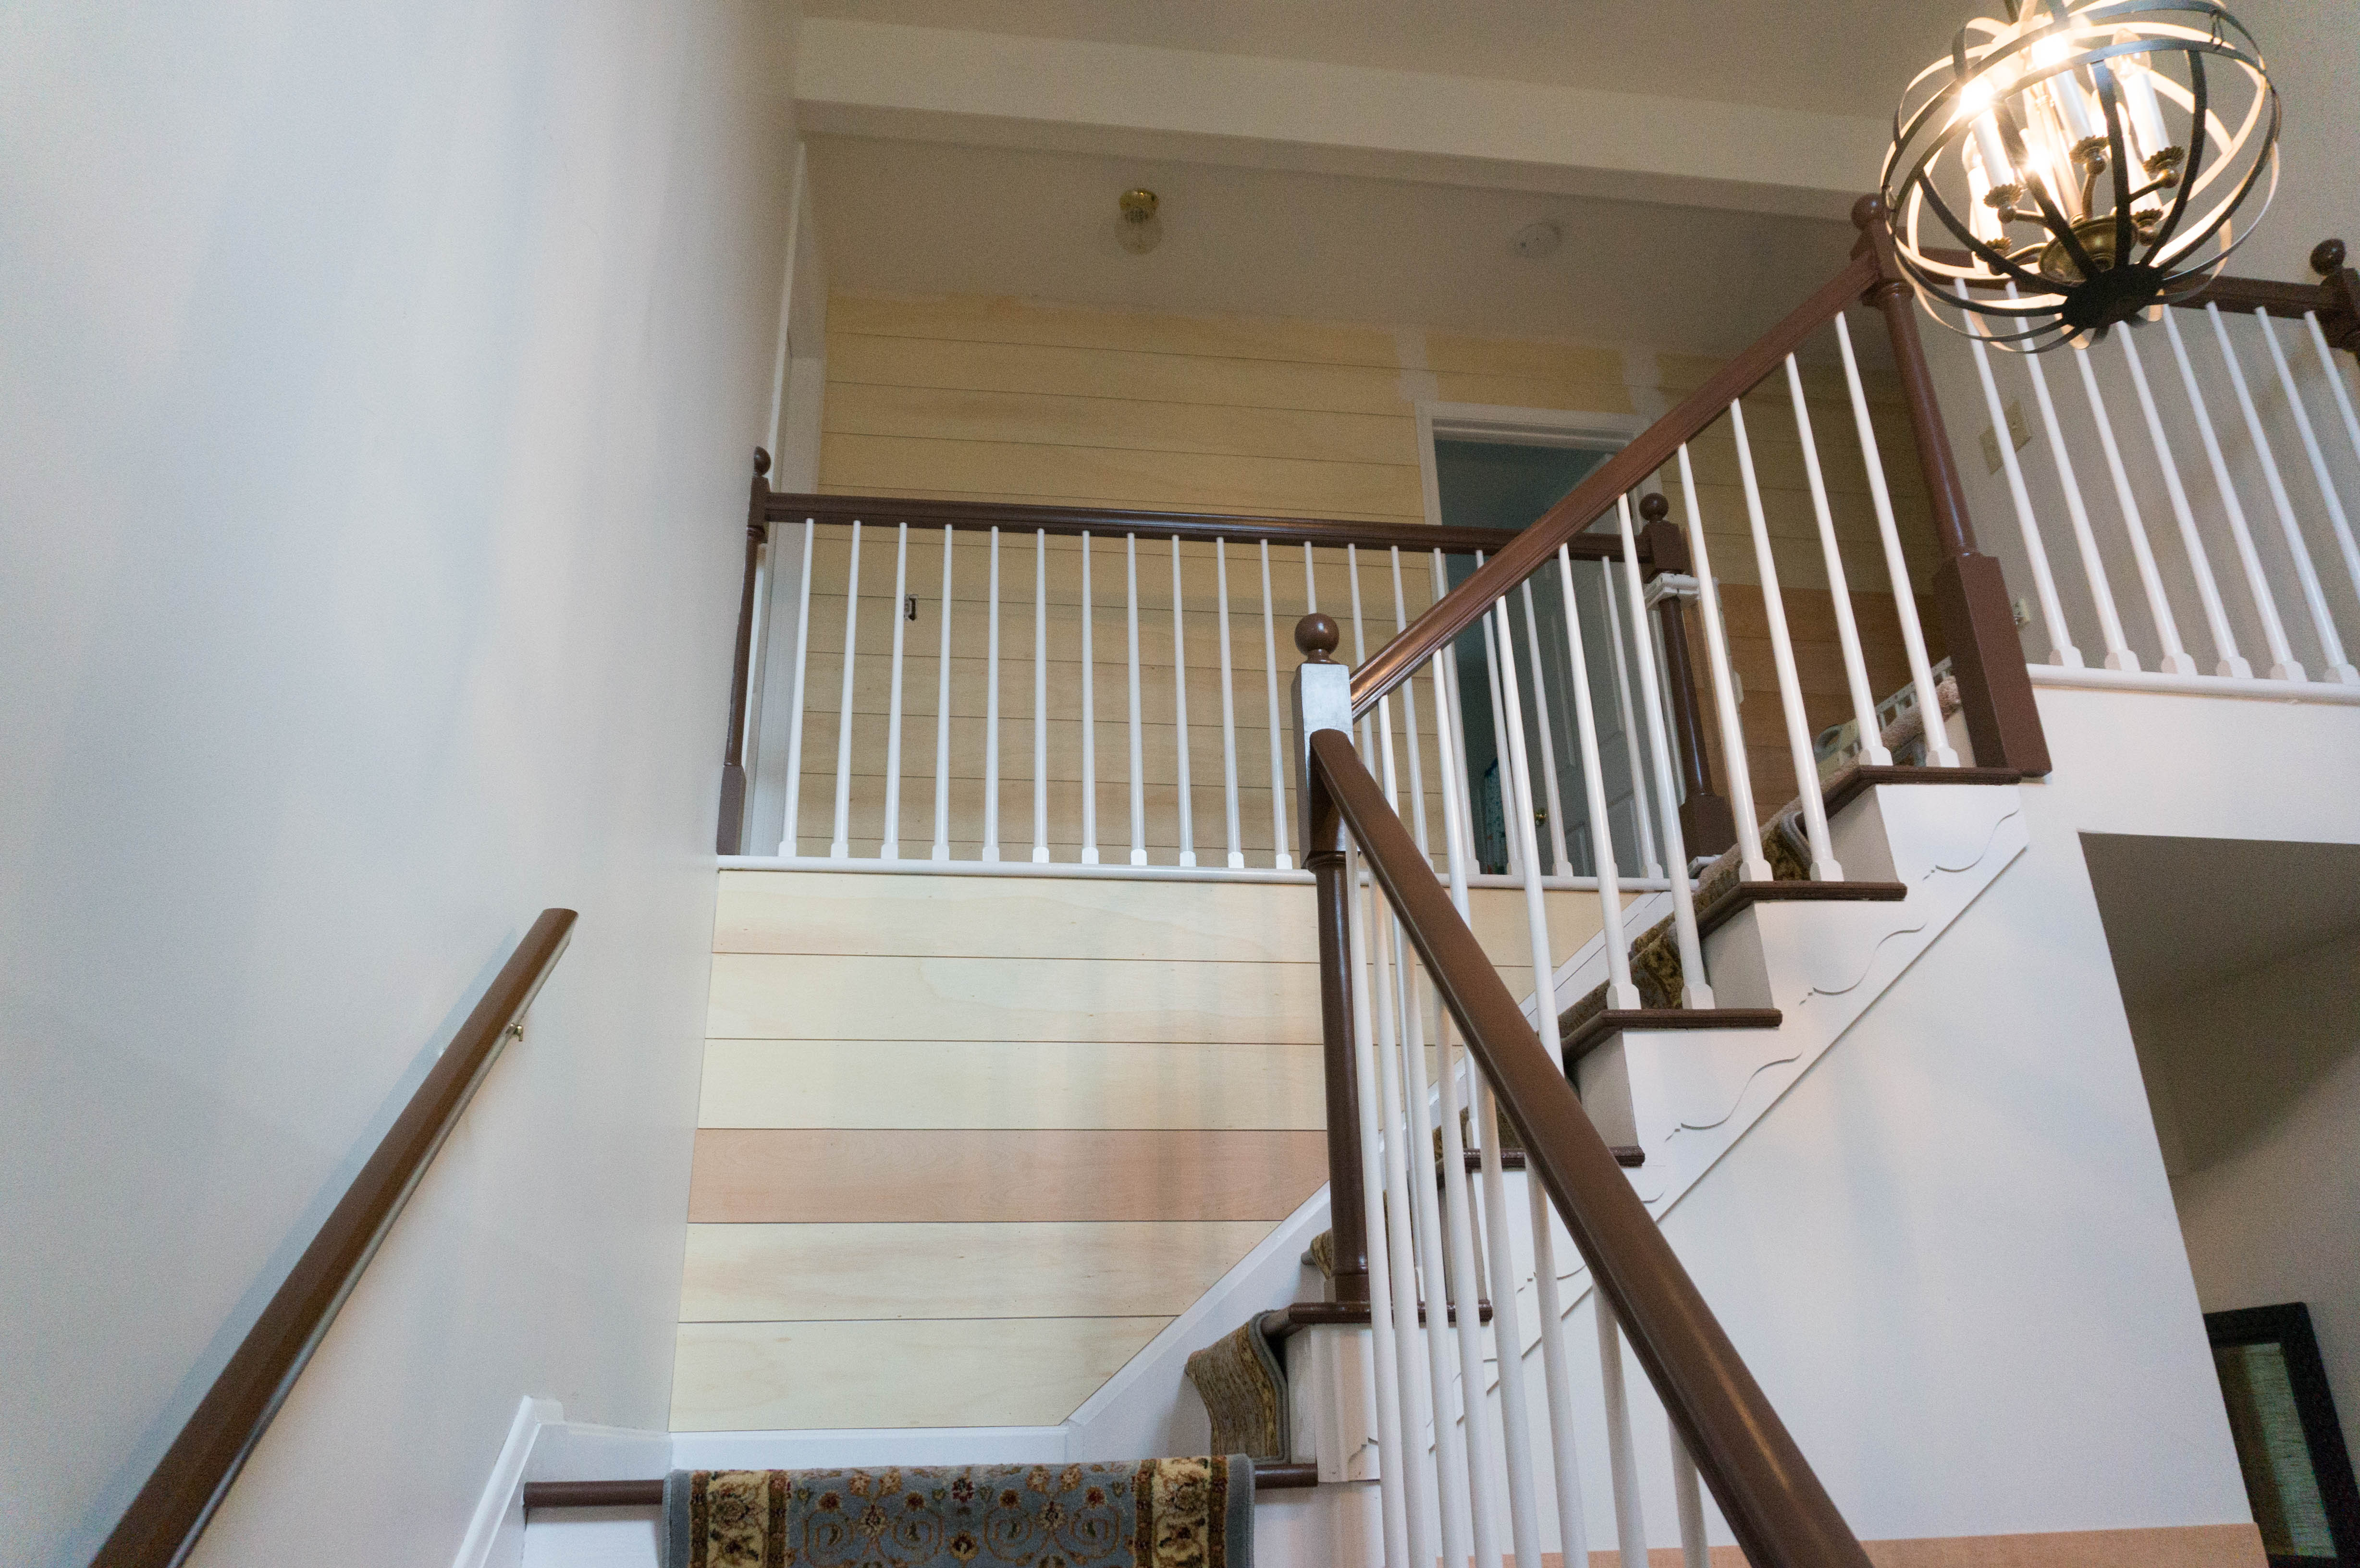
Our entry spent it's weekend getting Chip & Joanna-fied aka the shiplap went up. After drooling over shiplap the past few years, I am so excited to finally have a little bit of our own.
While we would have loved to have been able to afford real shiplap, it just wasn't in our budget. So we opted to use plywood instead for faux shiplap.
The only reason we were able to even complete the shiplap project was because of my parents. My Mom figured out all of the measurements and board sizes while my Dad was the project manager of the shiplap project. I was his not-so-handy sidekick.
My Mom took the kids out for the two days and my husband worked on other projects around the house while my Dad and I got to work. By Sunday night, the foyer had completely transformed.
How to Faux Shiplap - Our Method
To shiplap a few walls in our entry, it took six plywood boards. We decided to go with quarter inch plywood so that it would flow more seamlessly with the moldings.
In some Facebook groups I have read that people have had success asking their local hardware store to make the plywood cuts for them (some people were able to get this for free while others paid).
We decided that because of our unusual cuts we needed due to the awkward angles and shape of the walls, we would be better off cutting the wood ourselves. My Dad purchased a special tool called a Rip-Cut (which he luckily got on sale!) to rip the boards into planks. Here are the steps we used:
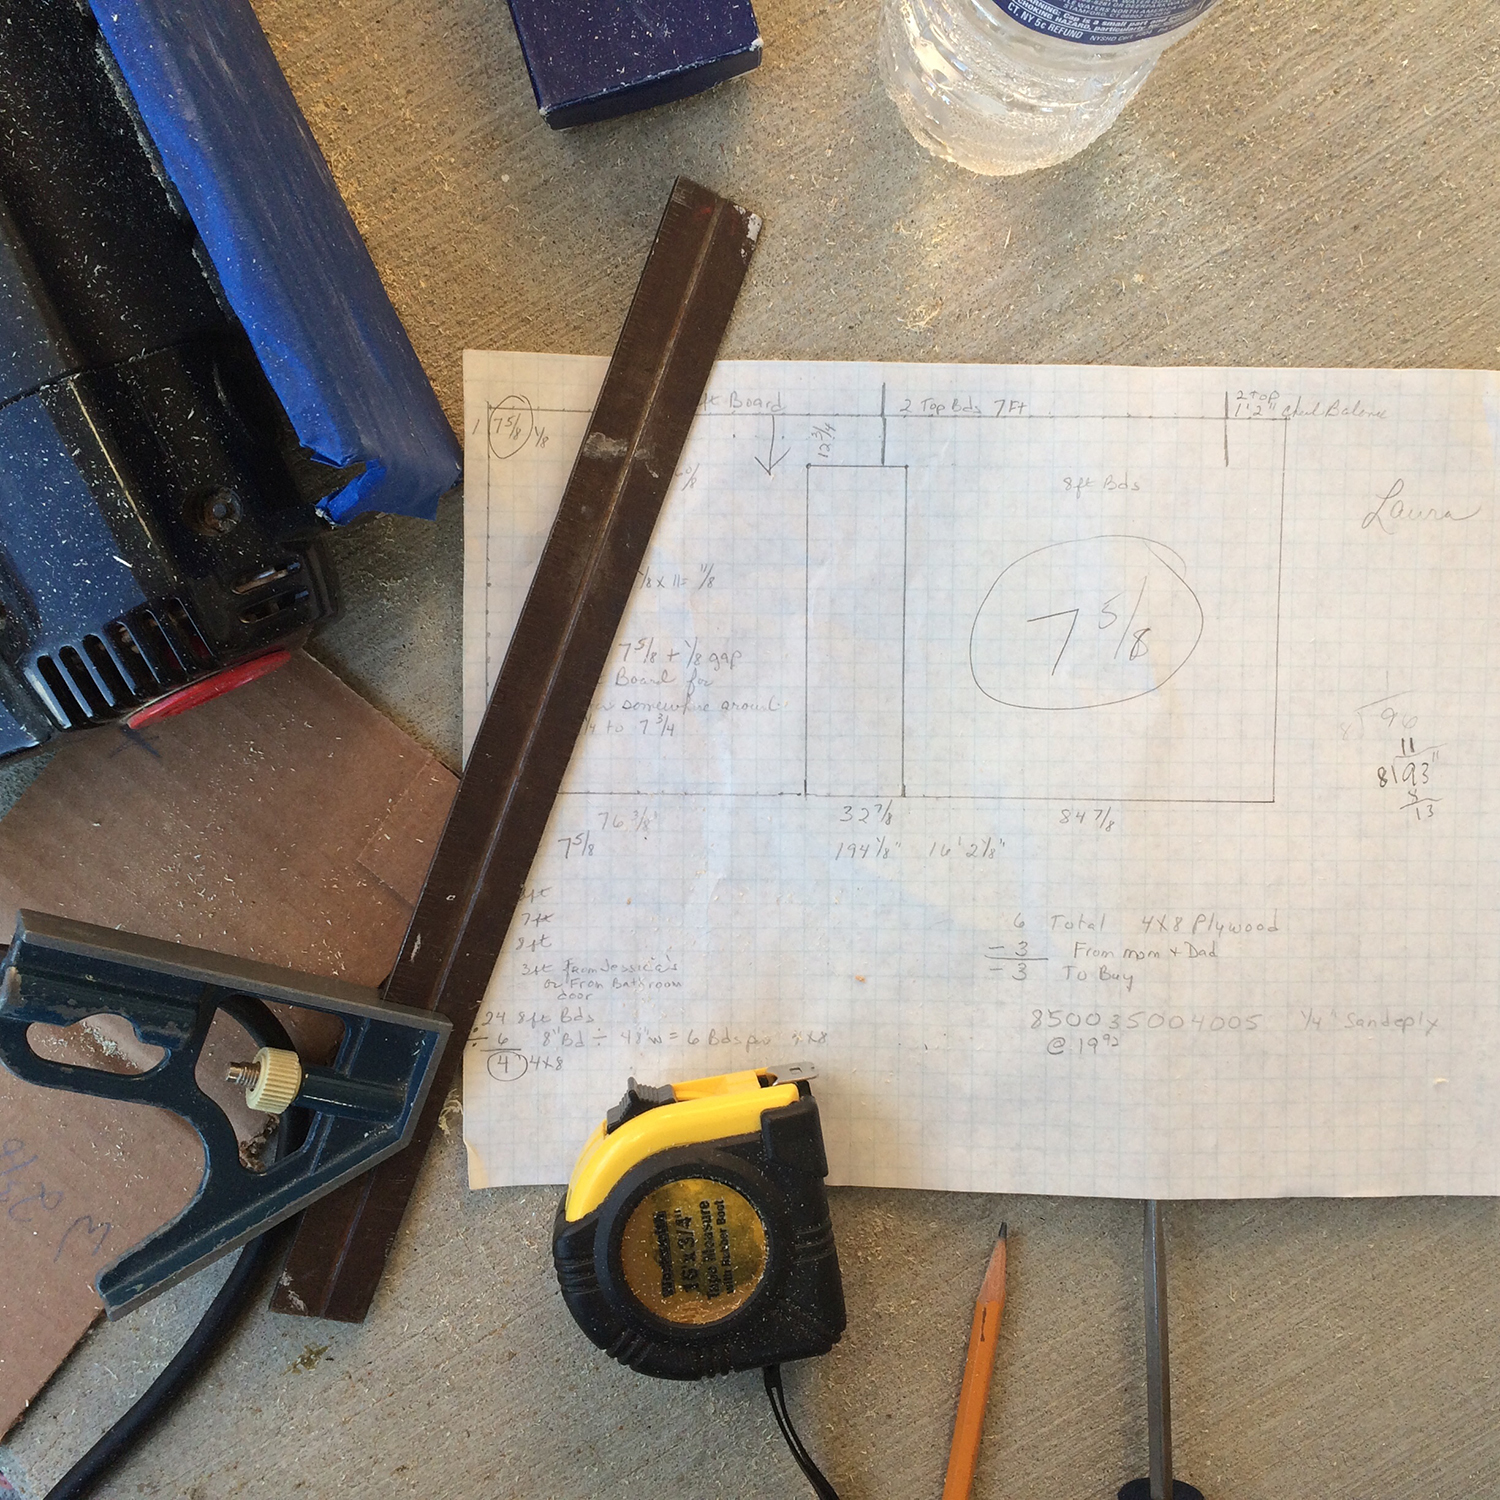
1. Measure the walls, twice.
Make sure to measure every bit of space you will be shiplapping. To determine the width of your boards, it's best to take the height of your space and divide it evenly. It's okay if the bottom board is a little bit smaller or bigger than the others, but you don't want to have like 8 boards all the same size and then one board that is half the size of the others. It's better to have 9 boards that are a little more evenly sized.
 2. Find the Studs on the walls and mark all of them.
We marked ours by placing a piece of painters tape on the trim in-line with each stud. We used a stud finder to find the studs.
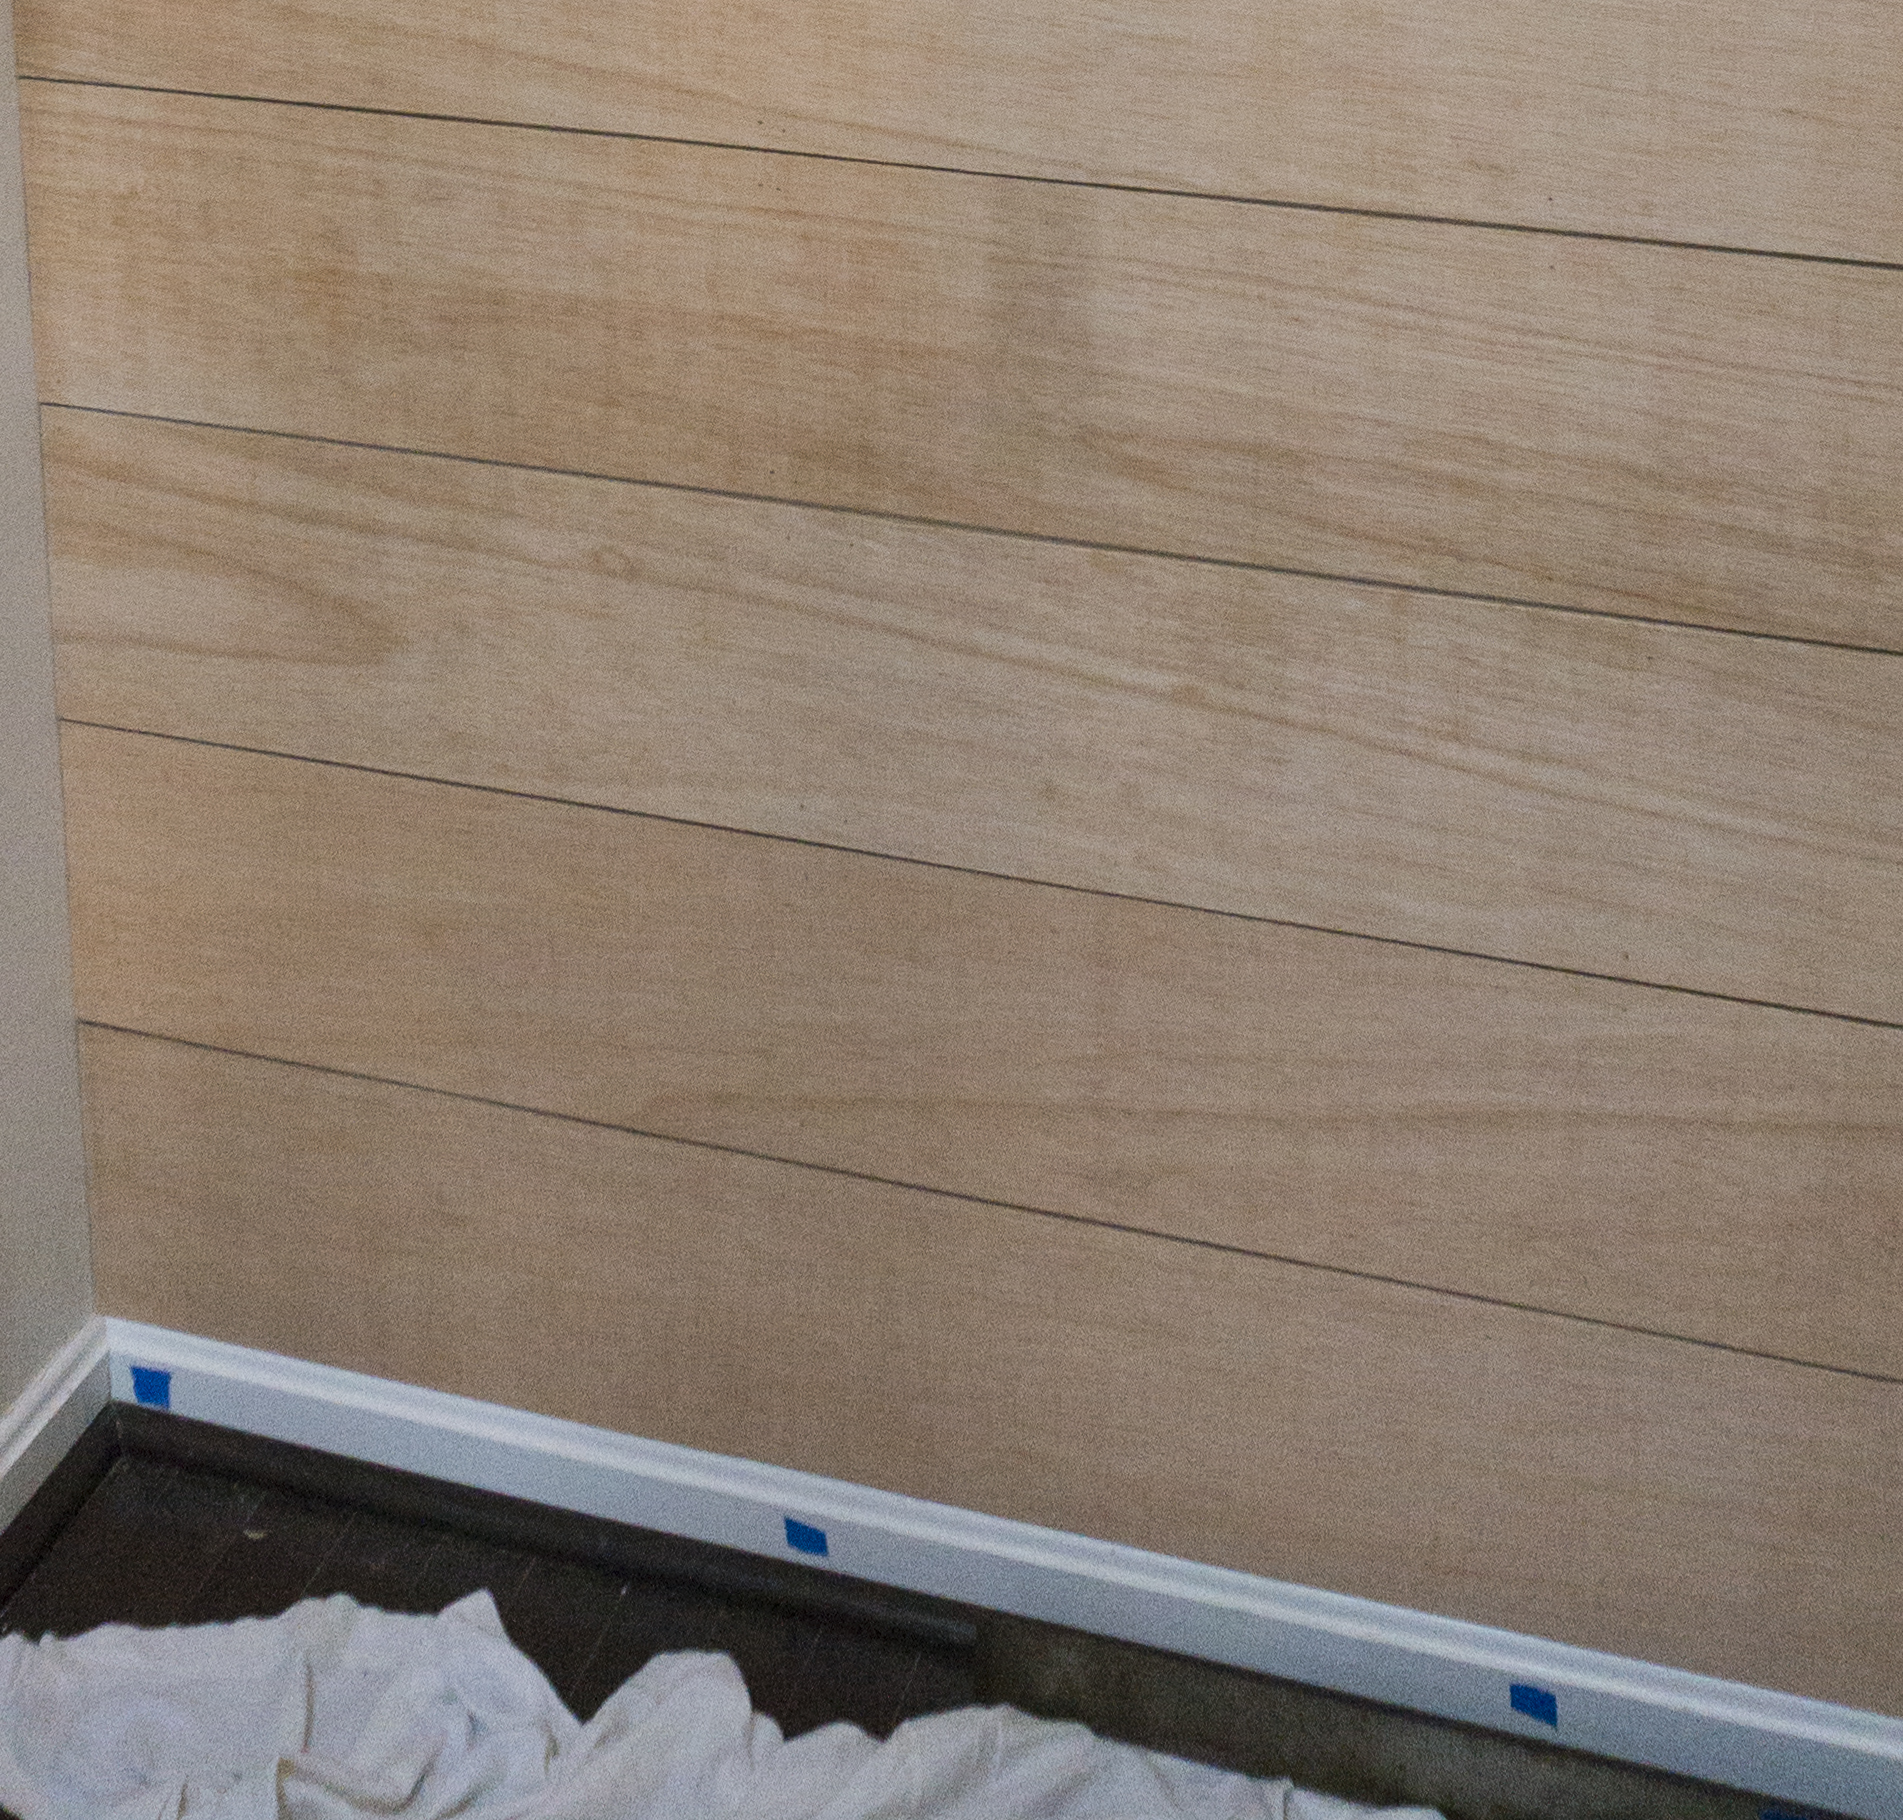
3. Decide if you're going to try to make a seamless look or if you want to vary your plank lengths.
We decided to go for a seamless look because we would only have two small areas that would need to be patched in our project. When my parents completed my sister's shiplap project, they chose to cut the boards in varying lengths to create a look similar to hardwood floors. Based on your decision, you'll know the lengths to cut your boards.
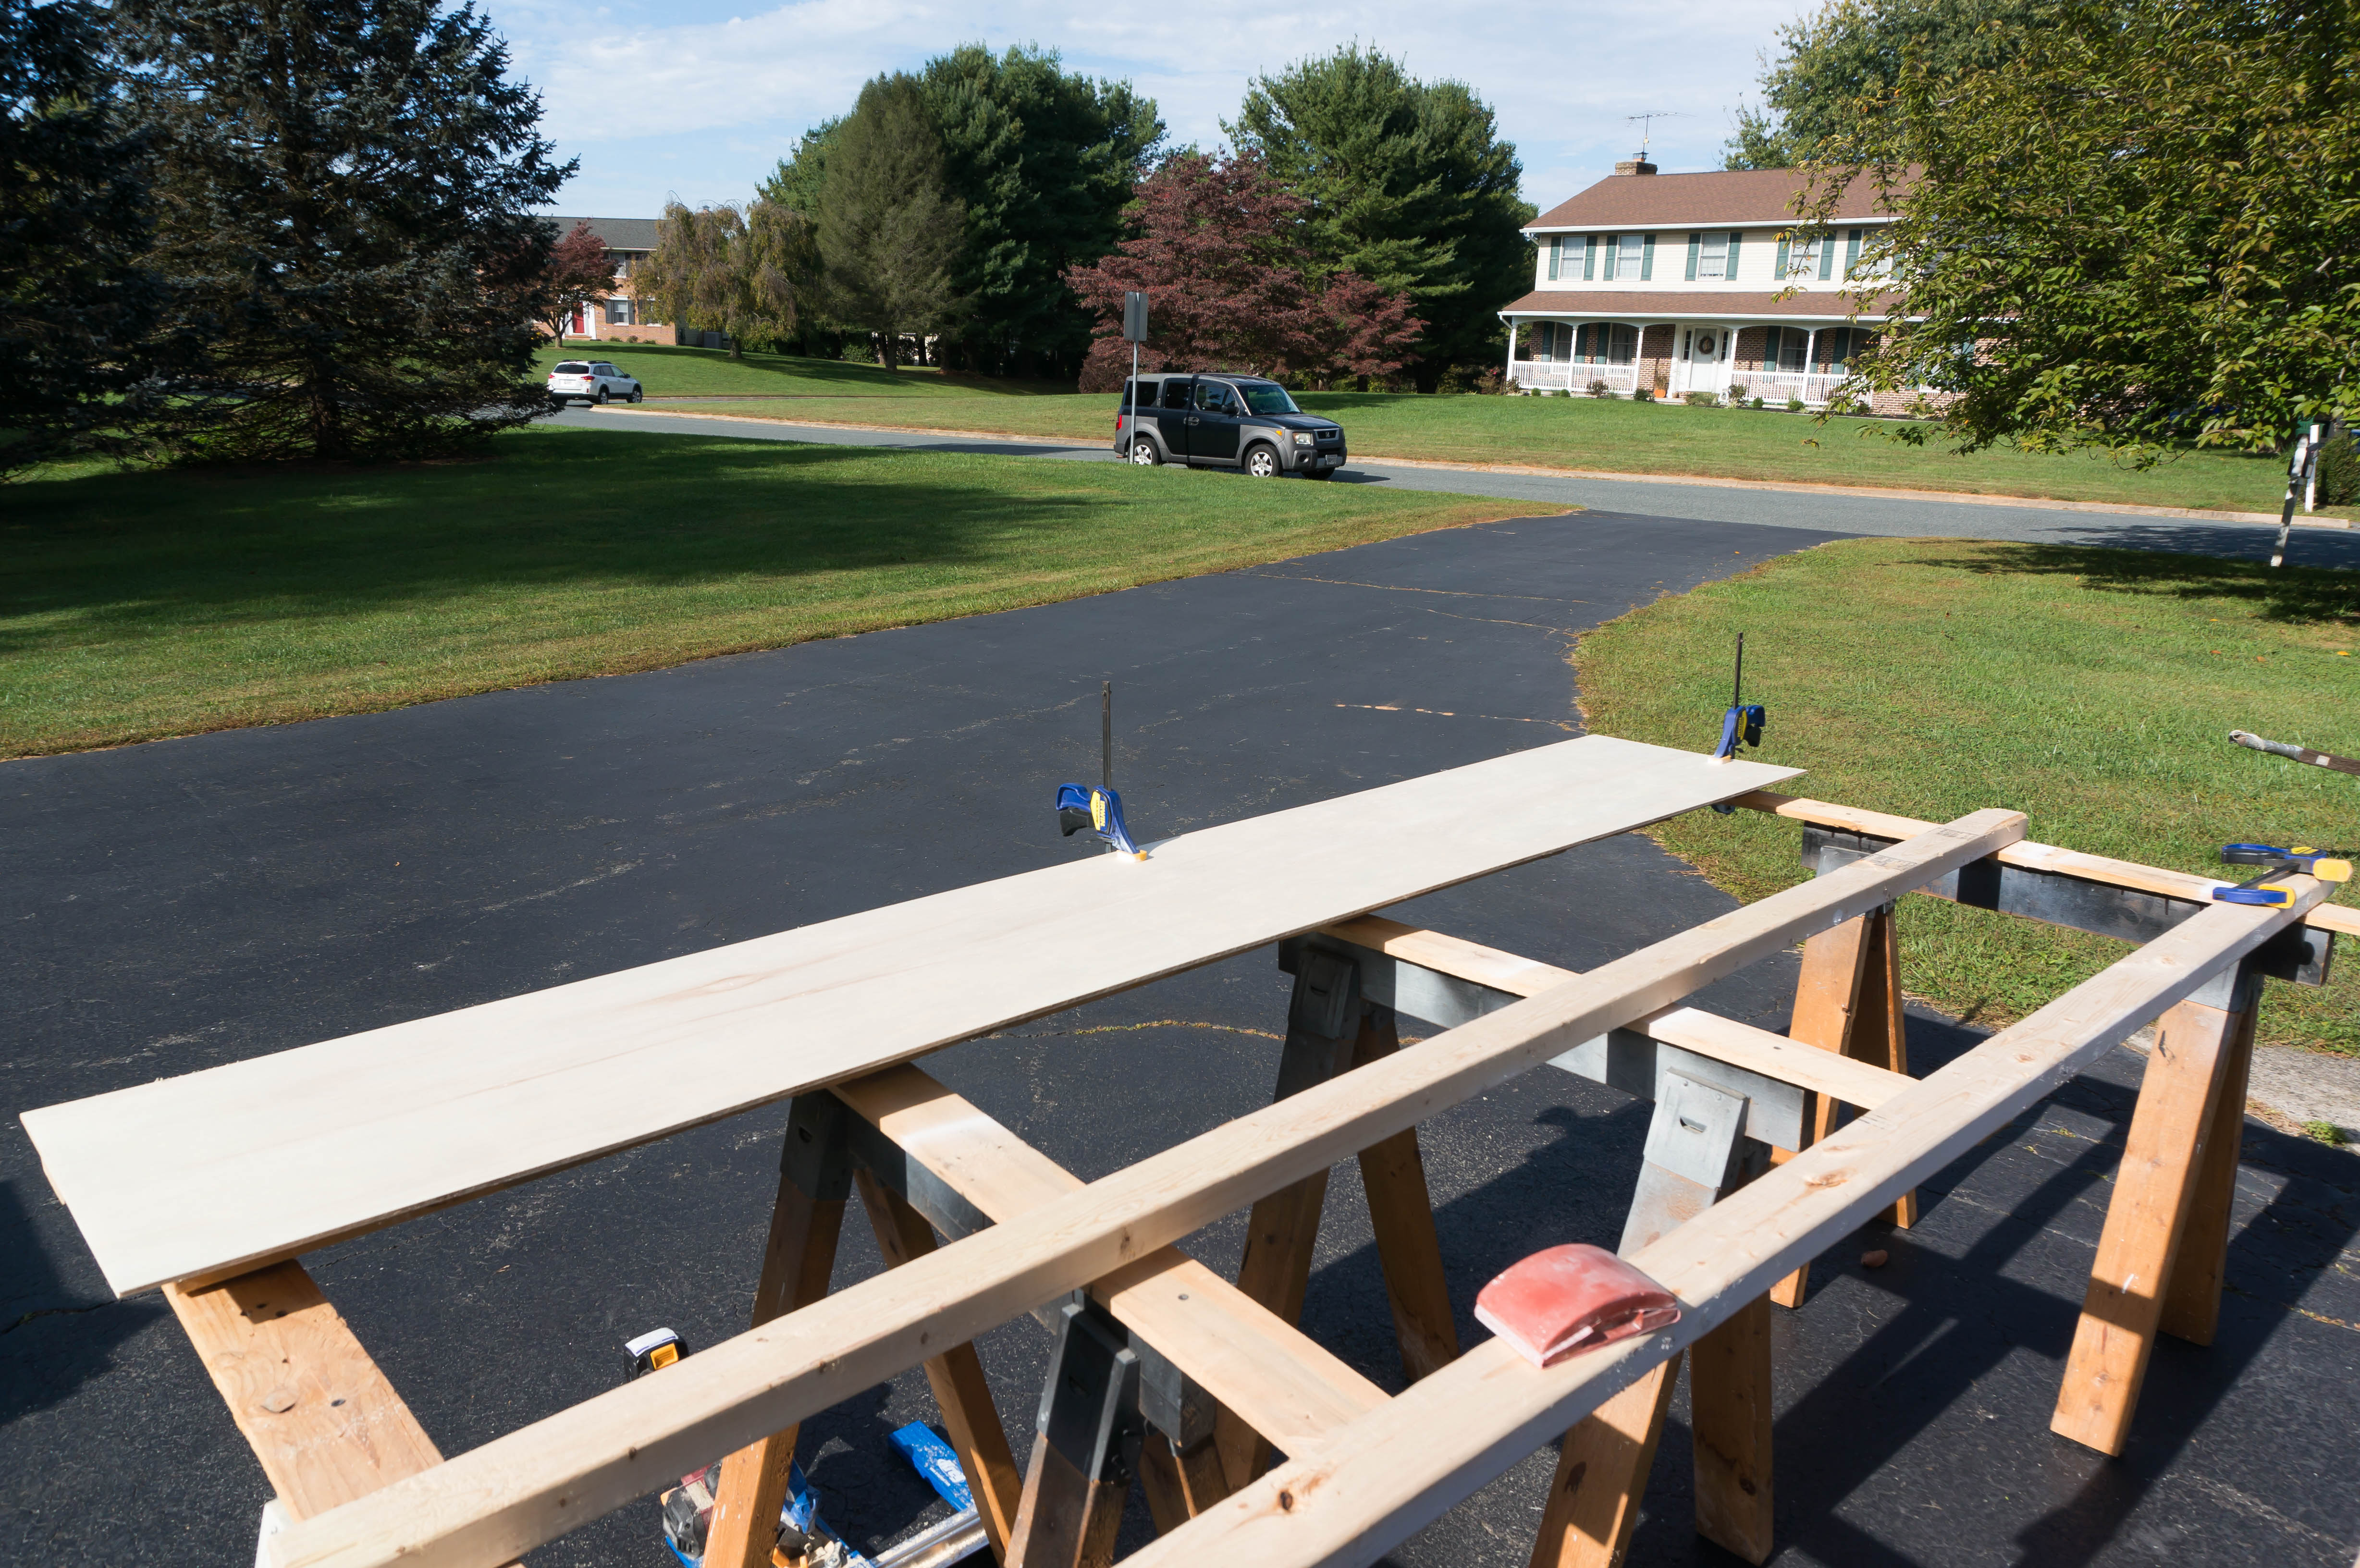
4. Get your planks pre-cut by a local hardware store, or cut them yourself using a tool such as the Kreig Rip-Cut.
Cut them to the plank height you determined based on number one.
 5. Cut the planks to the length needed (based on number one).
You may have to check your lengths as you go along for each board. Turns out my entry walls aren't squared. This means that the boards had to be different lengths as we went down the wall. We had to measure and cut each one as we went.
6. Sand each board with 120 grit sandpaper. Wipe the boards off with a rag or towel so you don't bring the saw dust into the house.
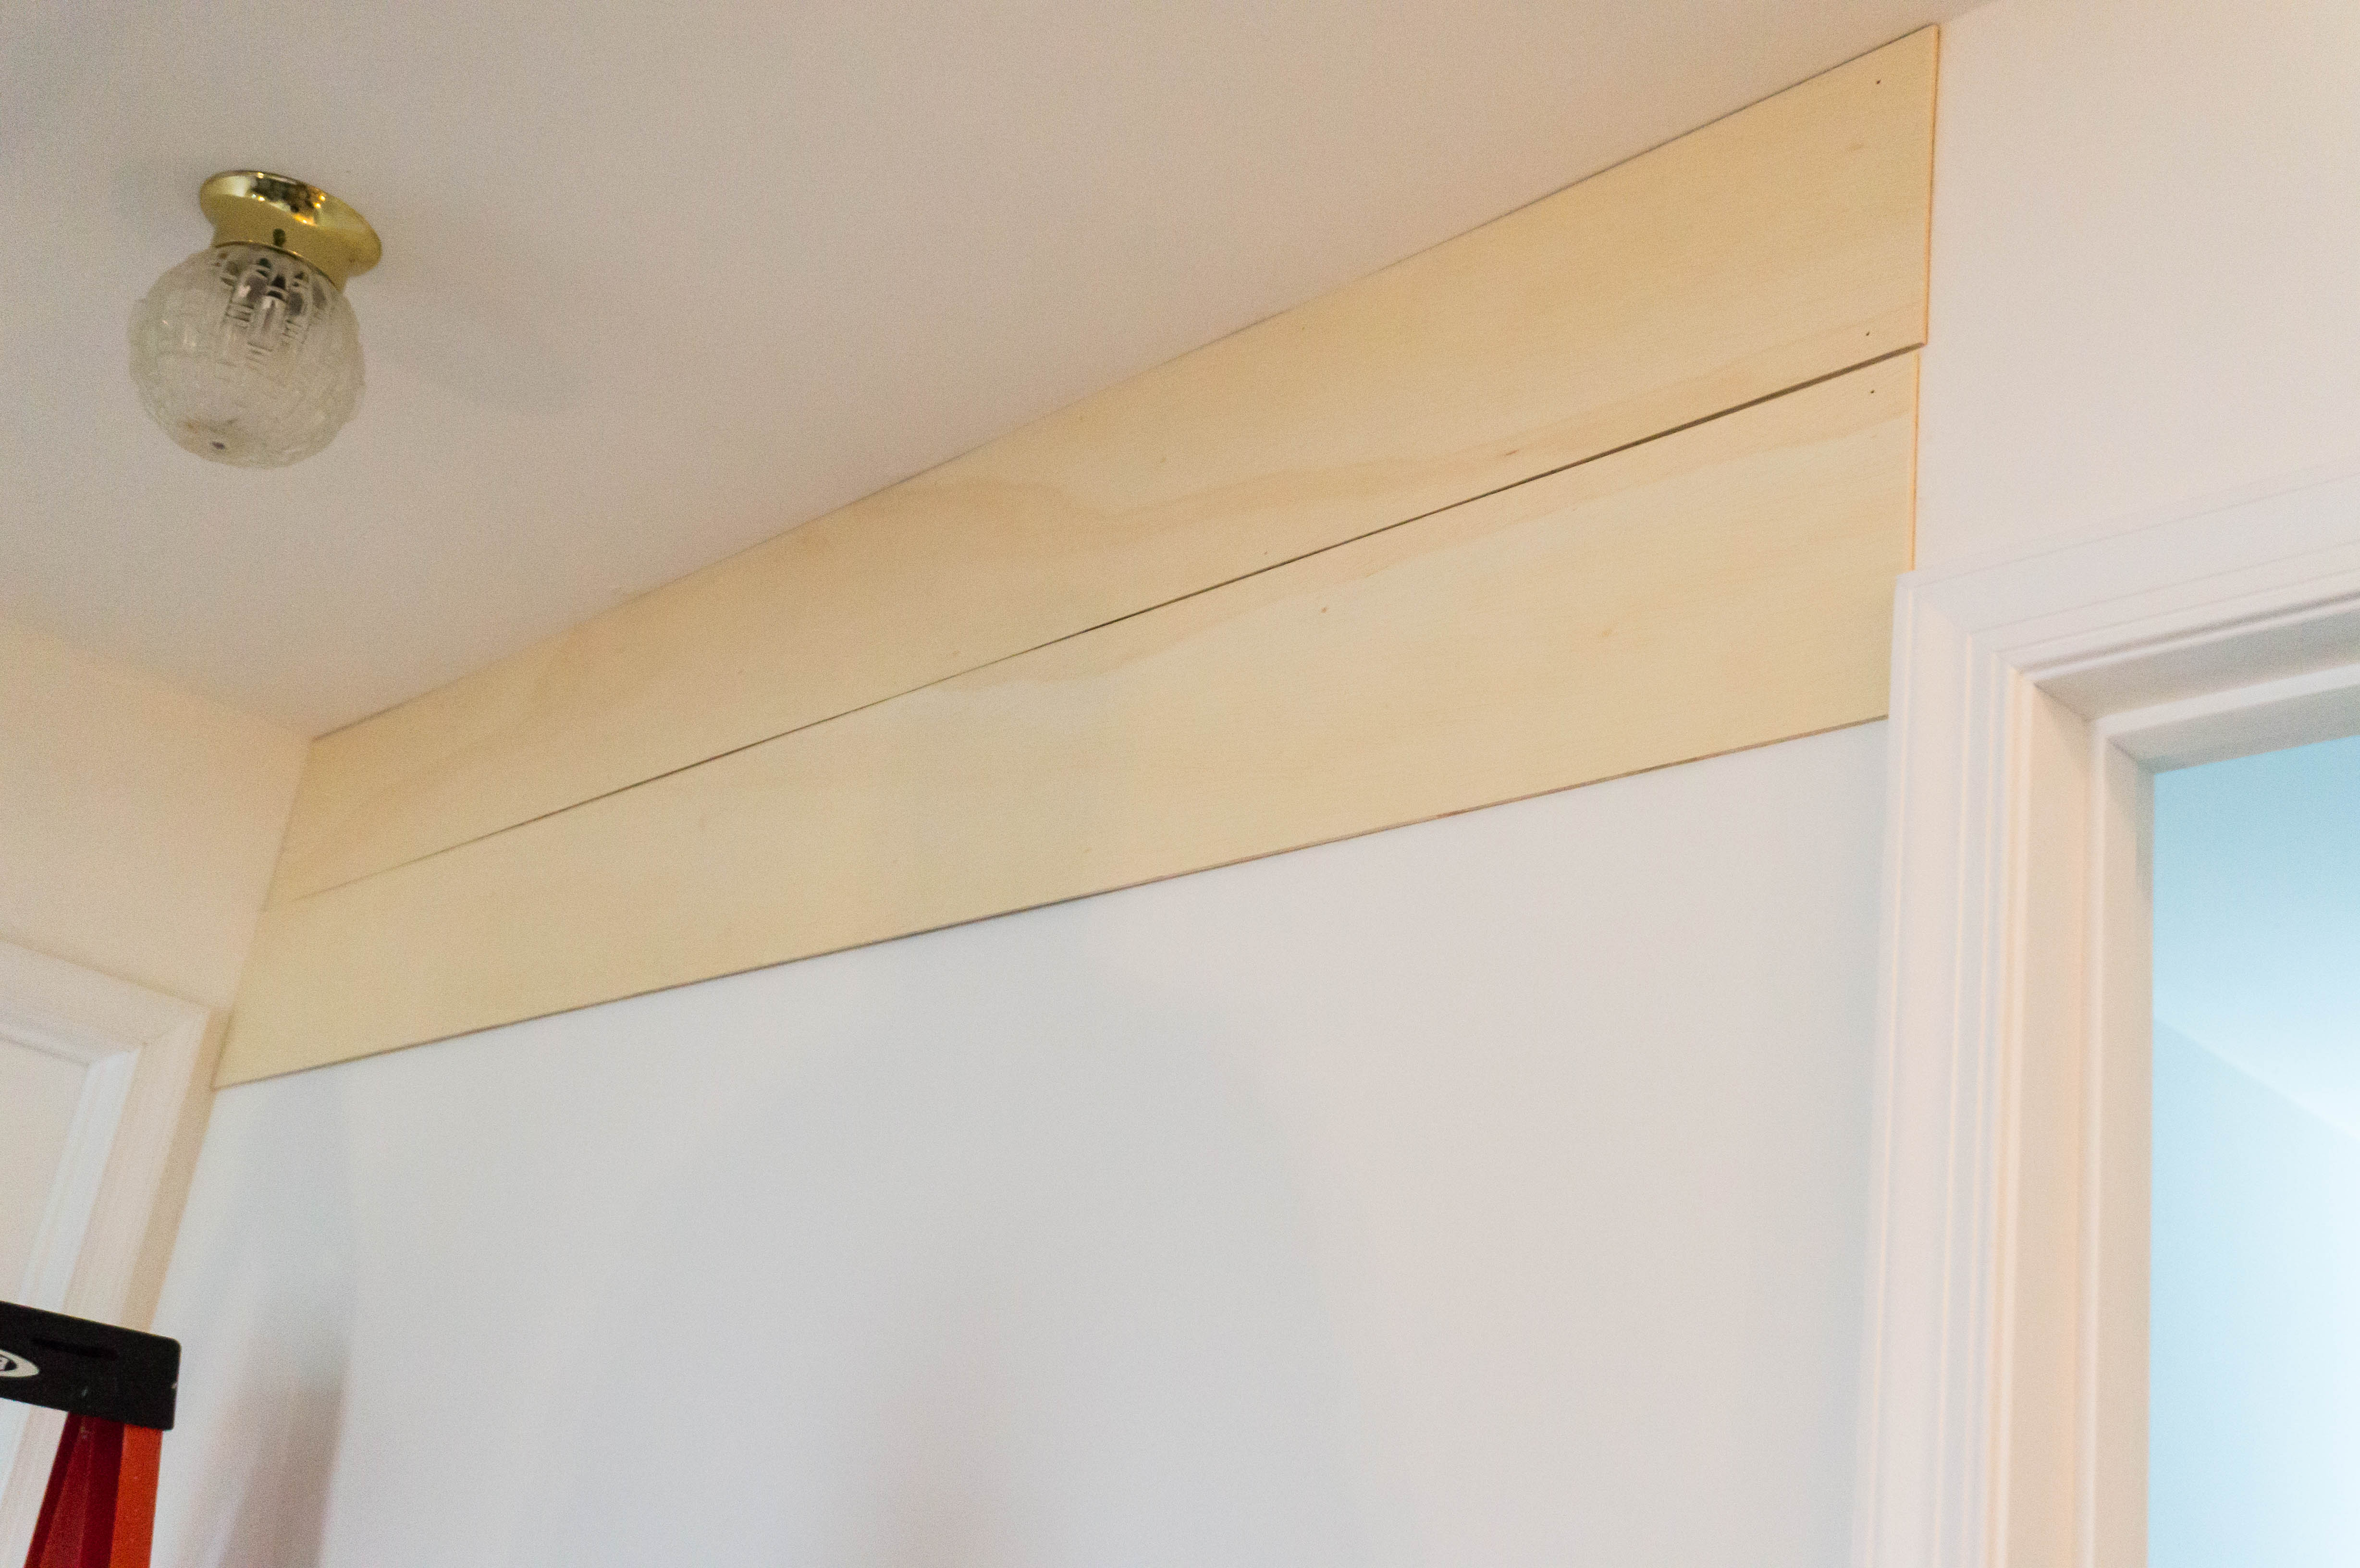 7. Using a nailgun, nail the first board on the wall (start either at the top or the bottom).
Place a nail far left or far right into the stud at the top of the board. Then place a nail at the top of the board and bottom of the board at each stud.
8. Hold your next board up on the wall. Place a spacer in between it and the previous board that is already nailed to the wall.
The spacer helps to give you an even space between each board (which creates the shiplap look). We used a square because it was ⅛ inch thick. You could also use tile spacers or nickles to space the boards.
9. Once you have your spacers in place and the board in place, nail the board to the wall again at the top and bottom of the board at each stud.
10. Repeat steps until you have all of your boards hung.
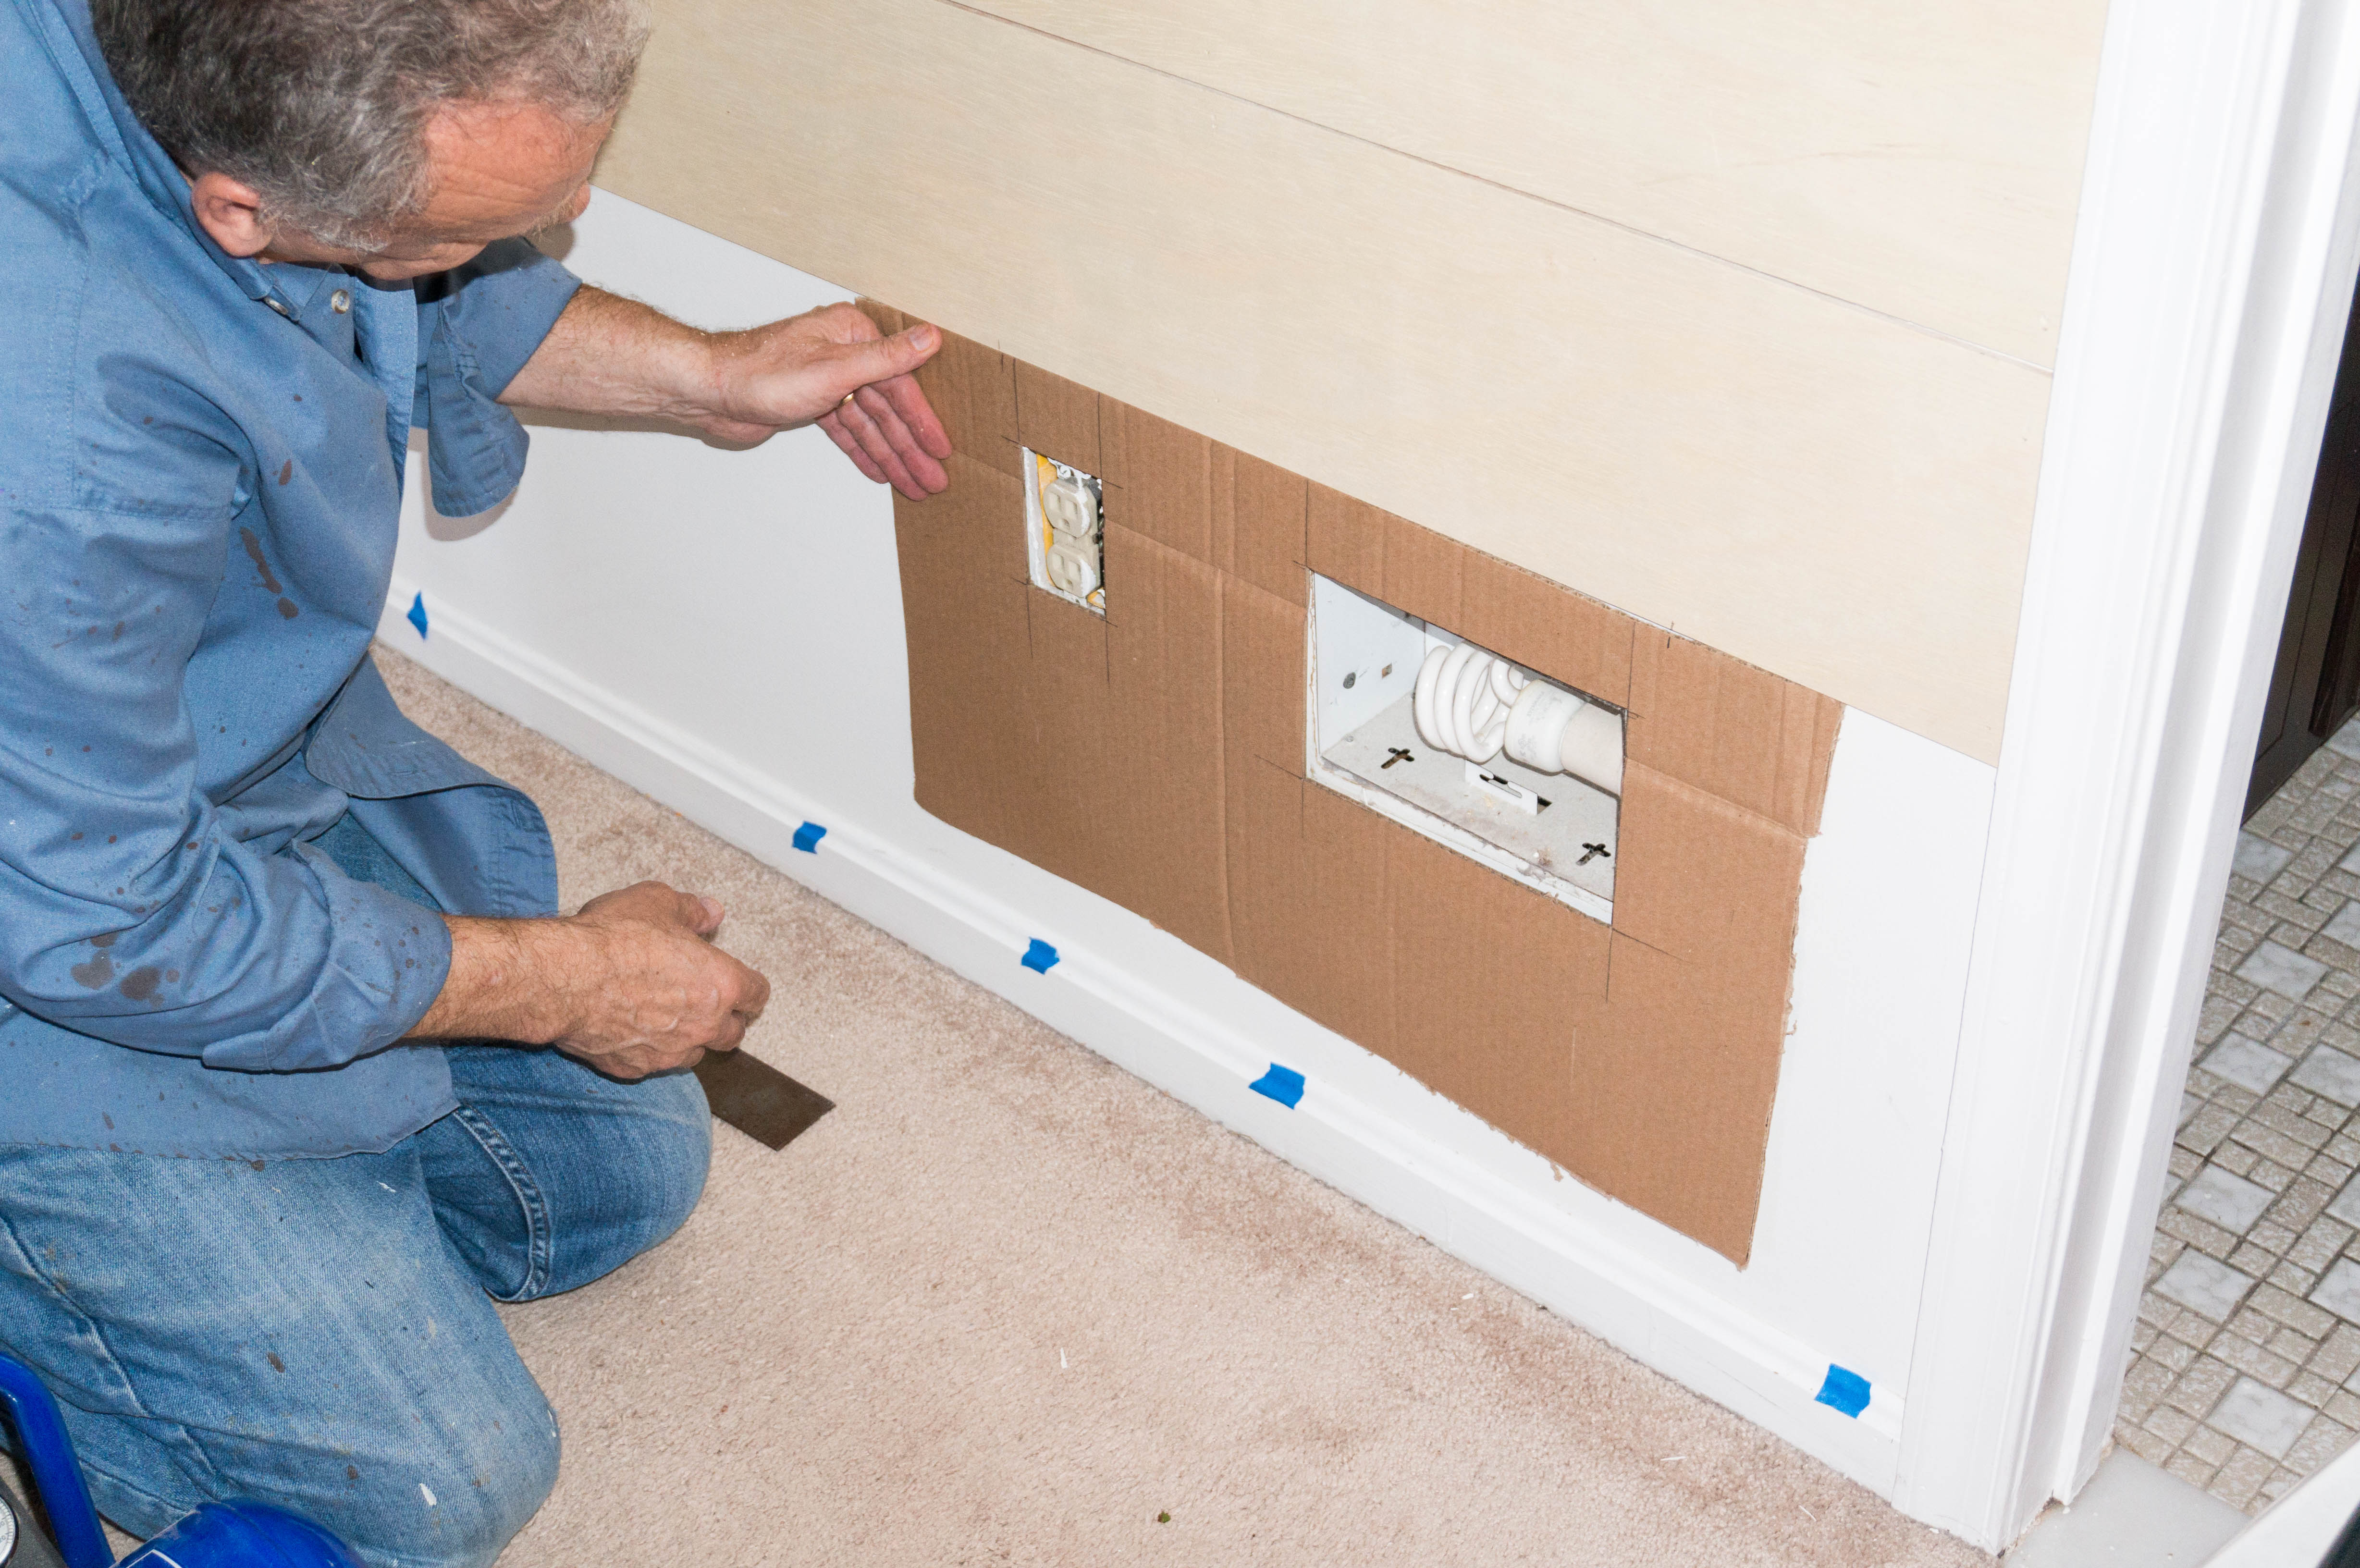
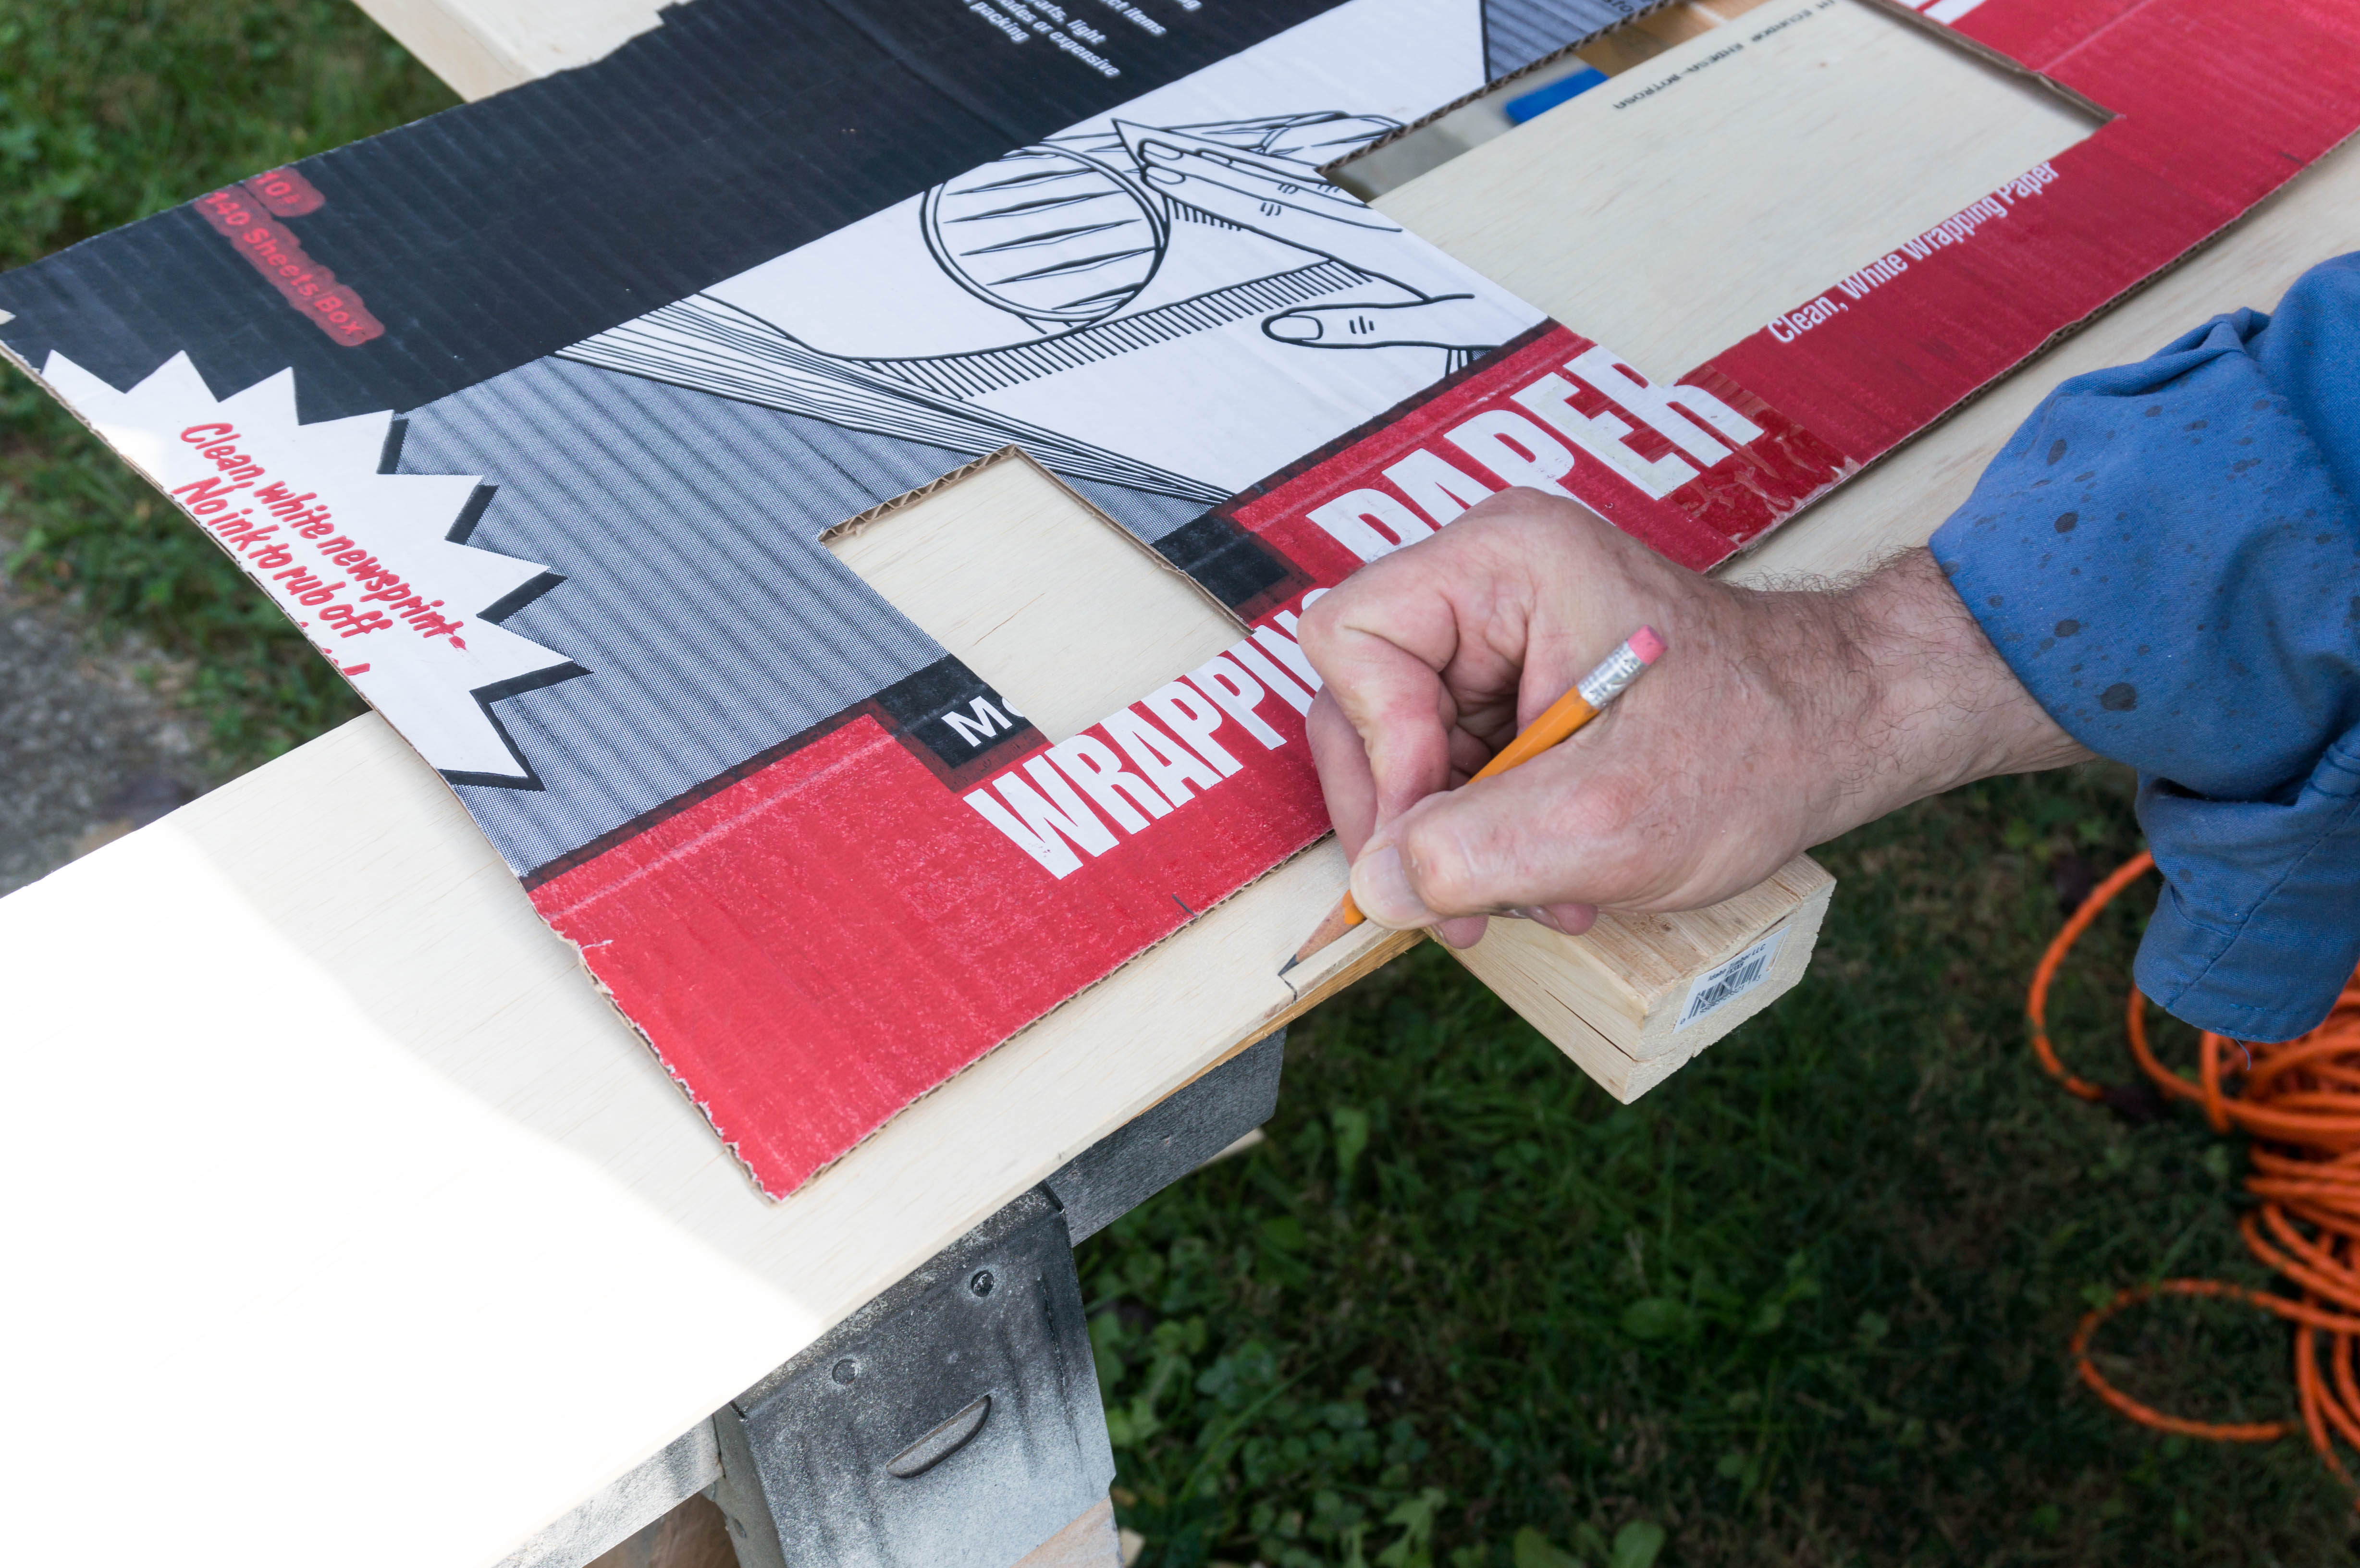
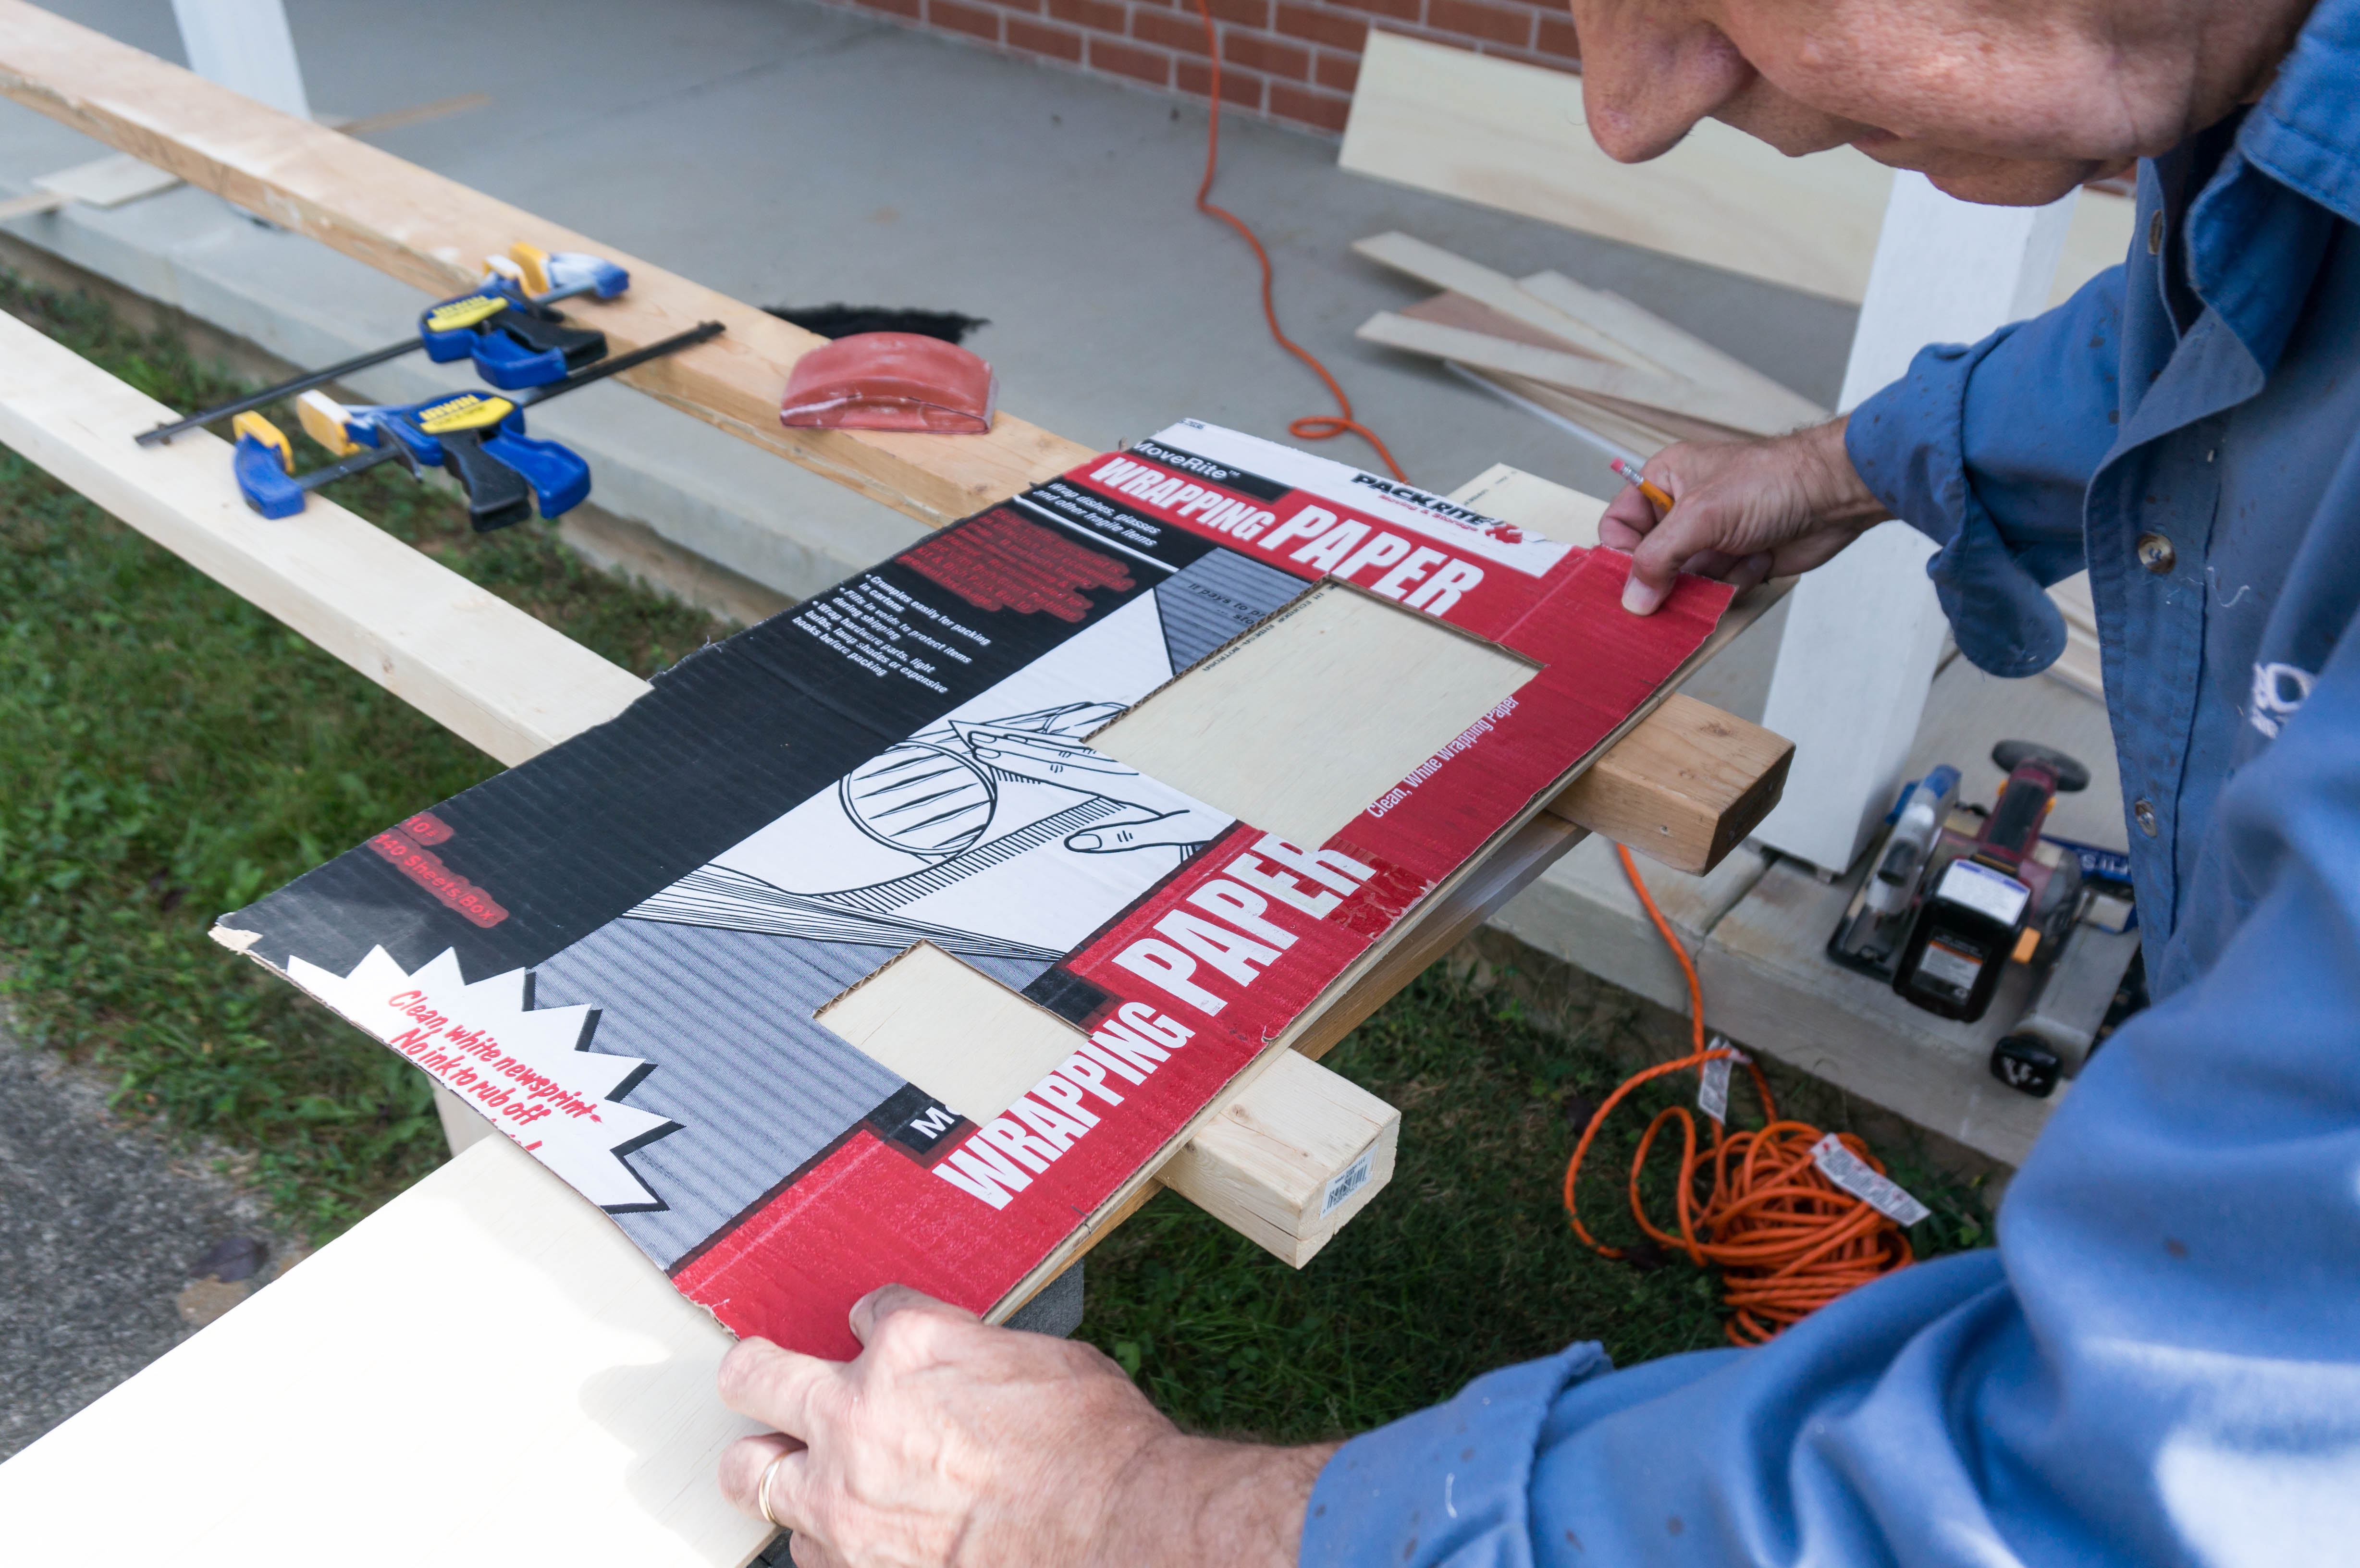
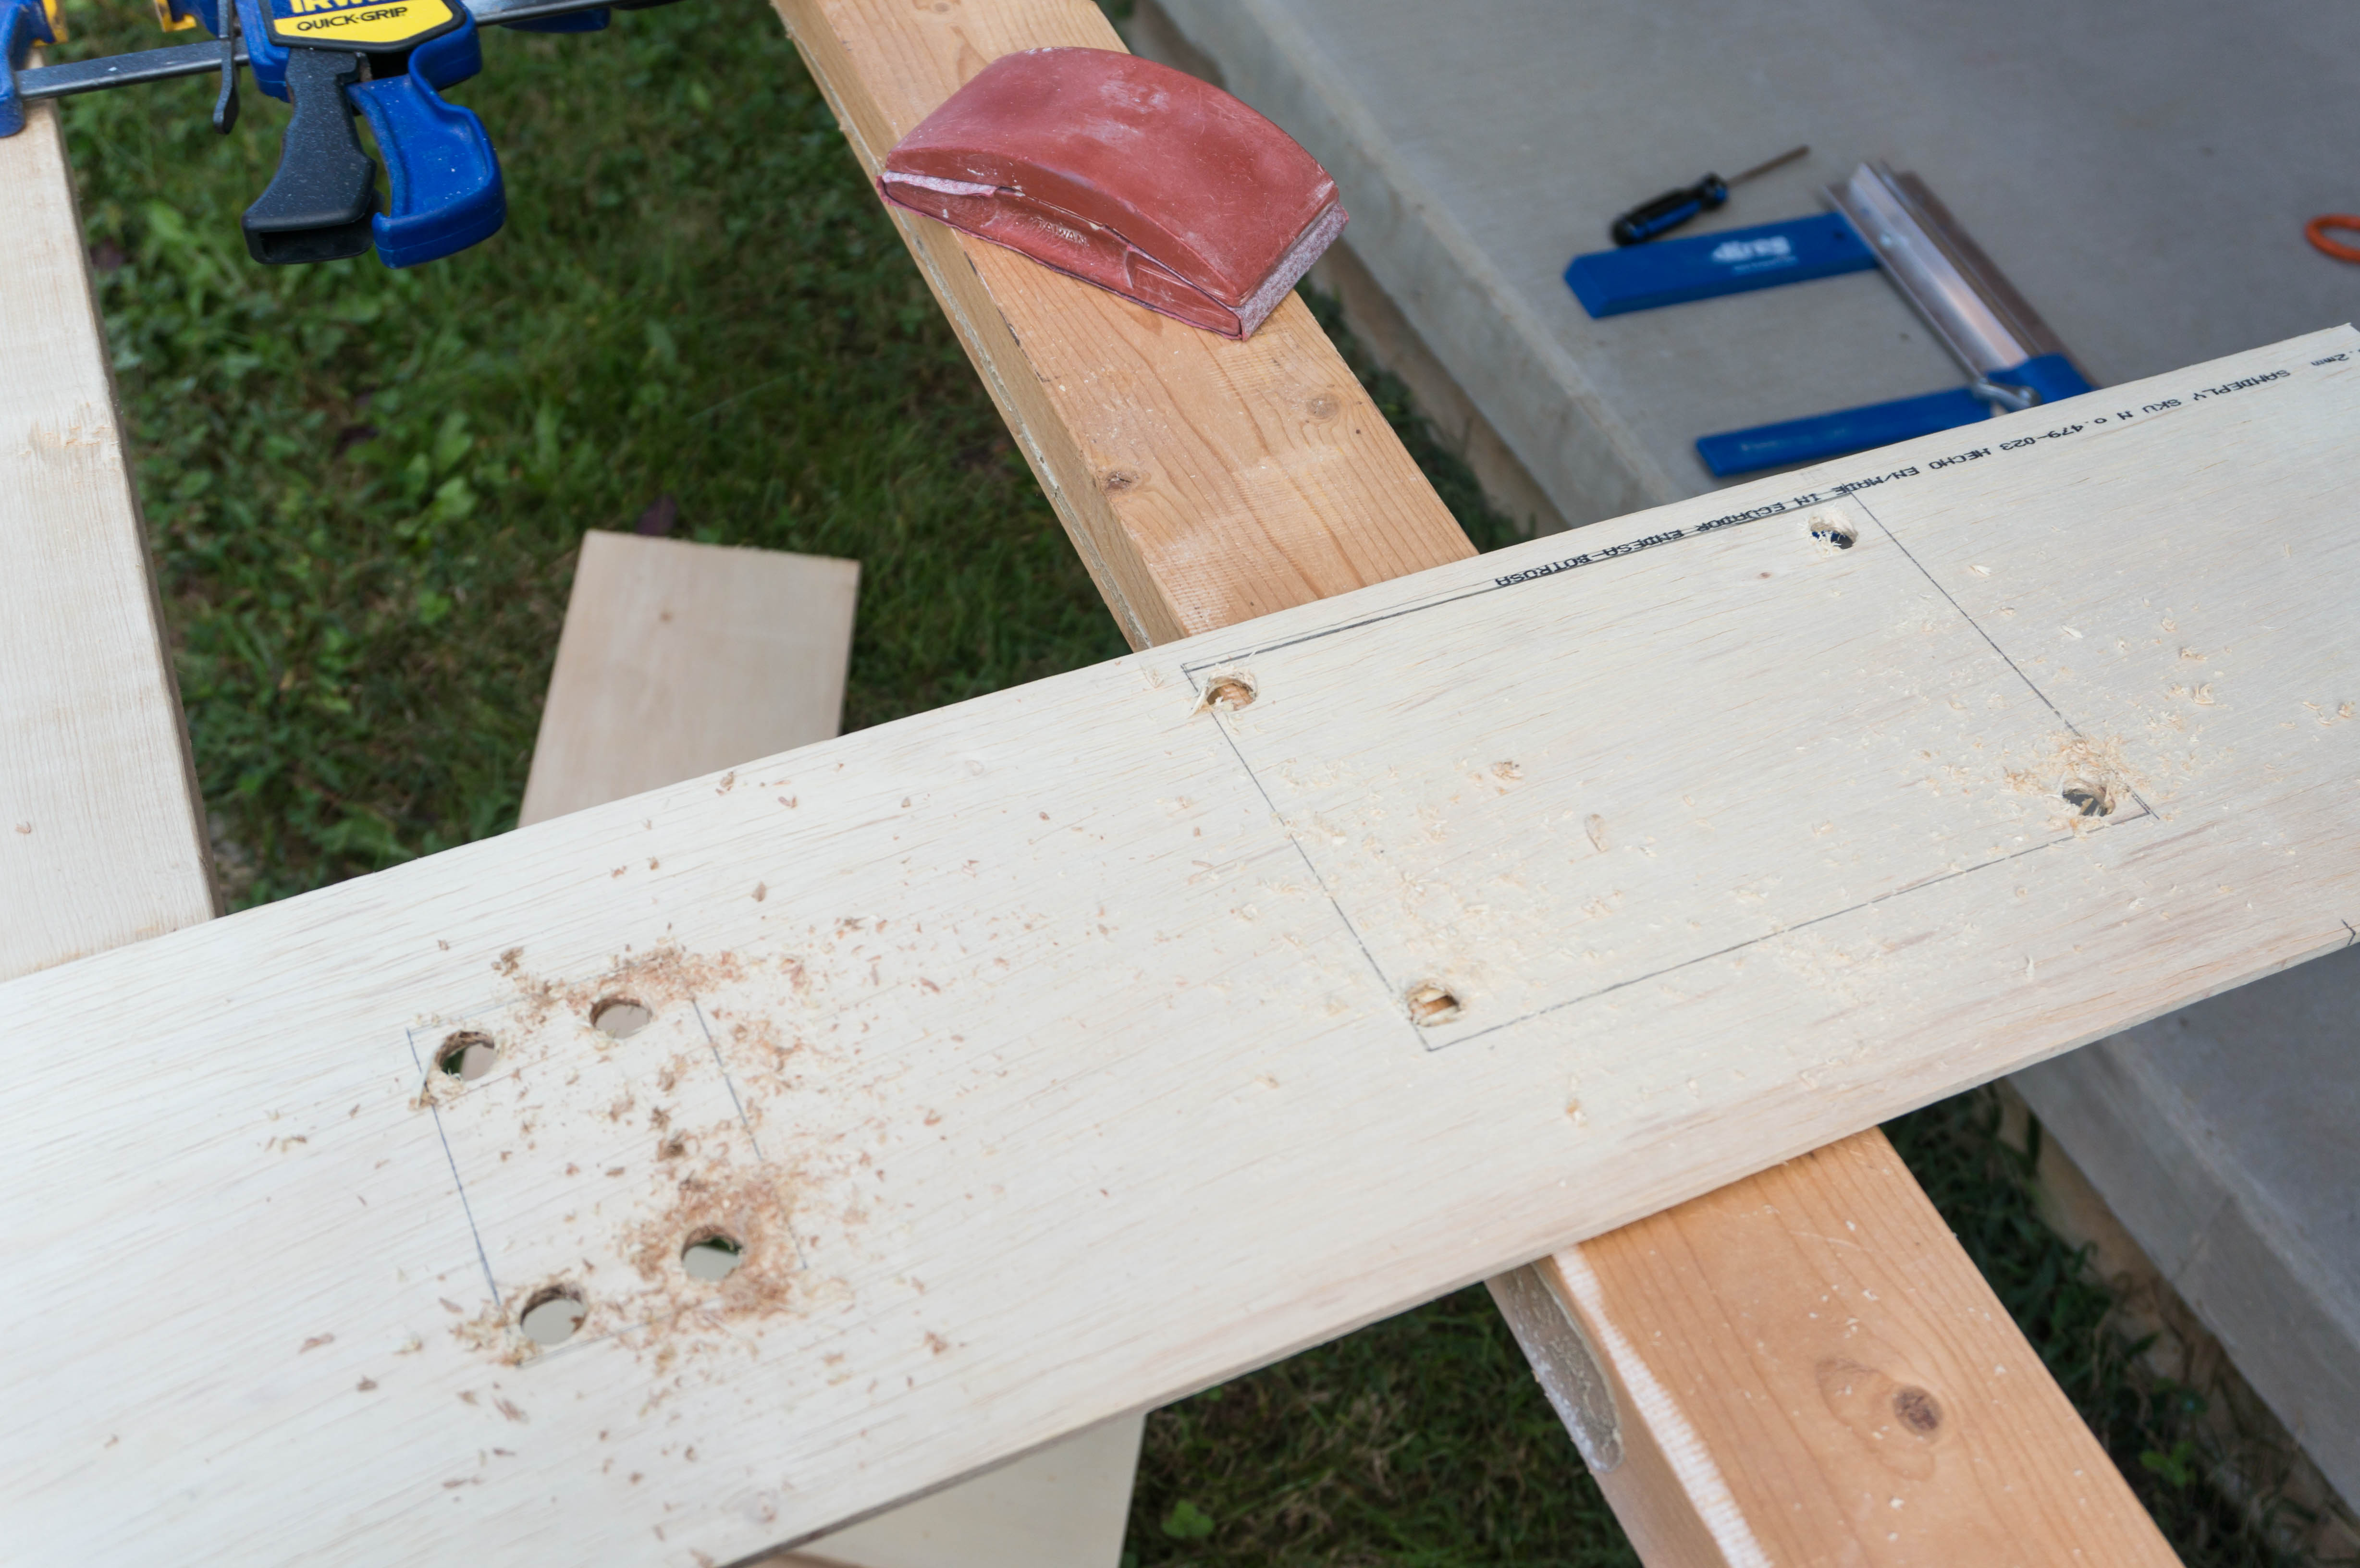
11. For boards that have odd cutouts (such as outlets or switches), I suggest using cardboard to make a template.
This is a trick my Dad uses that makes cutting odd shapes easier by drawing on cardboard to make a template. Once you cut your template, you can place it on the wall to make sure it's correct. Then, transfer the template to the board and cut the board. This will prevent cutting and wasting boards by testing the cardboard template first. Here is an example below:

12. Once all of the shiplap is up, prepare to paint. Tape your walls and trim where needed to protect your unshiplapped walls.
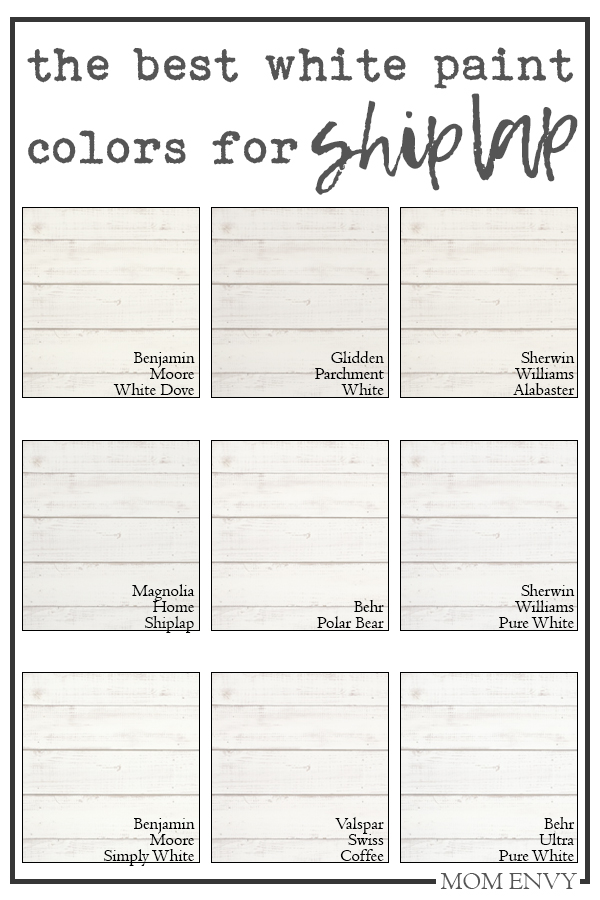
13. Prime your shiplap or use paint and primer in one (which is what I did). You will need 2-3 coats of paint to cover the shiplap.
I paint matched my other walls so that the shiplap would match. Some popular farmhouse white paint colors perfect for shiplap are:
Next Steps in the Entry Remodel
Over the next couple of weeks, I'll finish painting the shiplap, start my entry piece remodel, work on the artwork, and look for decor for the entry piece. We already finished the light, which I will share about next week.
Want to see the rest of our challenge - check out these posts:
- Week One: The Foyer Before
- Week Three: The Cheapest Light Makeover, Ever
- Week Four: Refinished Stairs and Chalk Painting a Sideboard
- Week Five: How to Turn a Cork Board into a Chalkboard
- Week Six: DIY Inexpensive Wall Art for Less than $6 a Piece
- Week Seven: Foyer Reveal
Need More Inspiration?
Don't forget to check out the rest of the One Room Challenge Guest Participants and the Feature participants. (The One Room Challenge brings bloggers together twice a year to redo one room in six weeks).

![]()


beautiful panels and love how you did it perfectly with the template trick! sorry about the roof but hope all is well by week 3!
Thanks for stopping by Tim! Love your guest room inspiration for your room!
I'm getting excited for the big reveal! I love this look. You are so lucky to have such helpful parents nearby!
Thanks, Grace!! I am definitely blessed!!
The shiplap will be stunning! Thank you for sharing the template tip -- I have to cut faux brick panels and that template is perfect (and perfect timing!) for figuring how to cut around some things on the wall. I look forward to following your progress!
Thanks so much, Deb! The cardboard template really saves a lot of headaches. I should have video'd how he made them to make it easy to understand. Good luck with your basement, your ideas for it sound great!
That template tip is amazing. I cant believe I hadn't thought of that while doing our wall...
He's going to love hearing everyone's excitement over the template 🙂 Thanks for stopping by!
Hi, I'm a newbie here but I heard about you through a podcast. I was wanting to know what size plywood did you use, I seen 1/3 or 1/4"? I saw everything in the details but that.
Thanks in Advance!
Hi Kendria!
I used 1/4 inch plywood! I'll have to edit my post to include that - you're right, I totally left it out.
You heard about me through a podcast?? That's exciting. Which one?? 🙂
- Laura
What type of 1/4 inch plywood did you use? I went on home depots site to order it for curbside pickup but there are tons to choose from.
I cant wait to tackle my bathroom with shiplap. Thanks for you do!
Hi Crystal, it was regular 1/4 inch plywood (the most inexpensive option at the time) with one side smooth finish and the other not. It was not a composite. Depending on your budget, you could use any kind you'd like. We were just going for the most inexpensive option 🙂