You'll find a lot of different xTool M1 reviews out there, but if you're a crafter, this review is specifically meant for you. As a fellow crafter, I am always looking for the next machine or tool to add to my collection. I'll be providing my honest review of the xTool M1 and will add to it after I spend more time creating more projects.
I've had laser engraver on my want list for years but have been intimidated to purchase one. I've wondered,
- How will I ventilate the machine?
- Are laser machines safe to have in my house (especially with kids running around)?
- Can I handle the software or will it be too confusing?
- Can I afford one?
M1 Deluxe Machine Bundle was supplied by xTool but all opinions are my own. As an Amazon Associate, I earn from qualifying purchases. I am also an affiliate for xTool, the HP ink program, ShareaSale, CreativeFabrica, and CJ Networks. Click here to read more.
After years of debating, I finally found the machine that is perfect for beginners: the xTool M1. It's cost-effective, user-friendly, and it's a desktop size that could even work inside of my craft room.
Plus, it's a hybrid machine that has 3 separate functions: laser engraving, laser cutting cutting, and blade cutting as well. It means that if I was low on space, I could get rid of my Cricut machine and Silhouette machines because it can do their jobs, too.
What Can the M1 Cut and Engrave?
You can use over 300 different types of materials with this machine since it's a hybrid laser cutter, laser engraver, and blade cutter. I won't list them all but thought I would list the most common materials below.
What Can the xTool M1 Laser Cut?
- wood (up to 10 mm)
- foam
- color acrylic (up to 3 mm)
- paper
- fabric
- felt
- faux leather
- leather
- rubber
- thin cork
- cardboard
- stone
What Can the xTool M1 Blade Cut?
- heat transfer vinyl
- sticky vinyl (permanent and reusable)
- sticker paper
- paper
- faux leather
- fabric
- felt
- faux leather
- leather
What Can the xTool M1 Laser Engrave?
- wood
- metal
- color acrylic
- plastic
- paper
- rubber
- stone
- tumblers
- glass (with laser engraving marking paper)
- cork
What Materials Should you Avoid?
There are some materials you should avoid because 1) the machine can't cut or engrave them or 2) for safety reasons due to the toxic fumes they would produce.
- Clear acrylic
- PVC (for laser cut, can use blade)
- Polycarbonate
- ABS
- Polystyrene and Polypropylene Foam
- HDPE
- Coated Carbon Fiber
What is the Price of the xTool M1?
The xTool M1 is far below the price of other popular laser machines. It's a much more affordable option for crafters and small business owners just starting out.
The price for the machine ranges based on the bundle that you get and what current sales or deals they have going on. They have lots of sales!
Get Your Own xTool M1 (or other xTool Laser Machine!)
I have been so happy with my xTool M1. It is the perfect machine for someone who is looking to learn how to use a laser for the first time. It is ready to plug and go right away and is so user-friendly.
I like to think of the xTool M1 as the next upgrade to a Silhouette or Cricut machine. It's perfect for hobbyist or someone looking to start a small laser business.
If you are more serious about starting a laser business, there are more options that would help you scale your laser business even quicker.
Click here to check out the amazing sale!
Save an Extra $80 with My Special Mom Envy Coupon Code!
xTool has been gracious enough to give me my own coupon code for my readers!
Click here to use my coupon momenvy80 to get an extra $80 off a laser machine!
What Size is the Working Area?
The largest material area you can work with is 15 inches x 12 inches.
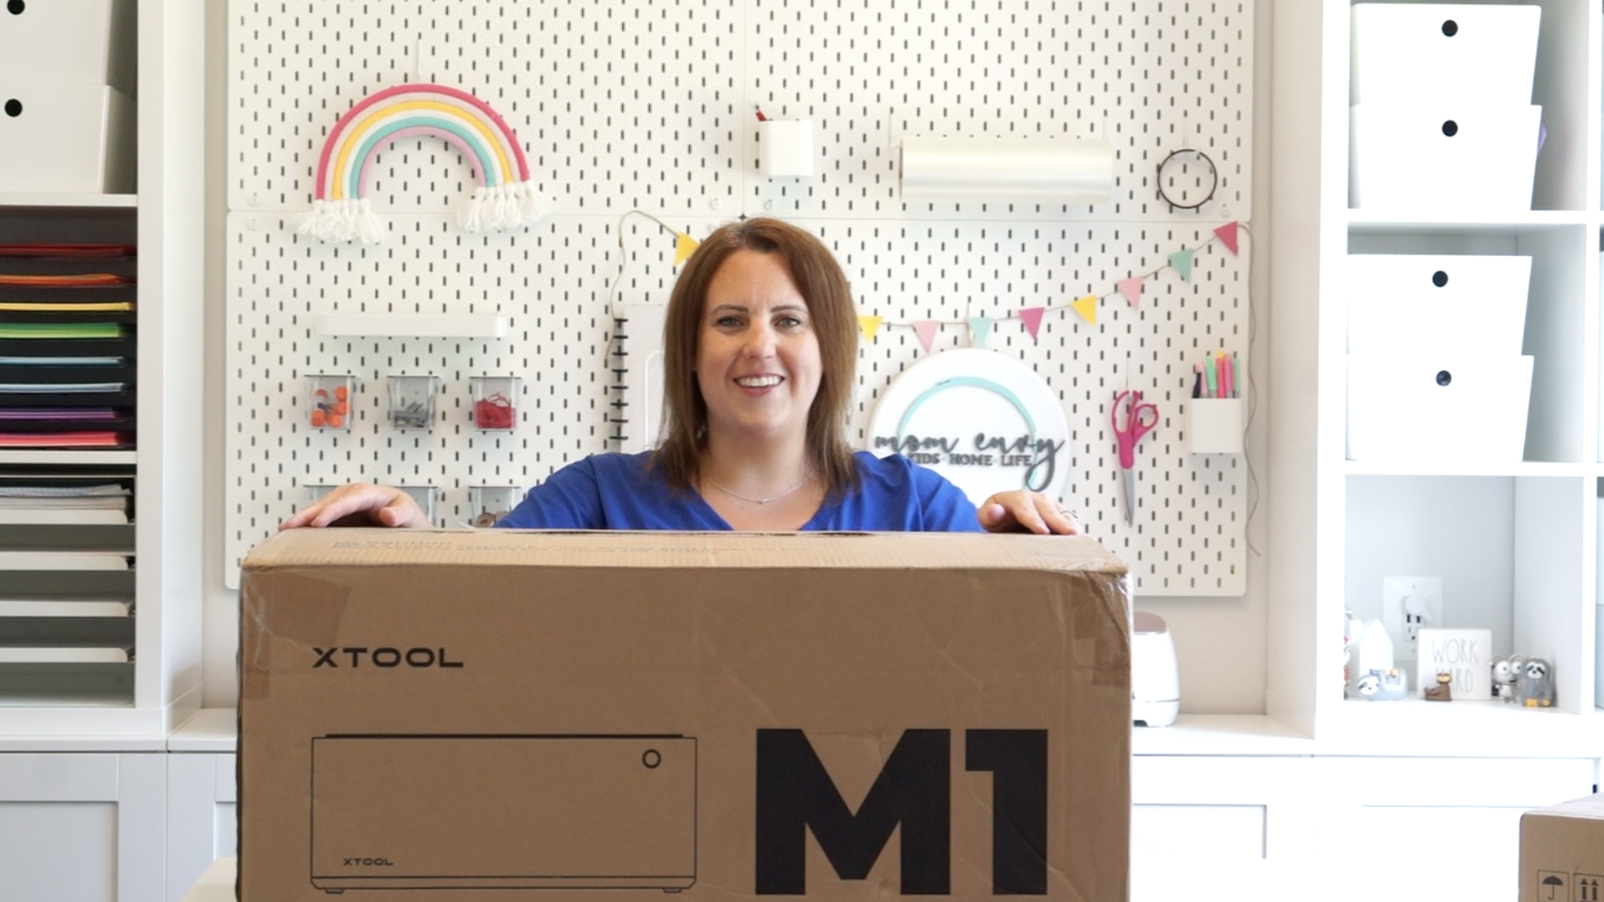
Unboxing the xTool M1 10W
Here is a video of me unboxing the xTool M1 10W Deluxe model. This is the bundle that I received and am unboxing in the video.
What is Included in the Box?
The standard M1 box has the following:
- M1 machine
- Power cord (2 pieces)
- USB cable
- Vent exhaust tube
- Vent tubing clamp
- Vent pipe connector
- Vent pipe connector screws
- Triangular prisms (10)
- Light-grip cutting mat
- Strong-grip cutting mat
- Cutting blade housing
- 45 degree replacement cutting blades (5)
- Basic material pack
- metal dog tag
- basswood piece
- vinyl
- piece of leather
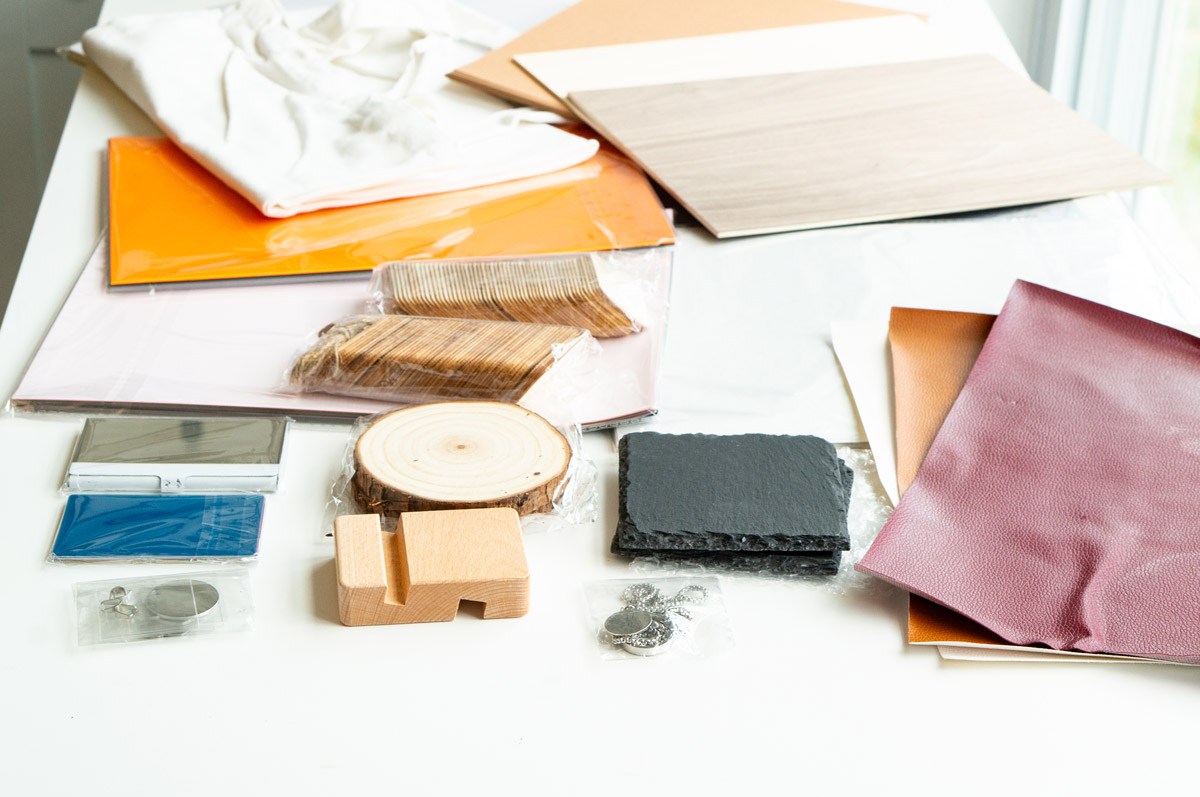
If you get one of the upgraded bundles, you'll get additional materials. I got the 10W Deluxe which came with everything above plus:
- Premium package of materials
- canvas tote bag
- wooden tags
- leather
- 2 stone coasters
- 2 wood slice coasters
- kraft paper
- metal card holder
- wooden phone holder
- metal cards
- set of 4 metal dog tags
- jewelry set (necklace)
- 1 piece of basswood plywood
- 1 piece of black walnut plywood
- heat transfer vinyl
- self-adhesive vinyl
- white sticker paper
- PU leather
- Colored glossy PVC sheet
- Transparent frosted PVC
- laser marking paper
- Rotary attachment 2 (so you can do tumblers and other round objects)
- Raisers (to use with the rotary attachment)
- An additional light-grip mat
- An additional strong-grip mat
How Difficult was the Assembly?
The assembly was incredibly easy - I was honestly shocked at how easy it was. It was already preassembled so there was very little that I had to do to get it up and running. It took less than 20 minutes to unbox the machine, download the software, and get it set up.
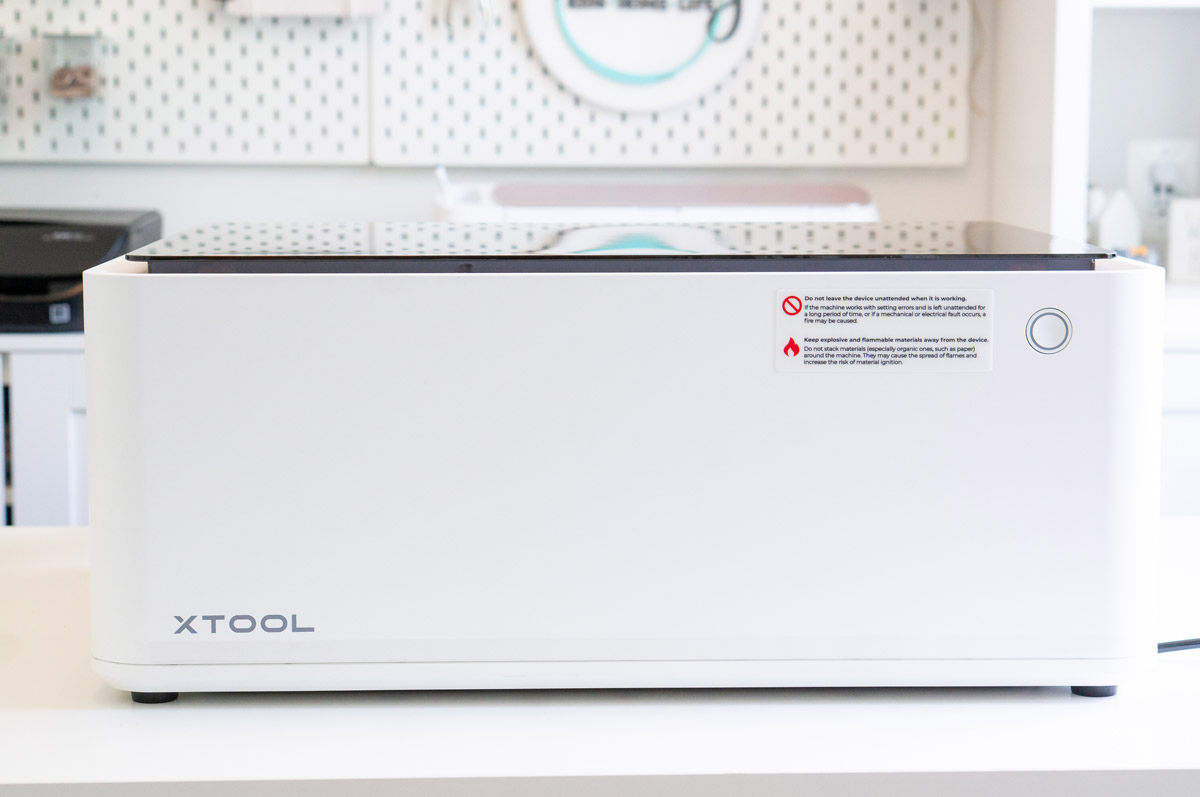
How Large is the M1 Machine?
Here are the machine's dimensions in case you are wondering if it will fit within your space or if you want to order a stand for it.
- Machine dimensions: 22 inches wide x 18 inches deep x 9 inches tall
- Machine weight: 21.6 lbs
What Do You Need to Keep in Mind When Setting it Up?
When you set up the machine, you'll have to make sure that it is near a window (unless you get the smoke purifier unit). You'll need to be near a window so that you can vent it to the outside (explained below).
In addition, you'll need to make sure of the following:
- Minimum 18 inch clearance above the machine so that you can open the lid fully
- Minimum 8 inch clearance in the back of the machine for the vent pipe
How Do you Vent the Exhaust from the M1?
The unit comes with a built-in fan for exhaust, an exhaust tube and all of the materials you need to attach it to the machine. You'll run the exhaust tube out of a nearby window.
If the exhaust tube is too short, you can easily purchase a longer tube from a Home Improvement store for a small extra cost.
The space around the tube going out the window will let in cold or warm air. If you have concerns about the temperature leaving or entering the room, you can purchase a window coupler set such as this one here.
If you don't have a window within the room you're working in, you can purchase the air purifier. This will purify the exhaust air making it safe to use in a windowless room.
Is the M1 Safe to Use within a House?
Yes! It comes with built in safety features. It uses a diode laser which is safe to use within the house and unlike many diode lasers, it actually comes in an enclosure with an efficient ventilation system. In addition, it has a lid that filters out the harmful blue light making it safe to use without any special glasses.
Diode Laser
Diode laser engravers is a semiconductor that is made by combining p-type and n-type material. It's a pretty complicated method which xTool explains here. But what does that mean for you as a user? It means that you're getting a more affordable laser that has significantly more cut hours than a CO2 laser.
Diode lasers are a great option for not just crafters but small business owners as well. They have great versatility in the products that they can cut and engrave at a fraction of the cost of CO2 lasers.
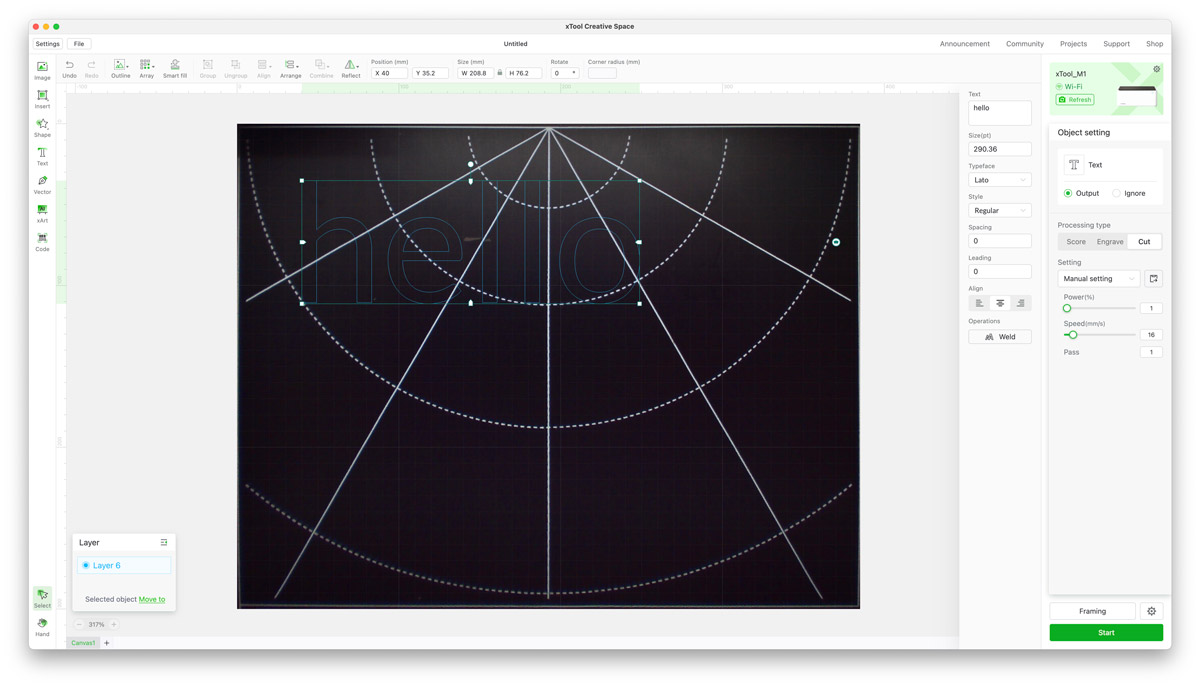
xTool Creative Space Software
The name of xTool's graphic design software is Creative Space. You can download it online for completely free - there are no uncharge costs for a Designer or Advanced version of the program.
What's great about the Creative Space program is that it's similar to other blade-cutting machine softwares. After reading xTool's online tutorial, I found it to be very user friendly.
When you're first learning how to use it, you may have trial and error and may need to just search around a bit. But, with all things, if you struggle to use the software, Google and youTube have tons of tutorials to help you complete different projects.
What Devices can you Download and Use Creative Space On?
You can use the software on a PC, Mac, iPad, and Android device. It makes it super flexible and adds to the ease of use. I love that you can easily switch between different devices - I love being able to create projects on my desktop iMac but then send the file to my iPad to cut.
Can You Use Your Own Fonts with the Creative Space Program?
Yes! Thankfully, all of the fonts that you have on your computer, can be used within the software. I didn't have to do anything to add them, they were automatically there when I started the program.
Can You Use Other Software?
You can use other software to create your files. Then you can load the files into the Creative Space software as long as you saved them in an acceptable file type. For example, you can create an SVG in Adobe Illustrator, Cricut Design Space, or Silhouette Studio.
What File Types Can you Engrave and Cut?
You can use an SVG file, PNG file or JPG (just use the tracing feature if you want to cut and not just engrave), DXF, BMP, and more.
Is it Wireless?
Yes, you can use it wirelessly. But, you have to first use the USB to set the WiFi up. After that, you can select to use WiFi and unplug your USB cord.
Can it Run without Internet?
Yes! If you don't want to use the wifi, you can use the provided USB plug.
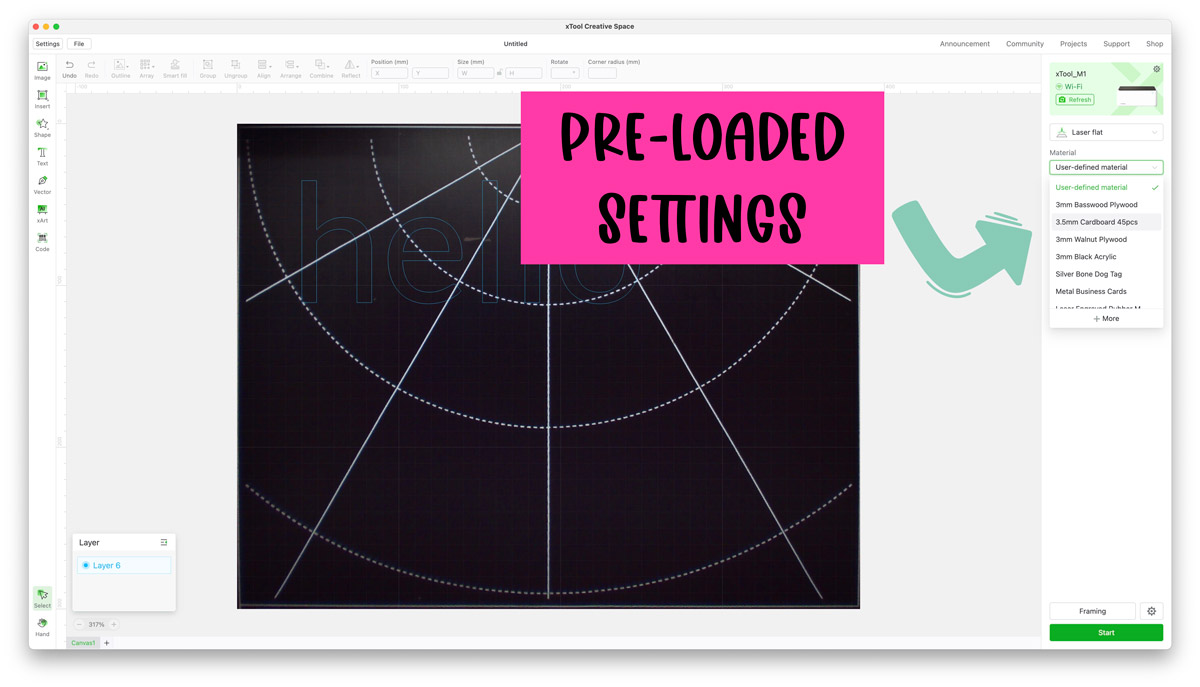
How Do You Know What Laser Settings and Cut Settings to Use?
The machine comes with default settings for some basic materials included. But, you may still need to make some small adjustments to the default settings because with all craft machines, there may be some slight variations and you may need different settings than the pre-set ones.
If you are using a different type of material that is not included, you can either use trial and error (using a test piece) to try out settings. If you get the premium materials bundle, it comes with a really nice pamphlet with cut and laser settings for all of the materials you receive.
Use the Facebook Group for Additional Help!
Working with a new material that isn't a preset in the program, try asking in the xTool M1 Facebook group. I have learned so much already from just being a lurker for a few weeks.
People have used so many different various materials and are happy to share their settings. In addition to cut settings, there are tons of tutorials, tips, and tricks, posted daily in the group. It's a very active group that is so helpful to each other.
Are There Pre-Loaded Designs? Can You Create your Own Designs?
Yes, there are some great preloaded designs. If you don't find one you want to make, no problem. You can either create your own or find some on sites like CreativeFabrica. I have a yearly subscription so I can download files as needed - search laser cut files or laser engraving files and you'll get so many amazing options.
While there are some ready-made designs for you, the program gives you the ability to create your own designs using the software. There are so many great editing features including aligning, grouping, combining, and array creating, that make project creation easy.
Hundreds of Free Tutorials and Designs
Did you know that xTool has a community where users share their own designs and tutorials? You can find hundreds of projects including design files here in their community.
Additional Accessories
There are some additional accessories you can purchase. They are not necessary but can help you to create more projects and/or better results. These are the three accessories I received to review.
Rotary Attachment 2 Pro
This versatile attachment allows you to engrave round objects and spheres. It comes with multiple rotary tool set up options so that you can engrave many different materials. It's one of the most popular add on accessories.
This includes but is not limited to: tumblers, drinking glasses, wine glasses, baseballs, baseball bats, ornaments, rings, bracelets, mugs, and more. With the use of framing, you can make sure that your set up is correct before you start engraving.
Air Assist
The air assist is a must if you are going to be frequently working with wood and don't want to work with masking material. The additional cost will be well worth it when you see the results.
One issue with using lasers to cut is that are you often left with super dark edges, burn marks, and sometimes slightly rough edges as well. When you use the air assist with the laser cutter, you are left with little to no burn marks, minimal charing on the edges, and cleaner cuts.
In addition, it protects the laser lens. This means less maintenance on the machine.
You do not need to use it with the blade cutter or laser engraver. It comes with everything you need store the air assist within the machine when it's not in use so that you don't have to detach it completely.
Smoke Purifier
Do you need a smoke purifier? Definitely not. This is not a must-have accessory but it really can be helpful if you plan to use your M1 in your craft room or office.
I am an allergy sufferer and have asthma. So clean air is a top priority for me at all times. So when I saw that there was an option to filter the exhaust from the machine, it was important for me to have this as an option.
This small purifier is overall small in size. You connect the exhaust hose from the machine into the purifier. The air is then processed through multiple hepa filters and then can either remain in the purifier unit or you can add an additional exhaust pipe onto the back of the purifier to route the air out a window.
The air has a 99.97% purification rate which is a great feature for fellow allergy and asthma sufferers.
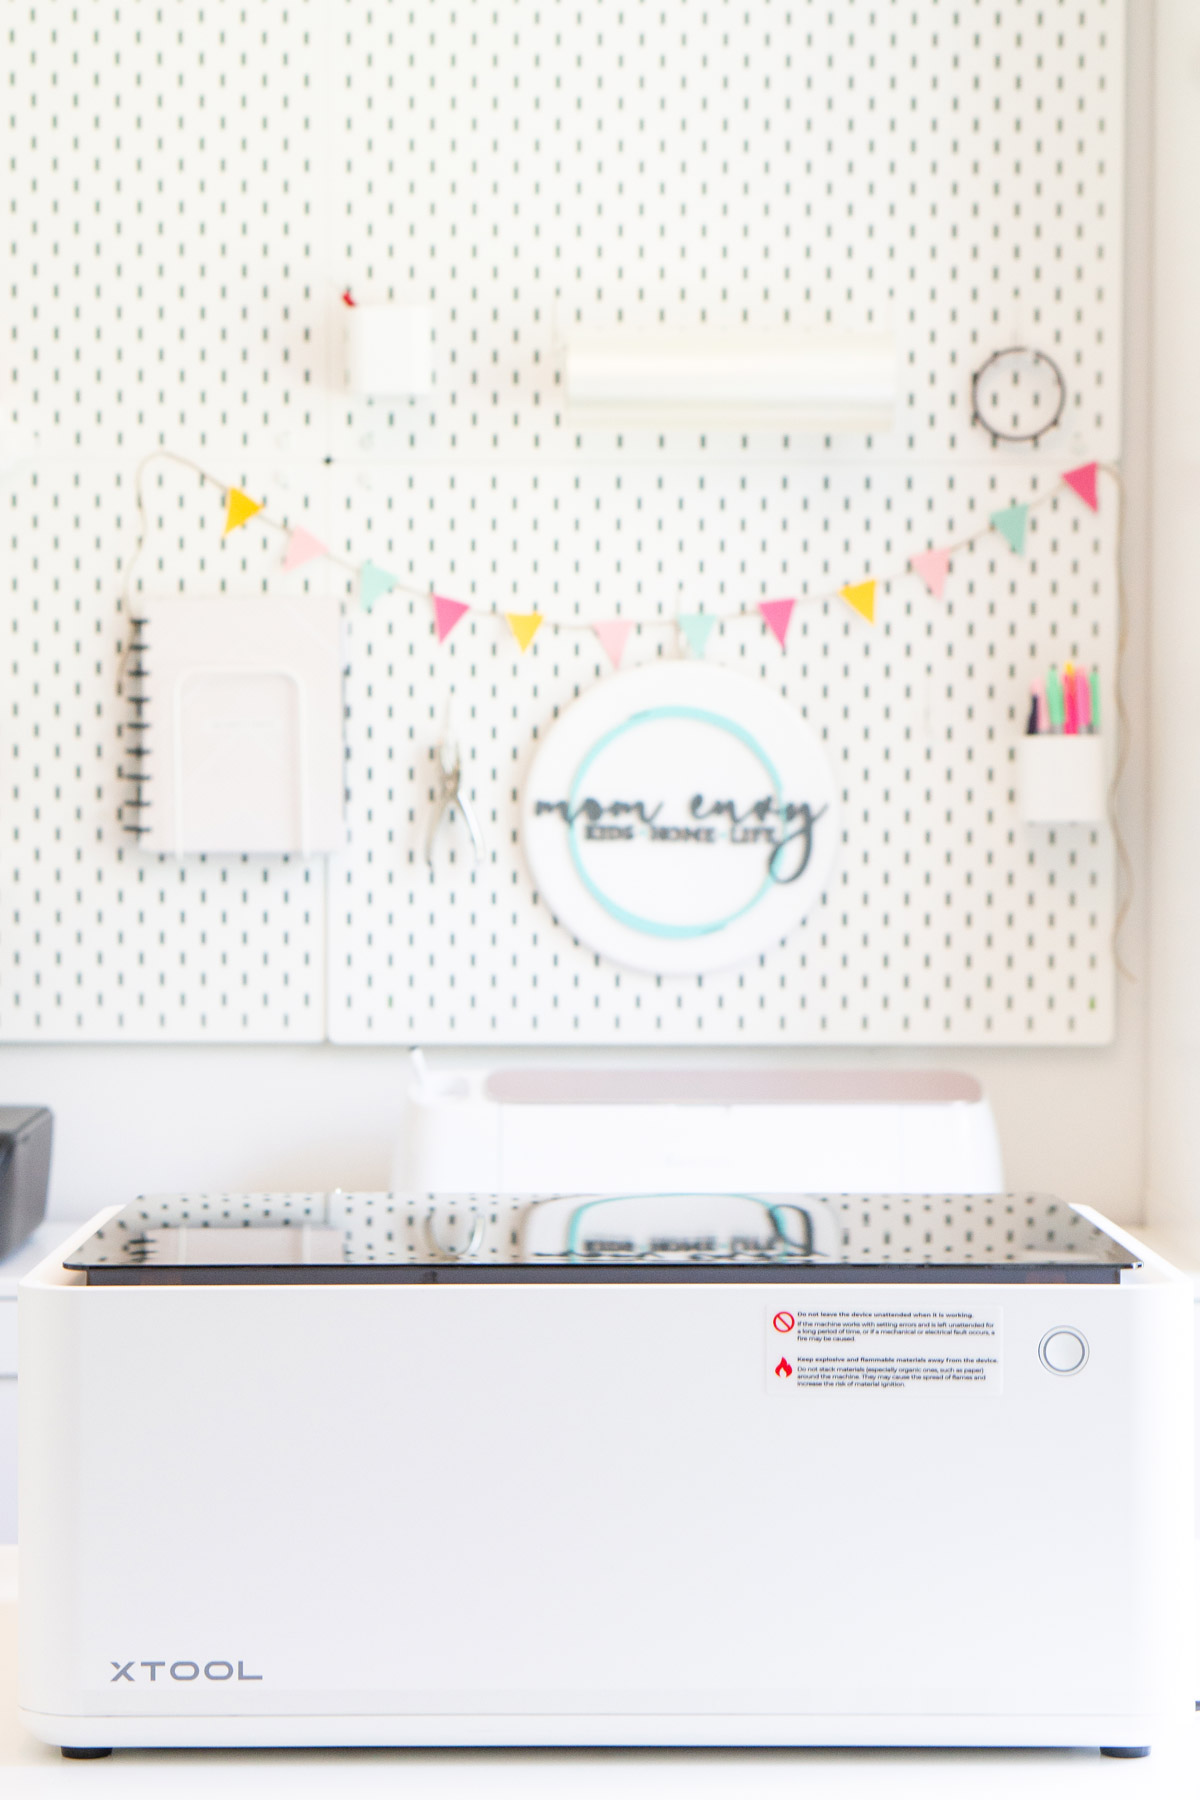
Where I Set up my Machine
Currently, I have set up my machine in my garage. Until I see how the smell lingers after cutting and engraving, I will be using my machine outside. As stated before, I have severe allergies and asthma so I am much more careful than the average crafter (hence my hairless dogs).
My machine is set up on a table with the air purifier below it, attached by the tubing that came standard. My plan is to purchase a cart on wheels so that I can more easily move it around my workspace. Due to where it is set up, my videos out in my garage won't be as pretty as the ones I create in my light and bright craft room/office.
My First Two Small Projects
To just try out my new machine, I decided to use a couple of test materials that I was not worried about wasting. I wanted something that would be very easy and just let me see how the machine worked.
My first project was engraving a wooden tag. It was not in any way a fancy project or one that I planned to keep. I received so many wooden tags within my materials bundle, I thought it would be perfect to test the machine out with it. And since I have never laser engraved anything, I wanted to try using an engraving machine for the first time.
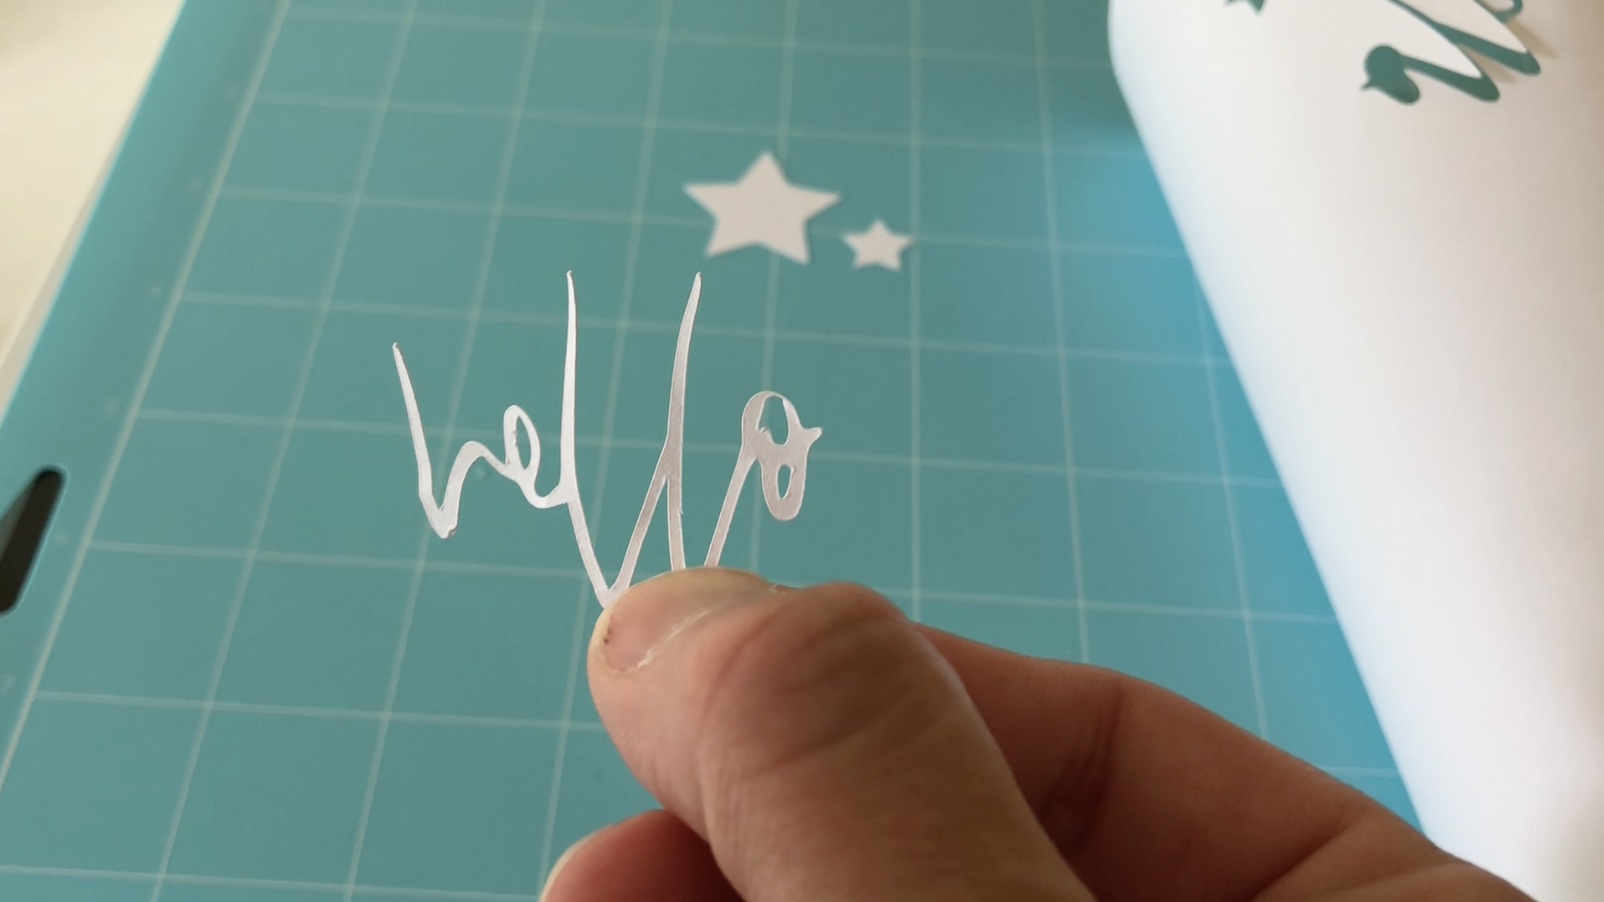
Next, I decided to test out cutting paper with the blade. I thought it would be good to compare it to using my Silhouette or Cricut machine.
Here is a short video clip of my projects.
For a first engraving project and first cut, I think that they were both relatively easy to set up. I learned just how important it is to make sure your material is straight.
In addition, I wish I had realized sooner that I could place the wood tag on the cutting mat. I am so used to just using the cutting mats with my craft cutting machines that I didn't think about it being used with the laser to help hold the material down.
Instead, I just used a small piece of tape under my tag. But it would have been easier to use the mat instead.
Are There Any Cons to the M1 Machine?
With all tools and machines, there will always be some cons. It wouldn't be an honest review without noting cons of the machine. So far, these are the things I have noticed.
The machine takes a long time for both cutting and using the laser compared to it's competitors. Since it is only a 10W machine, that means it isn't as strong of a laser and takes longer.
While you can still create some high quality products to sell, the length of time may be a deterrent to small businesses. As a crafter who only makes projects for gifts, fun, and for my blog, this isn't as big of a deal for me.
In addition, while you can use a variety of materials, there are still some materials you cannot use due to tit being a diode laser machine instead of a CO2 laser. This includes cutting thicker materials, cutting clear acrylic, and more.
I think that the riser base and honeycomb should just come as part of the machine. I didn't receive these items and plan to purchase them myself. Just using risers will leave a large gap at the bottom of the machine where the exhaust will escape. The riser base would eliminate this issue. I think increasing the cost just a bit and including them automatically would be a better idea.
In my opinion, it has a great price point. But, if you want to add on some of the accessories (like the air assist or honeycomb base), those of course will be an additional cost. But, even with the added accessories cost, I think the machine still extremely cost effective compared to other lasers like a Glowforge.
If you want to create something like planner stickers, you'll need to create the actual stickers in another program and then import them into the software. While the software is great for creating cut files, it's ability to create printable images such as stickers, isn't as high quality as other programs. I would just suggest using a different software like Adobe Photoshop, Canva, etc.
Lastly, I wish the machine gave a more accurate estimated time to completion. This would help me gauge how much time I will need to complete a project. Since you can't leave the machine unattended, this is particularly important. I am hoping there are updates that make this estimation more accurate.
Want to Compare All of the xTool Machines Available?
The M1 isn't the only laser tool by xTool. They have multiple options. You can check out all of the available xTool machines here.